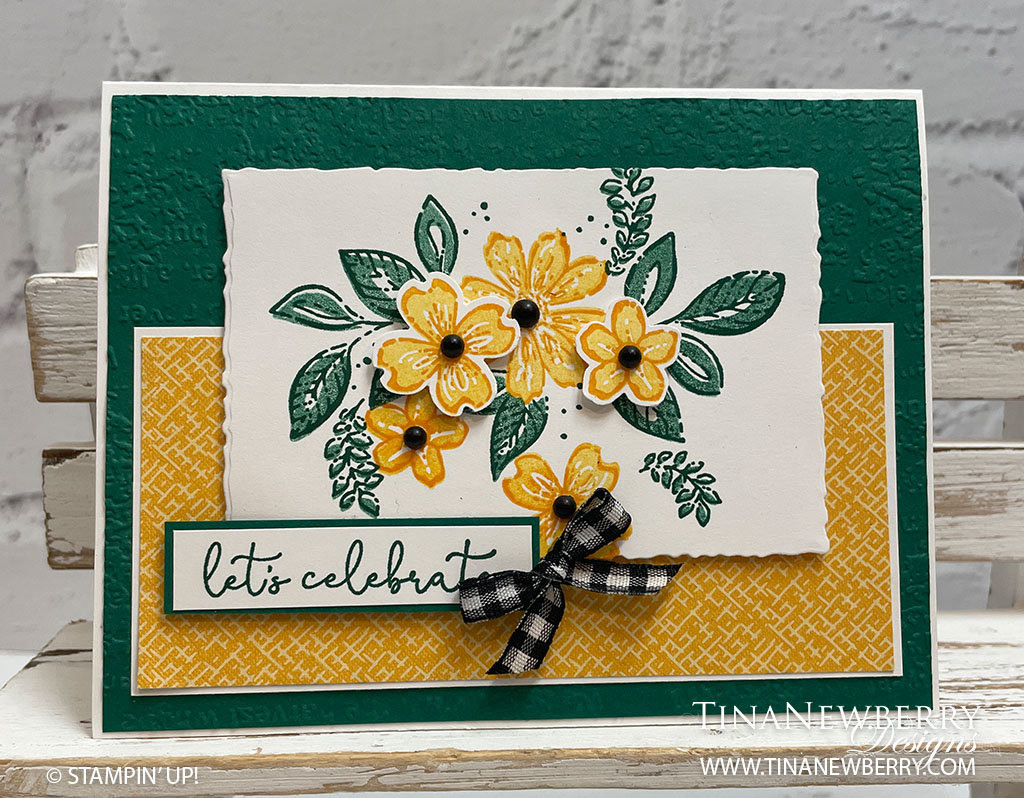
I love Two-Step Stamp Sets! First stamp the outline stamp, then stamp the fill stamp and voila, you’re done. Keep readying for all the details on this card.
Measurements
Full list of supplies needed, listed below. A die cutting machine is needed for this card.
Basic White
- 5 ½” x 8 ½” scored and folded on the long-side at 4 ¼”
- 5” x 2 ⅜”
- 4 ¼” x 3” (for stamping flowers and die cutting using the deckled rectangle die)
- 2” x 2” (for stamping and die cutting 2 small flowers)
- 2 ¼” x ½” (for sentiment)
Shaded Spruce
- 4 ⅛” x 5 ⅜”
- 2 ⅜” x ⅝”
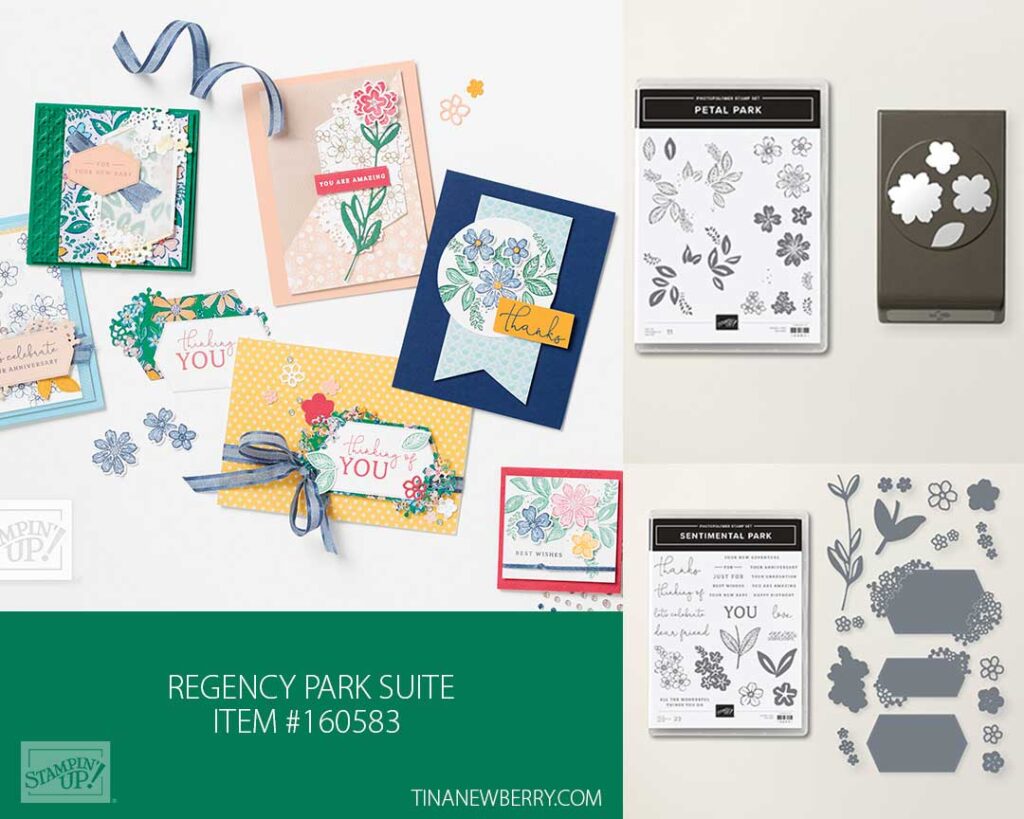
Regency Park 6”x6” Designer Series Paper
- 4 ⅞” x 2 ¼” (Mango Melody crosshatch print)
Let’s Create
- Affix all stamps to Acrylic Blocks. TIP: for mounting the 2 step leaves stamp set in order for them to line up correctly. Stamp the leaves outline onto your grid paper mat (or any scratch paper) Place the solid filled in stamp of the leaves onto the stamped image of the outline positioning them so the match up properly. Then lay the clear block onto your stamp.
- Fold the Card Base in half using a Bone Folder to sharpen the crease.
- Emboss the 4 ⅛” x 5 ⅜” Shaded Spruce cardstock using the Timeworn Type 3D embossing folder.
- Die cut the Basic White 4 ¼” x 3” using the Deckled Rectangle Die. (Counting out from the smallest die, it’s the 5th die).
- Using Shaded Spruce Ink, stamp the leaf outline onto the Basic White Deckled Rectangle. Stamp the solid image of the leaves using Shaded Spruce Ink, but stamp it off once to get a lighter shade. Hint – with any 2-step stamping, it’s easier to see to line up your images if you stamp the darker color first.
- Using the stamp with the 3 flowers outline and Mango Melody Ink Pad, stamp the flowers. You might want to practice on your scratch paper lining the flowers up in the opening. It is directional to where you can get the flowers to line up without overlapping leaves.
- Stamp the solid part of the flowers using Mango Melody Ink stamped off once.
Stamp a second set of the smaller flowers onto the 2”x2” Basic White Cardstock using the same technique as above. Punch these 2 flowers using the Petal Park Builder Punch. Adhere these 2 flowers to the stamped panel using Stampin’ Dimensionals. - Using Shaded Spruce Ink Pad, stamp the “let’s celebrate” sentiment onto the small rectangle of Basic White Cardstock. Mat this piece with the coordinating Shaded Spruce rectangle.
- Mount the Mango Melody Designer Series Paper onto the 5” x 2 ⅜” Basic White Cardstock.
- Adhere these layers to the Embossed Shaded Spruce Cardstock, then attach to the folded Basic White Card Base.
- Attach the Stamped Basic White panel to the Card Front using Stampin’ Dimensionals along the top edge and adhesive along the bottom edge. (this accounts for the thicker laying on the lower half of the card)
- Attach the Sentiment to the lower left side of the card using a Stampin’ Dimensional on the far left and adhesive in the middle to the right.
- Tie a small bow using Black & White Gingham Ribbon and attach it to your card using a Mini Glue Dot.
- Place Matte Black Dots in the flower centers.
- Stamp and decorate the inside of your card and the envelope. And it’s ready to send off to a special friend.
Shopping List
")
$37.75
")


 Designer Series Paper")
 Gingham Ribbon")

$7.00


$30.00
Recommended Stamper’s Toolkit ❤
Product List
$12.00

$7.00

$4.25

$5.75

$5.50

$11.00

$26.00

$7.00

$6.50

$11.00

$20.00

$11.00

$80.75

$128.00


$16.00

$13.00


