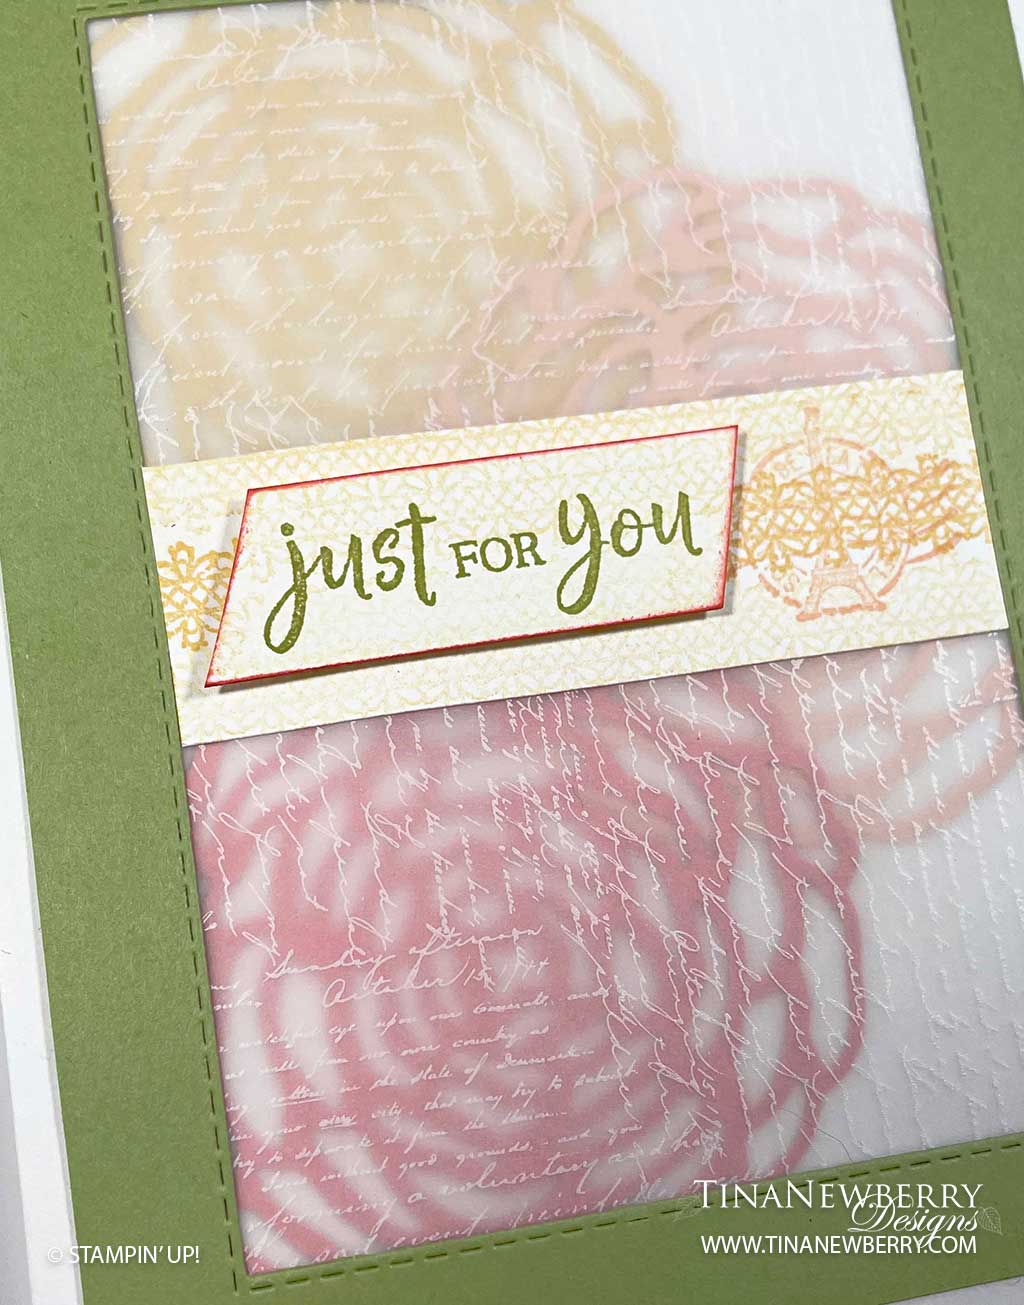
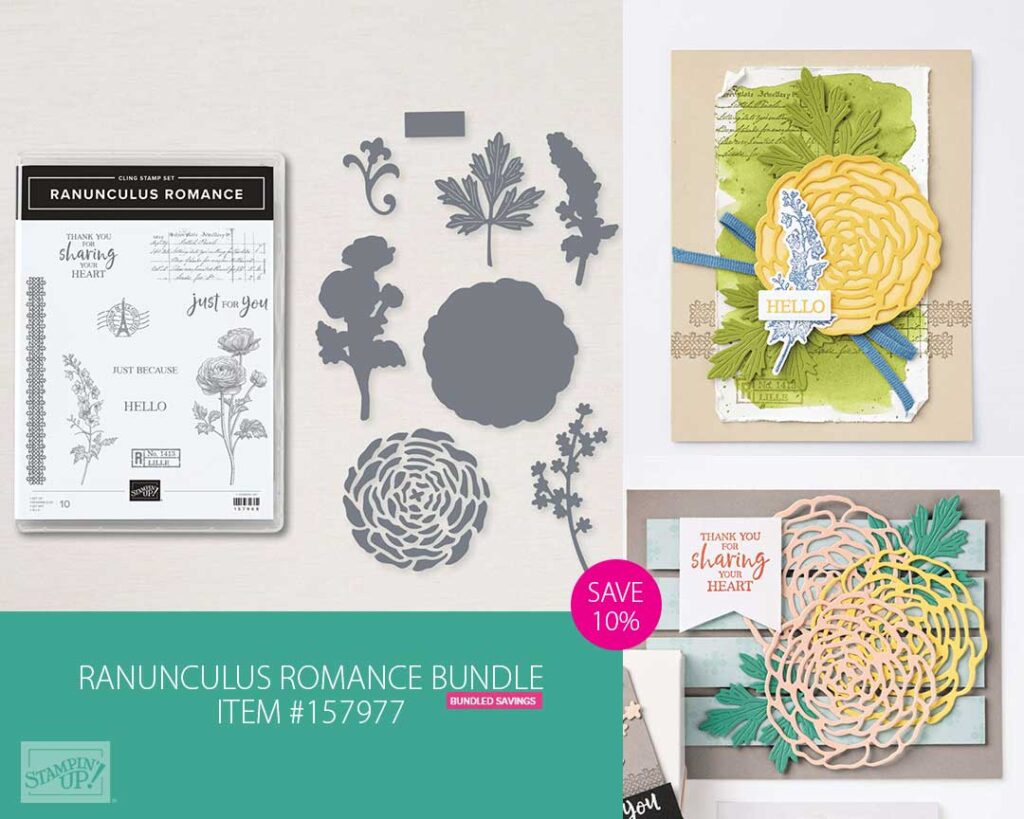
Did you know Ranunculus is a flower genus with over 600 species? Rananunculus includes buttercups, spearworts and water crowfoots. Some species are compared to the peony, but ranunculus tends to be more flat with a bit smaller bloom size. Thank you Wikipedia! LOL. The large bloom die in the Rananuculus Romance Bundle sure makes a statement in the background of this heartfelt For You greeting card.
Measurements
Full list of supplies needed, listed below. A die cutting machine is needed for this card.
Thick Basic White Cardstock: 5 ½” h x 8 ½” w folded to 5 ½” h x 4 ¼” w for Card Base
Vellum Layering Designs: 3 ¾” w x 5″ h
Pear Pizzazz Cardstock: 4″ w x 5 1/4″ h
Basic White Cardstock:
- Scrap ½” h x 3” w
- 1”h x 3 ¼” w
- 4″ w x 5 1/4″ h for inside
Scraps for die cutting flowers:
- So Saffron Cardstock
- Flirty Flamingo Cardstock
- Petal Pink Cardstock
Let’s Create
- Affix all stamps to Acrylic Blocks.
- Fold the Card Base in half using a Bone Folder to sharpen the crease.
- Attach Adhesive Sheets to each of these cardstock scraps: Flirty Flamingo, So Saffron, Petal Pink. Die cut three large Ranunculus flowers, one of each color.
- Remove the adhesive sheets backer and adhere the 3 die cut Ranunculus flowers onto the card front. Keep them about 1/2″ away from the edge.
- Die cut a large Stitched Rectangle out of the center of the 4″ h x 5 1/4″ w Pear Pizzazz layer so that you create a frame that is about ½” inch around. Discard the center piece, it is not needed.
- Use Stampin’ Seal+ to adhere the Vellum Layering Designs onto the backside of the Pear Pizzazz frame.
- Stamp the Basic White 1”h x 3 ¼” layer with So Saffron Stampin’ Pad and the long design stamp image, stamp across the center first for full ink value, then stamp above and below so that the ink color is lighter with each stamped image.
- Stamp with Petal Pink Stampin’ Pad the Eiffel Tower image onto the far right end of this Basic White layer. Use Stampin’ Seal to adhere this layer across the Vellum within the Pear Pizzazz frame, trim the ends, if needed to make it lay flat within the frame.
- Now let’s stamp the Basic White ½” h x 3” w sentiment layer. Use the So Saffron Stampin’ Pad and the long design image again but this time stamp off first and apply the image with very faint ink color. It will need to be stamped 2 times to cover this layer of Basic White card stock.
- Use the Pear Pizzazz Stampin’ Pad to stamp the “just for you” sentiment onto the Basic White sentiment layer that was just stamped with the So Saffron design. Tap the edges of the Basic White layer into the Flirty Flamingo Stampin’ Pad to lightly color each of the edges.
- Use Dimensionals and adhere the sentiment layer onto the left side of the center layer of the card front.
- Stamp and decorate the 4″ w x 5 1/4″ h Basic White Layer for inside and attach with Stampin’ Seal.
- Decorate your envelope.
- Wonderful! Who can use a pick-me-up today?
Shopping List
")


 Layering Designs")

$35.00
Recommended Stamper’s Toolkit ❤
Product List
$12.00

$7.00

$4.25

$5.75

$5.50

$11.00

$26.00

$7.00

$6.50

$11.00

$20.00

$11.00

$80.75

$128.00


$16.00

$13.00


