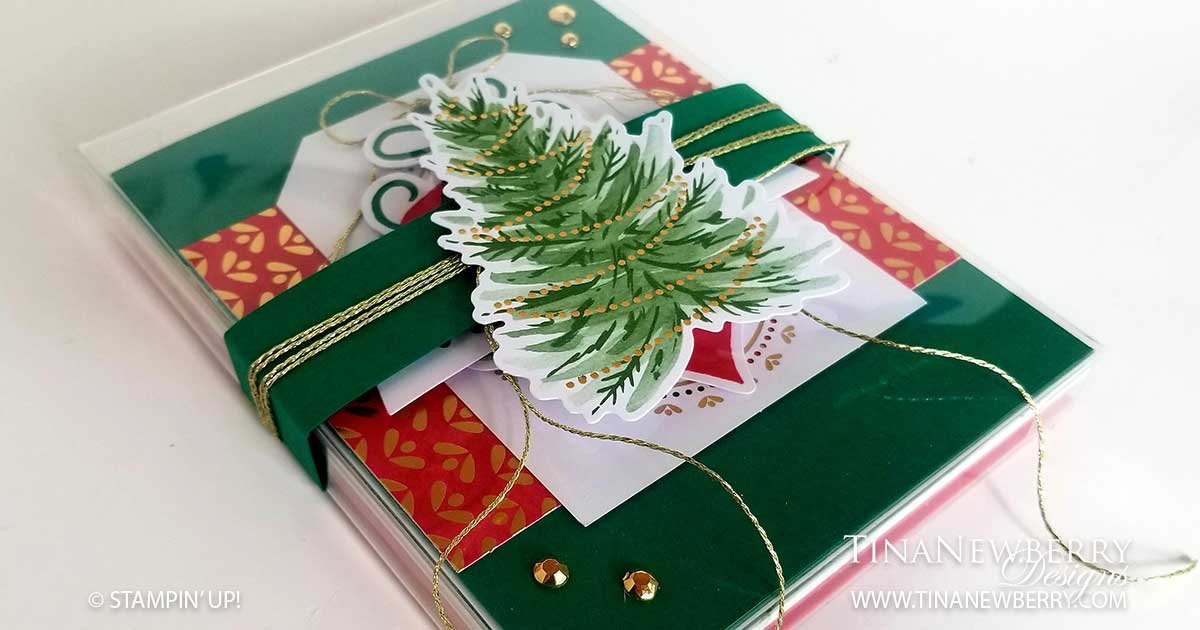
Take the Tag Buffet Kit a step further by making a few cards out of tags and then package them up for a sweet gift. Four cards and envelopes fit in one Acrylic Box. The Tag Buffet has a few extra tree dies and gold thread, which I used to decorate the outside of the box.
Full list of supplies needed, listed below. A die cutting machine is needed for these cards.
Card Base (2): Real Red Cardstock 11 x 4-1/4 and score at 5-1/2 and then at 2-3/4”.
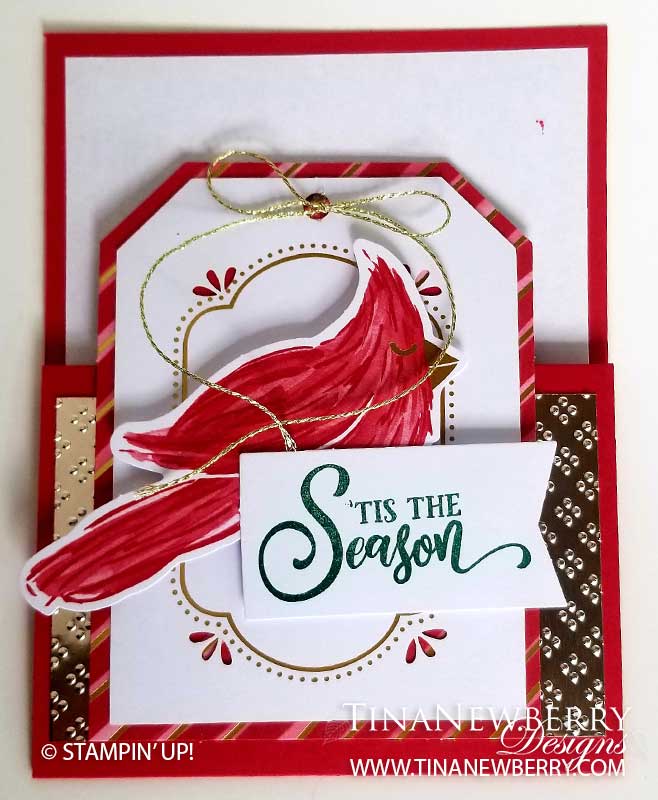
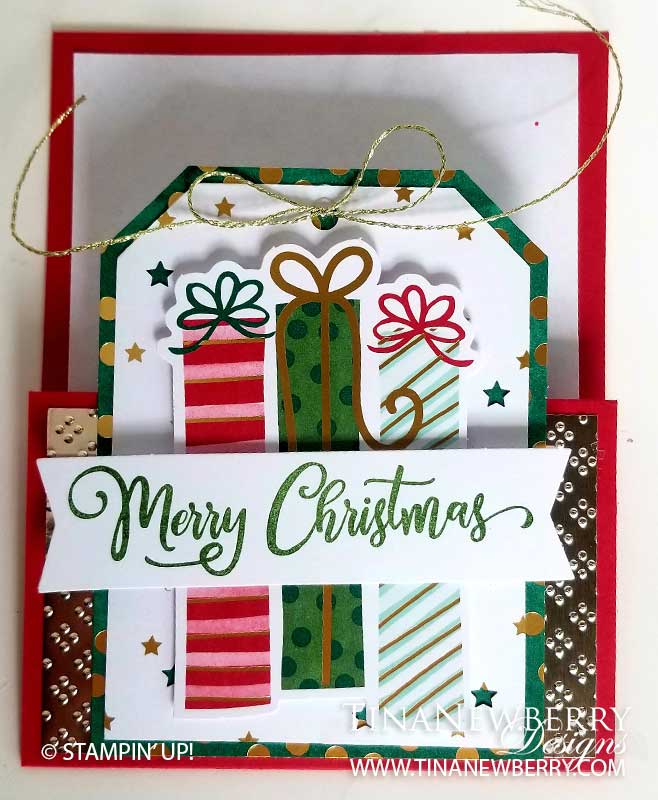
Card Base (2): Shaded Spruce Cardstock 8 1/2 h” x 5 1/2″ w folded to 5 1/2″ w x 4 1/4″ h.
Tags: Choose 4 tags.
Front Background (2): Gold Foil 4″ w x 2-1/2” h.
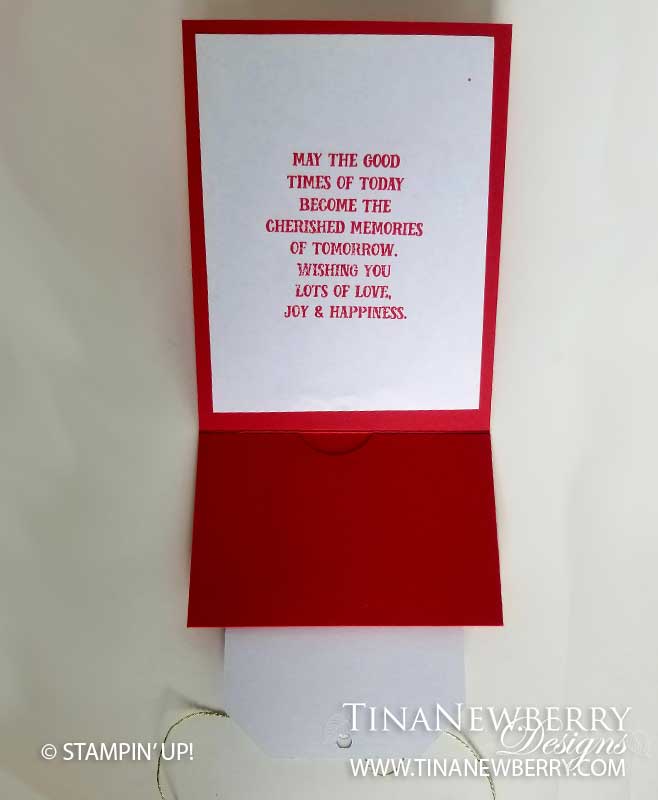
Inside Layer (4): Whisper White Cardstock 5-1/4″h x 4” w.
Belly Band: Shaded Spruce Cardstock 1″h x 8″ w.
- Affix all stamps to Acrylic Blocks.
- Make the Tag Buffet Kit
- Make 2 Gift Card Holders:
- Fold the Real Red Card Bases along the score lines with the Bone Folder to sharpen the crease.
- On the 2-3/4” flap punch put half of a 1-1/2” circle and then add adhesive on the two sides and fold to create a pocket for a gift card/money.
- Stamp the sentiment in Real Red towards the bottom of the inside layer and attach with Stampin’ Seal.
- Emboss the Front Background with the Wrapped in Texture Embossing Folder and layer to the front flap on the bottom.
- Attach a finished tag to the front with Stampin’ Dimensionals.
- Make a double bow with the Gold Twine and add to the top of the tag.
- Decorate 2 Envelopes.
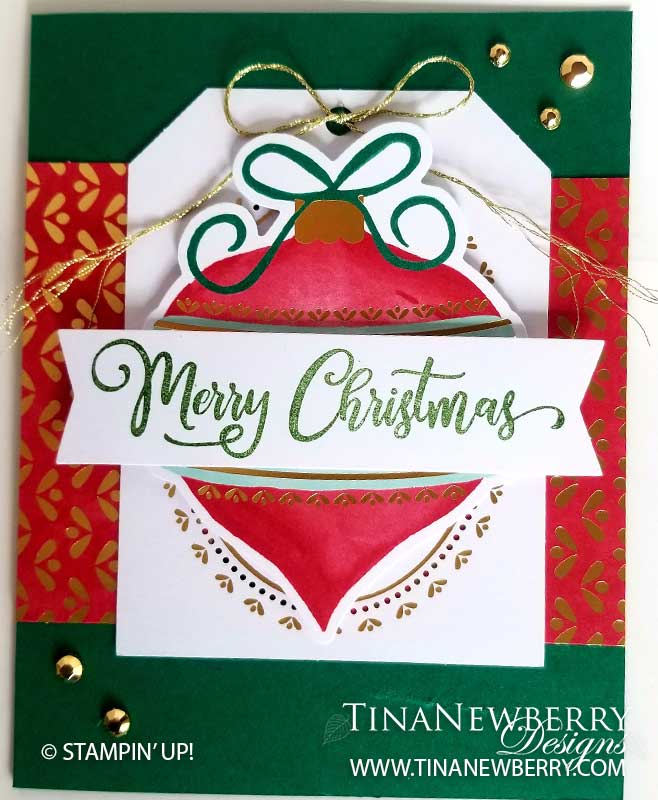
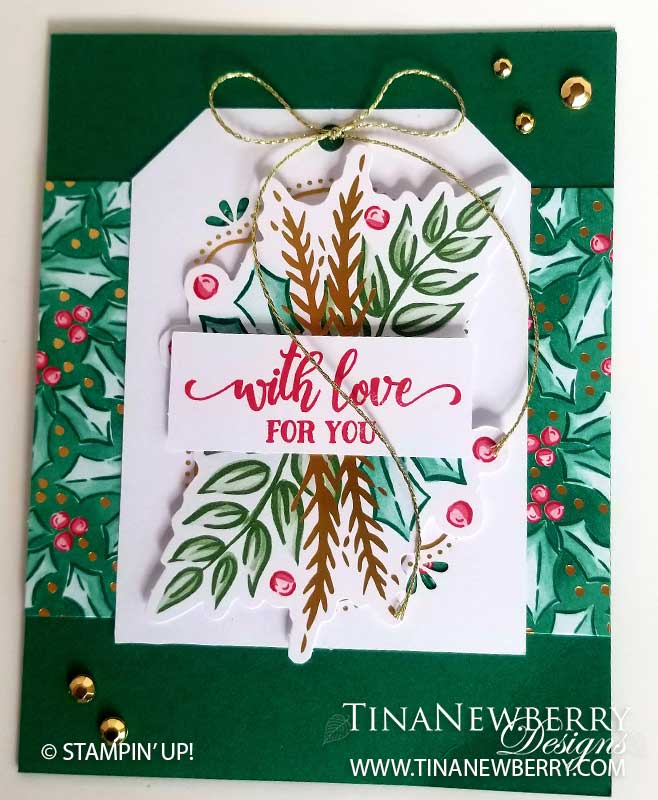
- Make 2 Cards:
- Fold the Shaded Spruce Card Bases along the score lines with the Bone Folder to sharpen the crease.
- Disassemble the two tags.
- Cut the tag portion off the two patterned piece of paper to make two rectangles. Then cut the rectangles in half.
- Attach two matching rectangles to the middle edges of the Card Base.
- Attach the Tag
- Add Gilded Gems.
- Decorate remaining 2 Inside Layers and attach.
- Decorate 2 Envelopes.
- Decorate the Acetate Box:
- Wrap the Belly Band around the box, use your fingers to crease at the corners and attach to itself with Stampin’ Seal.
- Wrap Gold Thread from Kit around the Belly Band and tie in a knot.
- Attach a leftover Tree to the Belly Band with a Stampin’ Dimensional.
- Slide all the cards and envelopes in and close.
- So cute! Now give it to someone special.
Shopping List


$30.00


$4.00


$5.00

$7.00

 Circle Punch")
$16.00

$7.00
Recommended Stamper’s Toolkit ❤
Product List
$12.00

$7.00
$4.25

$5.75

$5.50

$11.00

$26.00

$7.00

$6.50

$11.00

$20.00

$11.00

$80.75

$128.00


$16.00

$13.00


Design inspired by Michelle Litwiller.