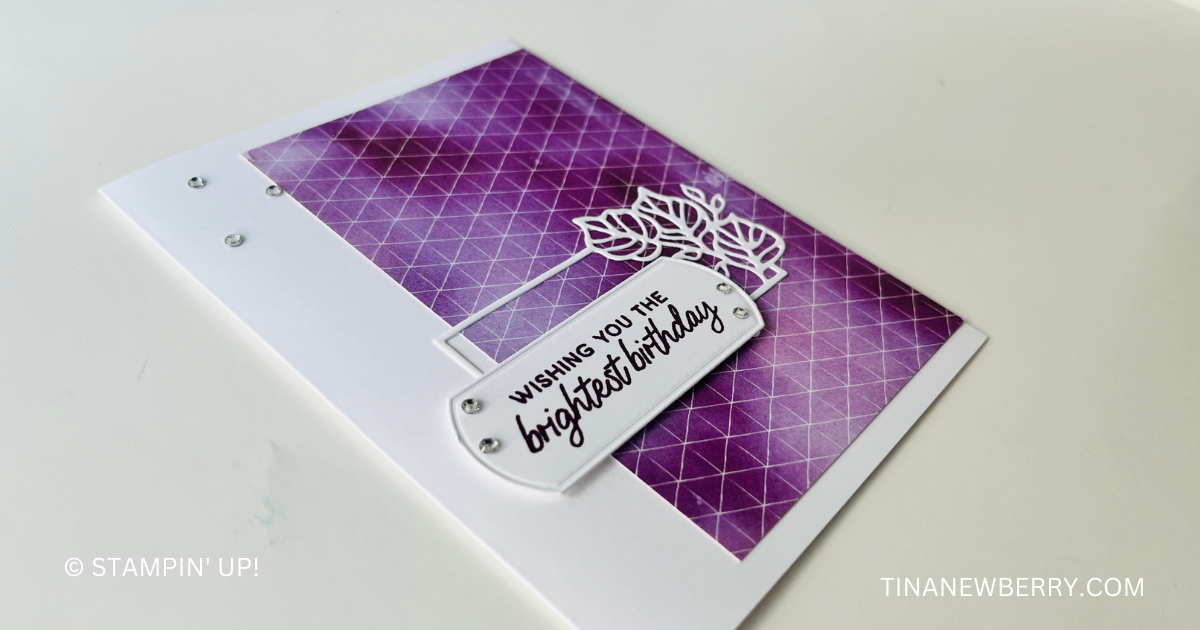
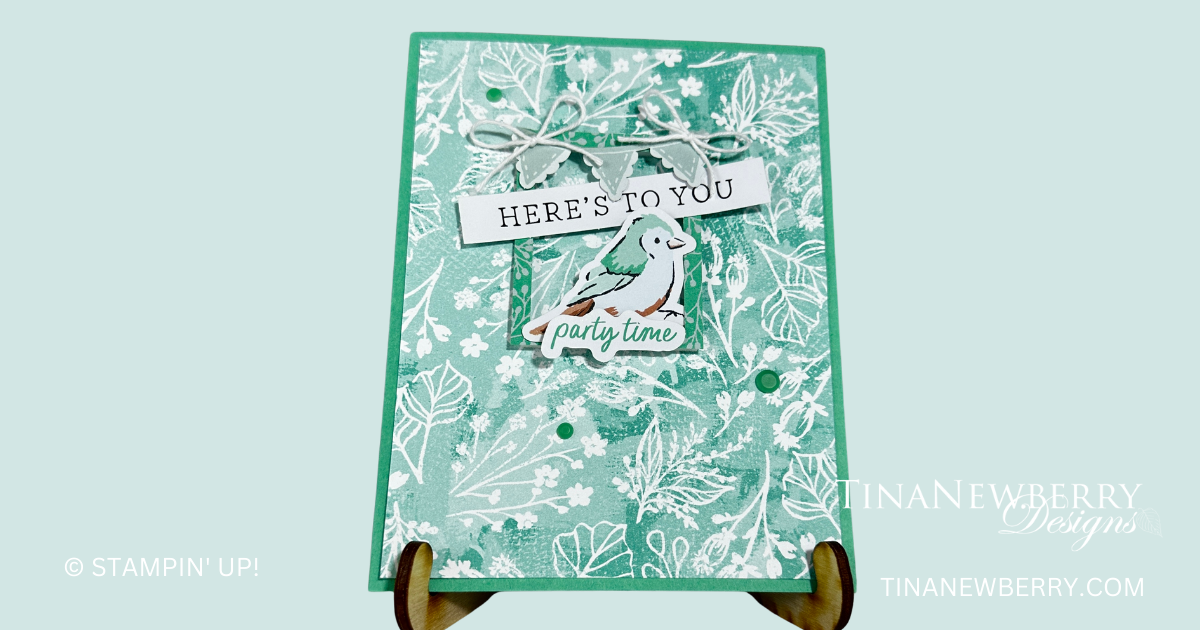
Snowflake Santa Express

Use the notecards and envelopes as the base for this super cute card. Much of the cutting and punching and die-cutting has been done for you. Simply gather your ink pads, stamps, blocks, snips and adhesives.

Santa Express Suite
All aboard the Santa Express! Santa has a new way to deliver Christmas cheer with the Santa Express Suite Collection, which means you have a fun and playful way to express your holiday wishes! Build a train full of Christmas supplies and send cards decorated with North Pole friends. This collection is the perfect way to celebrate a wonderfully jolly season.

Measurements

Full list of supplies needed, listed below. A die cutting machine is needed for this card.

The following cutting and scoring instructions are provided for when you want to repeat these instructions for your own use. You may need to cut the Designer Series Paper, and fussy-cut some of the images.

Card Bases Shaded Spruce Memories and More Note Card

Card Frame Shaded Spruce Memories and More Note Card (cut to 5 ½” x 8 ½”, scored at 4 ¼”)

DIe-Cut Fabulous Frame

Memories and More Card Pack (Let it Snow pattern)

Memories and More Card Pack (Snowflake Window Sheet)

Let’s Create

  1. Start with two Shaded Spruce Memories and More note cards. Wrap trim around the larger note card and tie a bow. Sprinkle a few snowflakes near the edges. Set larger note card aside. 
  2. Cut second note card to 5 ½” x 8 1/2”, score at 4 ¼”.. Open this note card, and roll it through the Stampin’ Cut & Emboss Machine with the largest Fabulous Frames die centered on the front of the card.
  3. Set the small rectangle aside and use it for another card.  
  4. Cut down the Memories and More Card Pack window card (snowflake pattern) to size. Adhere Memories and More Card Pack window card to frame with Tear-n-Tape. Place Foam Strips all along the back of the frame.
  5. Cut down one of the Memories and More Card Pack cards (Let it Snow pattern)  and adhere it to the inside of the Memories and More note card with the image showing through the frame in a pleasing manner. Adhere the edges of note card to the inside so that this smaller card is now one layer.
  6. Adhere the frame to the opening in the center. It should fit perfectly.
  7. Adhere smaller note card to larger note card with Stampin’ Dimensionals.
  8. Die-cut two train cars out of Designer Series Paper. Adhere to card front with Stampin’ Dimensionals. 
  9. Stamp puffs of smoke in Memento Black on Basic White. Die-cut little puffs of smoke, and highlight with Balmy Blue Light Blend. Adhere puffs to card front with Mini Stampin’ Dimensionals.
  10. Sprinkle on the snowflakes.
  11. Stamp and decorate the inside and attach with Stampin’ Seal.
  12. Decorate your envelope.
  13. So cute! Now send it to someone special.

Shopping List

Recommended Stamper’s Toolkit

Product List
Order online from the convenience of your own home or send me your order and I’ll take care of you. ❤ Either way, please use the host code ANTD9UHS. Order online AND, if your order is $50 or more using host code ANTD9UHS between now and the end of the month you’ll receive a free pack of embellishment as a THANK YOU gift from me. ❤ If your order is over $150, skip the host code, earn Stampin’ Rewards for free stuff yourself and I’ll still send you a free pack of embellishment as a THANK YOU gift from me. ❤

Dear Santa I’ve Been Good Card

Cards comes together in jiff with the Memories & More card pack. Add a bit of cardstock and be on your way.

Santa Express Suite
All aboard the Santa Express! Santa has a new way to deliver Christmas cheer with the Santa Express Suite Collection, which means you have a fun and playful way to express your holiday wishes! Build a train full of Christmas supplies and send cards decorated with North Pole friends. This collection is the perfect way to celebrate a wonderfully jolly season.

Measurements

Full list of supplies needed, listed below. A die cutting machine is needed for this card.

When you open the Santa Express Memories & More Card Pack, you will see much of the cutting and punching and die-cutting has been done for you. Simply gather your ink pads, stamps, blocks, snips and adhesives. The following cutting and scoring instructions are provided for when you want to repeat these instructions for your own use. You may need to cut the Designer Series Paper, and fussy-cut some of the images.

Basic White Thick Cardstock: 5 ¼” x 10 ½”, score at 5 ¼”

Petal Pink Cardstock: at 3 ¼” x 4 ¾”

Bermuda Bay Cardstock: 3 ¼” x 3 ¼”

Santa Express Designer Series Paper (DSP): 5 ⅛” x 5 ⅛”

Santa Express Memories & More Card Pack (M&M):

  • 2 ⅞” w x 4” h (candy cane pattern)
  • 3 ⅛” x 3 ⅛” (Dear Santa pattern)


Let’s Create

  1. Affix all stamps to Acrylic Blocks.
  2. Fold the Card Base in half using a Bone Folder to sharpen the crease.
  3. Run Petal Pink cardstock through Stampin’ Cut & Emboss Machine with the Wintry 3D Embossing Folder (snowy pattern). . Use Stampin Seal to adhere to card front.
  4. Adhere 2 ⅞” x 4” M&M card (candy cane pattern) to card front with Stampin’ Seal.
  5. On the 3 ⅛” x 3 ⅛” Dear Santa M&M write a little note to Santa, and adhere to Bermuda Bay layer with Stampin’ Seal.
  6. Wrap Iridescent Trim around card front, and tie a bow on the left side.
  7. Adhere Dear Santa panel to card front with Stampin’ Dimensionals.
  8. Sprinkle on the gems.
  9. Stamp and decorate the inside and attach with Stampin’ Seal.
  10. Square Card fits into a 5 ½” x 5 ½” Square Envelope from your M&M Pack.
  11. Super Quick card! Now send it to someone special.
Product List

Recommended Stamper’s Toolkit

Product List
Order online from the convenience of your own home or send me your order and I’ll take care of you. ❤ Either way, please use the host code ANTD9UHS. Order online AND, if your order is $50 or more using host code ANTD9UHS between now and the end of the month you’ll receive a free pack of embellishment as a THANK YOU gift from me. ❤ If your order is over $150, skip the host code, earn Stampin’ Rewards for free stuff yourself and I’ll still send you a free pack of embellishment as a THANK YOU gift from me. ❤

Starter Kit of Tools

Just like a cook with a well stocked kitchen of tools, having the right papercrafting tools can make the difference between an enjoyable and fun experience or one with a few more struggles. I have a Recommended Stamper’s Toolkit, which is the ultimate kit of tools, and listed below is a paired down ‘getting started version’.

The total is $124.25, unless you Join Stampin’ Up! and then it’s $99 with free shipping.

Personally, if I were planning to purchase over $100, I would consider Joining Stampin’ Up!  I have a webpage here that talks about all of the benefits of joining, but the main ones are:

  • the 20% product discount (thru October or longer if you love it and keep ordering)
  • free shipping on your first starter kit order
  • early access to new products and catalogs
  • ability to increase discount to 25% on-going

Once you Join Stampin’ Up! you can use your discount to pick your stamps, ink and paper and get crafting! The hardest part will be choosing from all of the pretty projects! Browse through the current catalogs for inspiration to get started and then let me know what projects you like and I can help you put together a shopping list. Plus I have a recipe for each project in the catalog that we can consult for your list.

Shopping List

Tag Buffet Cards & Gift Card Holders

Take the Tag Buffet Kit a step further by making a few cards out of tags and then package them up for a sweet gift. Four cards and envelopes fit in one Acrylic Box. The Tag Buffet has a few extra tree dies and gold thread, which I used to decorate the outside of the box.

Full list of supplies needed, listed below. A die cutting machine is needed for these cards.
Card Base (2): Real Red Cardstock 11 x 4-1/4 and score at 5-1/2 and then at 2-3/4”.
Card Base (2): Shaded Spruce Cardstock 8 1/2 h” x 5 1/2″ w folded to 5 1/2″ w x 4 1/4″ h.
Tags: Choose 4 tags.
Front Background (2): Gold Foil 4″ w x 2-1/2” h.
Inside Layer (4): Whisper White Cardstock 5-1/4″h x 4” w.
Belly Band: Shaded Spruce Cardstock 1″h x 8″ w.

  1. Affix all stamps to Acrylic Blocks.
  2. Make the Tag Buffet Kit
  3. Make 2 Gift Card Holders:
    1. Fold the Real Red Card Bases along the score lines with the Bone Folder to sharpen the crease.
    2. On the 2-3/4” flap punch put half of a 1-1/2” circle and then add adhesive on the two sides and fold to create a pocket for a gift card/money.
    1. Stamp the sentiment in Real Red towards the bottom of the inside layer and attach with Stampin’ Seal.
    2. Emboss the Front Background with the Wrapped in Texture Embossing Folder and layer to the front flap on the bottom.
    3. Attach a finished tag to the front with Stampin’ Dimensionals.
    4. Make a double bow with the Gold Twine and add to the top of the tag.
    5. Decorate 2 Envelopes.
  4. Make 2 Cards:
    1. Fold the Shaded Spruce Card Bases along the score lines with the Bone Folder to sharpen the crease.
    2. Disassemble the two tags.
    3. Cut the tag portion off the two patterned piece of paper to make two rectangles. Then cut the rectangles in half.
    4. Attach two matching rectangles to the middle edges of the Card Base.
    5. Attach the Tag
    6. Add Gilded Gems.
    7. Decorate remaining 2 Inside Layers and attach.
    8. Decorate 2 Envelopes.
  5. Decorate the Acetate Box:
    1. Wrap the Belly Band around the box, use your fingers to crease at the corners and attach to itself with Stampin’ Seal.
    2. Wrap Gold Thread from Kit around the Belly Band and tie in a knot.
    3. Attach a leftover Tree to the Belly Band with a Stampin’ Dimensional.
    4. Slide all the cards and envelopes in and close.
  6. So cute! Now give it to someone special.

Shopping List

Recommended Stamper’s Toolkit

Product List
Order online from the convenience of your own home or send me your order and I’ll take care of you. ❤ Either way, please use the host code ANTD9UHS. Order online AND, if your order is $50 or more using host code ANTD9UHS between now and the end of the month you’ll receive a free pack of embellishment as a THANK YOU gift from me. ❤ If your order is over $150, skip the host code, earn Stampin’ Rewards for free stuff yourself and I’ll still send you a free pack of embellishment as a THANK YOU gift from me. ❤

Design inspired by Michelle Litwiller.

Tag Buffet

Create stunning seasonal gift tags with the Tag Buffet Project Kit and the Tag Buffet Stamp Set! This duo is perfect for new crafters, busy crafters, or crafters on the go. Pair with ink and your choice of adhesive for complete tags. This is a semi-inclusive card kit. Semi-inclusive kits require additional supplies to complete. Take a look at the Shopping List below to see the additional products needed. To keep costs down, you could use the same ink color on all the tags.

The best part of Kits, is all the materials are all pre-cut! Yipeee!

  1. Affix all stamps to Acrylic Blocks.
  2. Separate all of the die cuts into little piles. There are supplies to make 5 each of 6 designs for 30 total tags!
  3. Take a look at the instructions sheet inside the kit and the pictures of the finished tags.
  4. Choose one of the 6 designs – ornament, bird, presents, tree, stocking or foliage and assemble the five tags. Assemble each of the tags and finish with the gold trim.
  5. So pretty and easy!

Shopping List

Recommended Stamper’s Toolkit

Product List
Order online from the convenience of your own home or send me your order and I’ll take care of you. ❤ Either way, please use the host code ANTD9UHS. Order online AND, if your order is $50 or more using host code ANTD9UHS between now and the end of the month you’ll receive a free pack of embellishment as a THANK YOU gift from me. ❤ If your order is over $150, skip the host code, earn Stampin’ Rewards for free stuff yourself and I’ll still send you a free pack of embellishment as a THANK YOU gift from me. ❤