Did you know the various patterns and prints on the Designer Series Paper at Stampin’ Up! are first painted and sketched and then transferred to digital media and turned into the designs you see in your paper pack? How neat is that? And genuine! Not to dis the very talented digital designers out there at all! I think it’s cool that the SU! Concept Designers work in actual paint and ink and then also create digitally. That’s some talent! When I first saw the Berry Blessings Bundle in the 2021 Sale-a-bration brochure, I put it at the tip top of my wishlist. I couldn’t wait to get my hands on all those yummy papers and get to creating. The colors are spectacular and the images so very well done. Hard to believe this card is #simplestamping using just Stamps, Ink and Paper.
Full list of supplies needed, listed below. A die cutting machine is needed for this card.
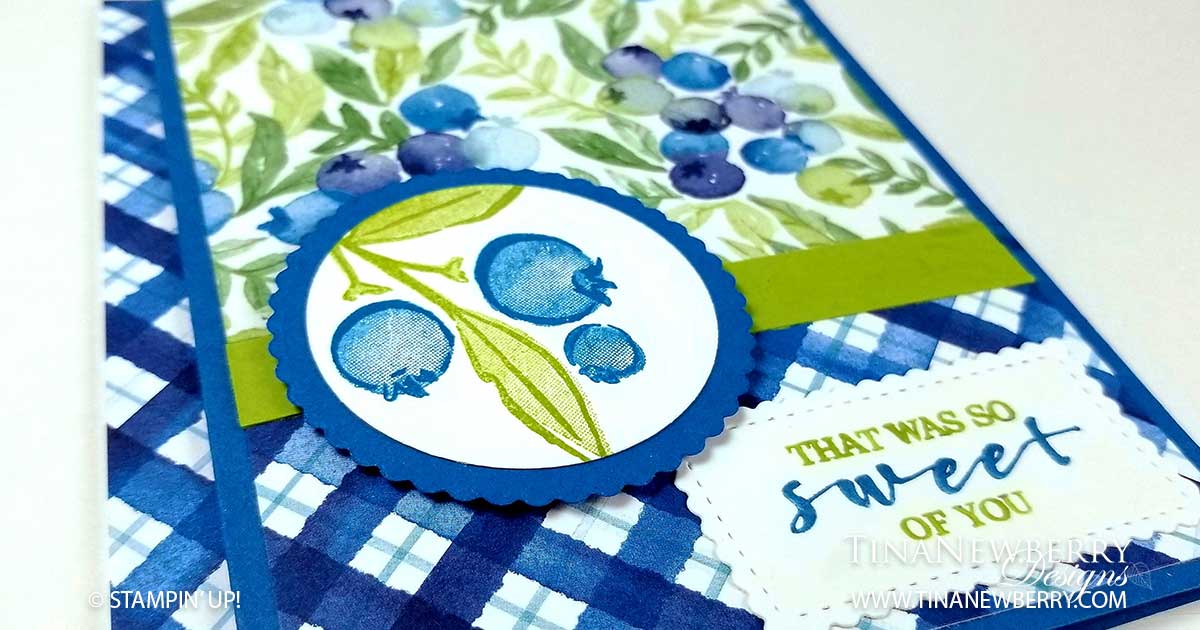
Card Base: Pacific Point Cardstock 8 1/2 h” x 5 1/2″ w folded to 5 1/2″ h x 4 1/4″ w.
Background-Top: Berry Blessing DSP 3 1/2″ h x 4″ w
Background-Bottom: Berry Blessing DSP 1 3/4″ h x 4″ w
Background-Strip: Granny Apple Green Cardstock 1/2″ h x 4″ w
Decorative-Matte: Pacific Point Cardstock 2 1/4″ Scalloped Circle from the Layering Circles Dies
Decorative Layer: Basic White Cardstock 2″ Circle from the Layering Circles Dies (stamp first)
Sentiment: Basic White Cardstock 1 1/8″h x 2 1/8″ w Stitched So Sweetly Die
Inside Layer: Basic White Cardstock 5 1/4″h x 4″ w
- Affix all stamps to Acrylic Blocks.
- Fold the Card Base in half using a Bone Folder to sharpen the crease.
- Attach the Background-Top and Background-Bottom using Stampin’ Seal.
- Attach the Background-Strip using Stampin’ Seal.
- Use Pacific Point and Granny Apple Green Stampin’ Write Markers to color the Sentiment Stamp and then stamp on the Sentiment layer before attaching to the lower right corner with Stampin’ Seal.
- Stamp the Blueberries in Pacific Point ink and Leaves in Granny Apple Green ink and then die cut and attach to the Decorative-Matte with Stampin’ Seal.
- Attach the Decorative Matte with Stampin’ Dimensionals
- Decorate the Inside Layer and attach.
- Decorate the envelope.
- So cute! Now send it to someone special.
Shopping List

")


Recommended Stamper’s Toolkit ❤
Product List


