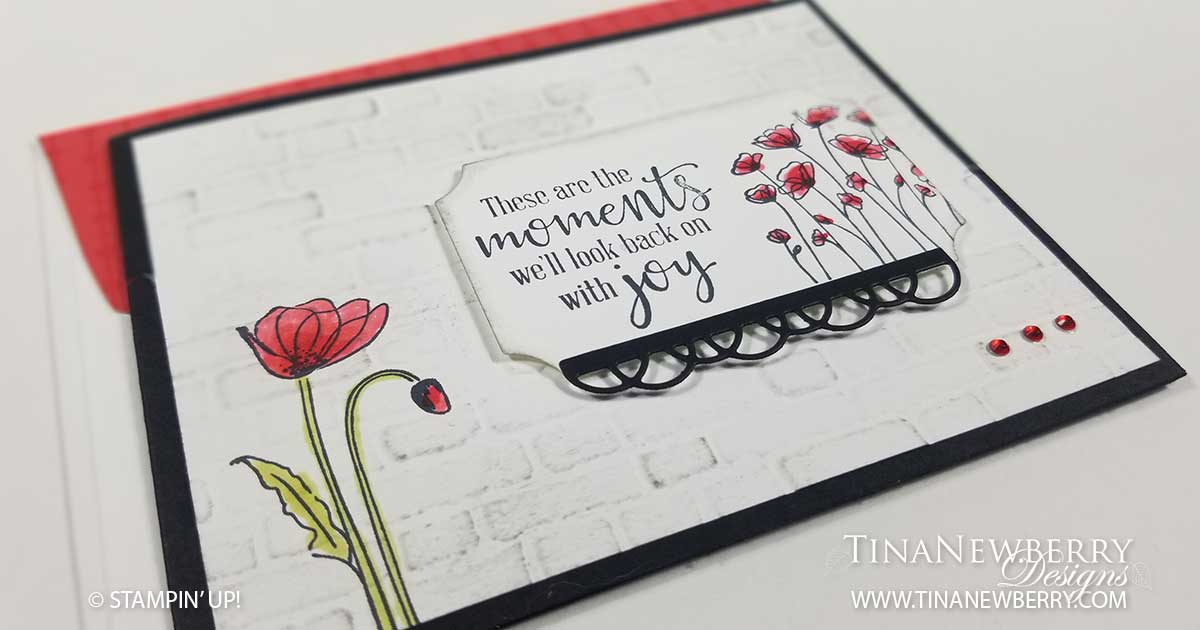
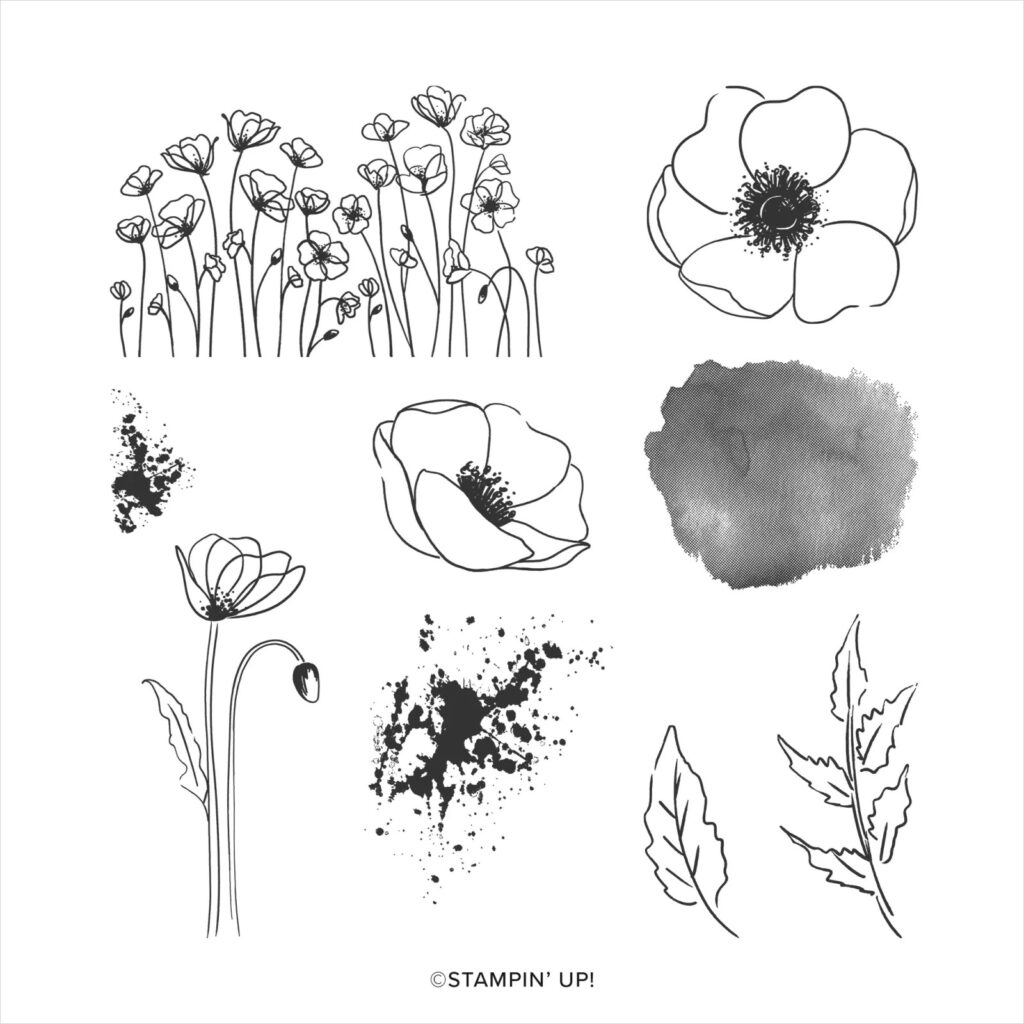
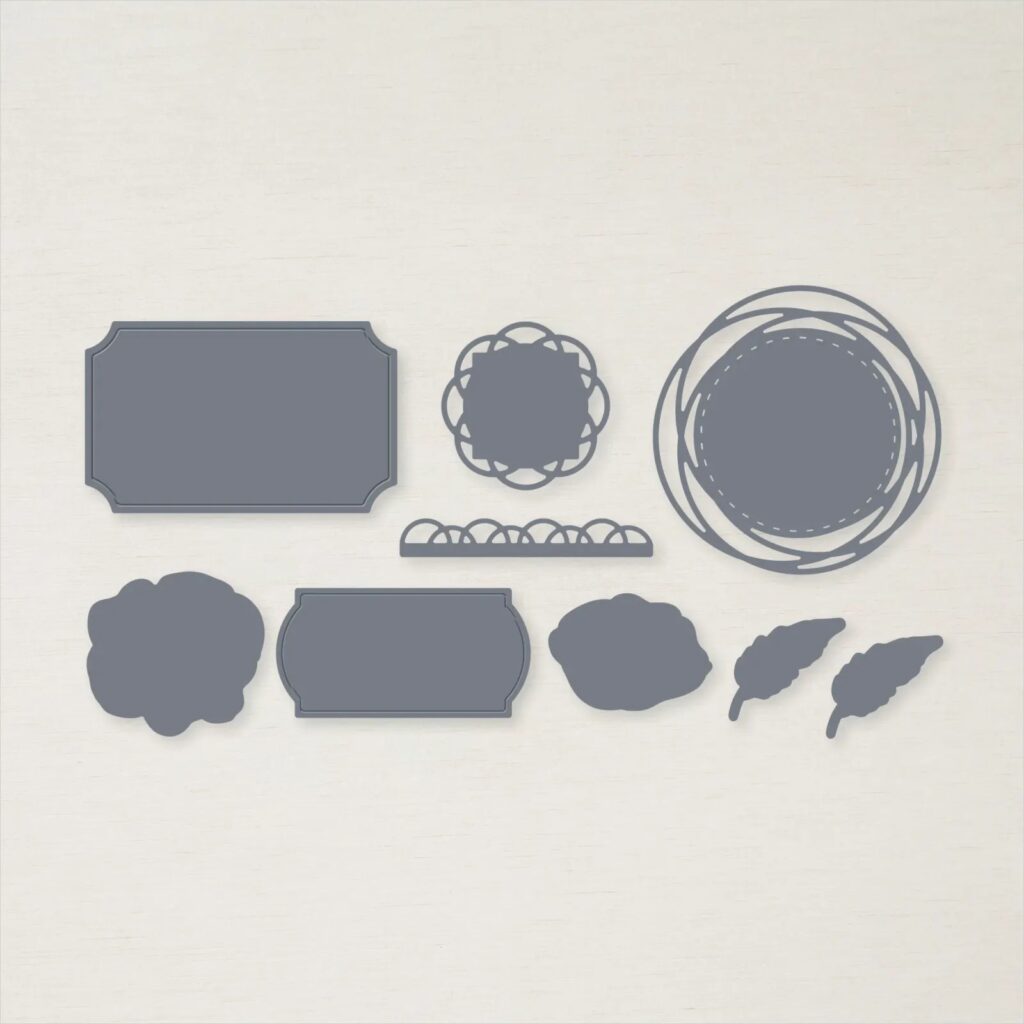
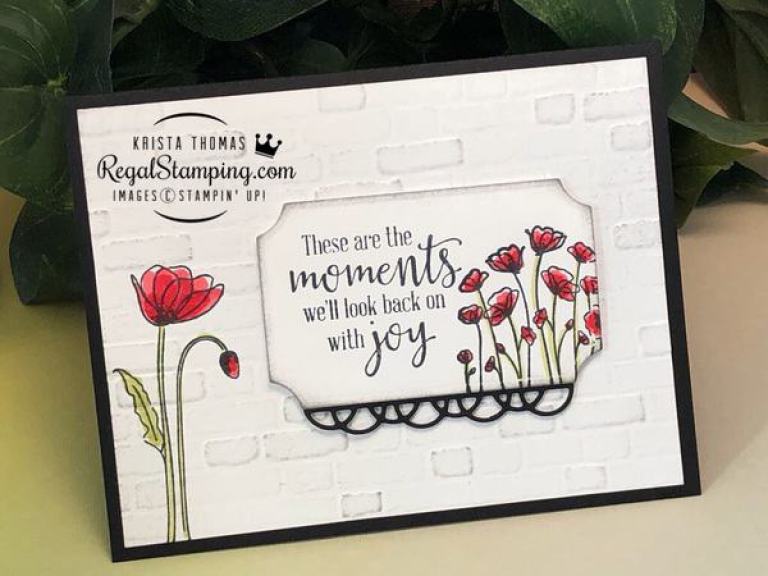
The Painted Poppies Suite Collection came out with a flurry in 2019 with the Jan-June Mini Catalog. The Product Suite was huge with the most beautiful Designer Series Paper. It was all so beautiful it was easy to be distracted from the simple elegance found in the Painted Poppies Cling Stamp Set. And let’s not forget the Painted Labels Dies with some of the prettiest labels and accents, plus dies to match the poppies and leaves stamps. This versatile set and coordinating dies makes beautiful cards and when I saw this pretty card by Krista Thomas, I HAD to try it. I was really interested in figuring out how she added ink to the embossing folder.
Measurements
Full list of supplies needed, listed below. A die cutting machine is needed for this card.
Card Base: Basic Black Cardstock 5 1/2″ h x 8 1/2″ w folded to 5 1/2″ h x 4 1/4″ w
Background: Basic White Cardstock 5 1/4″ h x 4″ w with the Brick and Mortar Embossing Folder
Sentiment Layer: Basic White Cardstock with the Painted Labels Die
Sentiment Trim: Basic Black Cardstock with the Painted Labels Die
Inside: Basic White Cardstock 5 1/4″ h x 4″ w
Let’s Create
- Affix all stamps to Acrylic Blocks.
- Fold the Card Base in half using a Bone Folder to sharpen the crease.
- First stamp the Poppy on the Background with Memento Tuxedo Black Ink. Then color in with the Painted Poppies and Old Olive Stampin’ Blends alcohol Markers.
- Next, run the Background through the Stampin’ Cut & Emboss machine with the Brick and Mortar Embossing Folder then use a sponge to lightly apply Basic Grey ink to the raised area and edges of the Background before attaching to the Card Base with Tear & Tape or Stampin’ Seal+.
- Stamp the Sentiment and Poppies on the Sentiment Layer with Memento Tuxedo Black Ink. Color the images in with the Painted Poppies and Old Olive Stampin’ Blends alcohol Markers before attaching to the Background with Stampin’ Dimensionals.
- Attach the Decorative Trim to the Sentiment using Fine Tip Glue or Adhesive Sheets if you have them.
- Sprinkle on some Red Rhinestones.
- Stamp your inside sentiment and decorate if desired, before attaching with the adhesive of your choice.
- Decorate the envelope.
- Beautiful! Who will you send it to?
Shopping List


Stamper’s Toolkit
You will also need adhesive, acrylic blocks, scissors and other basic PaperCrafting items from the Stamper’s Toolkit


")


