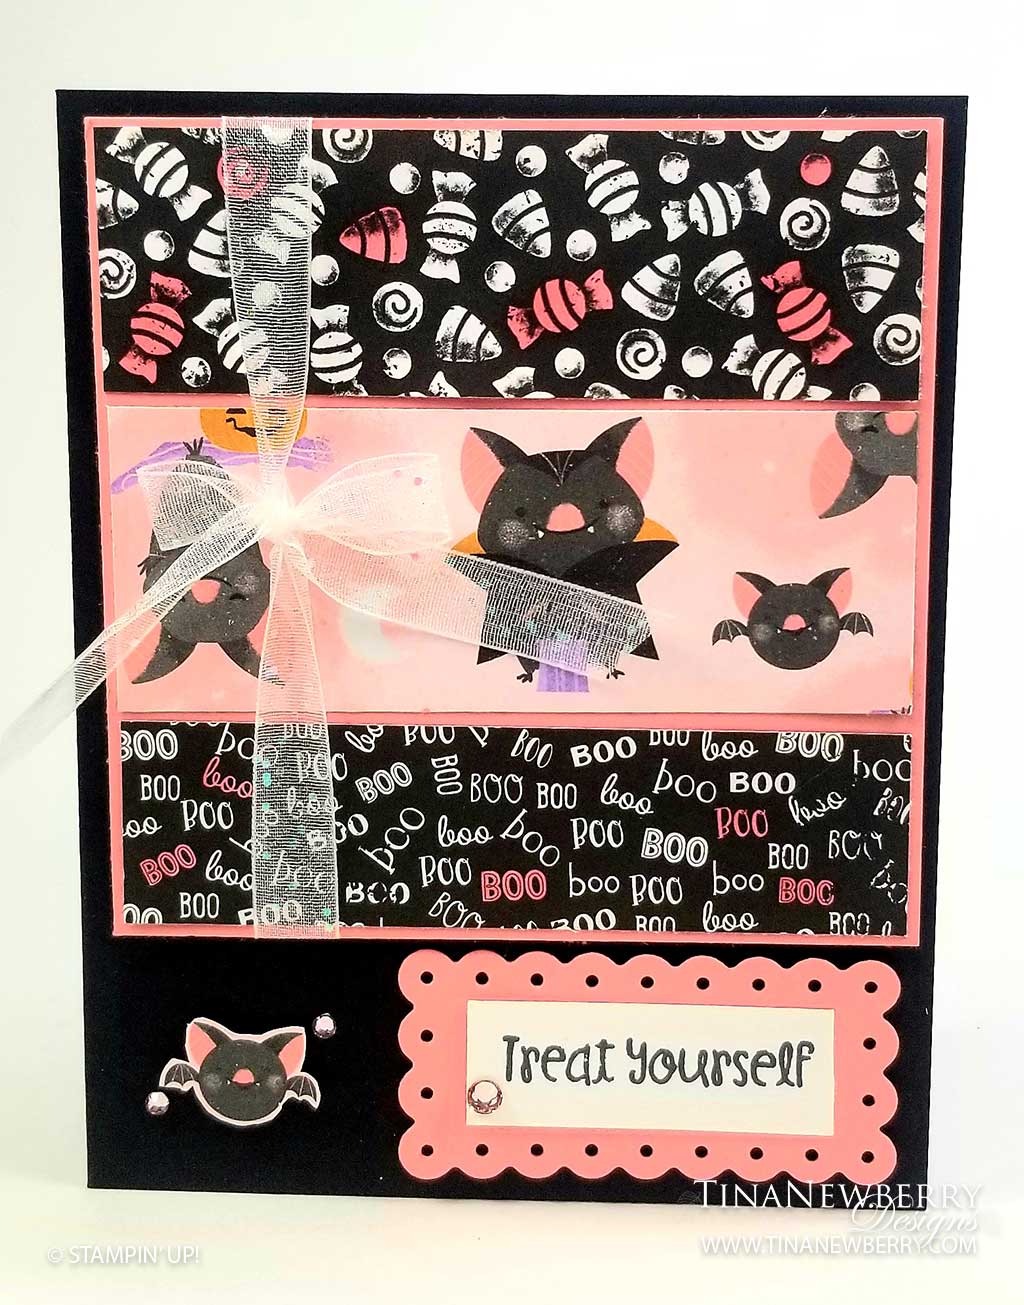
OK so bats are TOTALLY not my thing. Ick! But look at how cute these little Batty Dudes are!!!! OMgoodness. I couldn’t wait to make a cute Halloween card featuring these little dudes. So fun!
Measurements
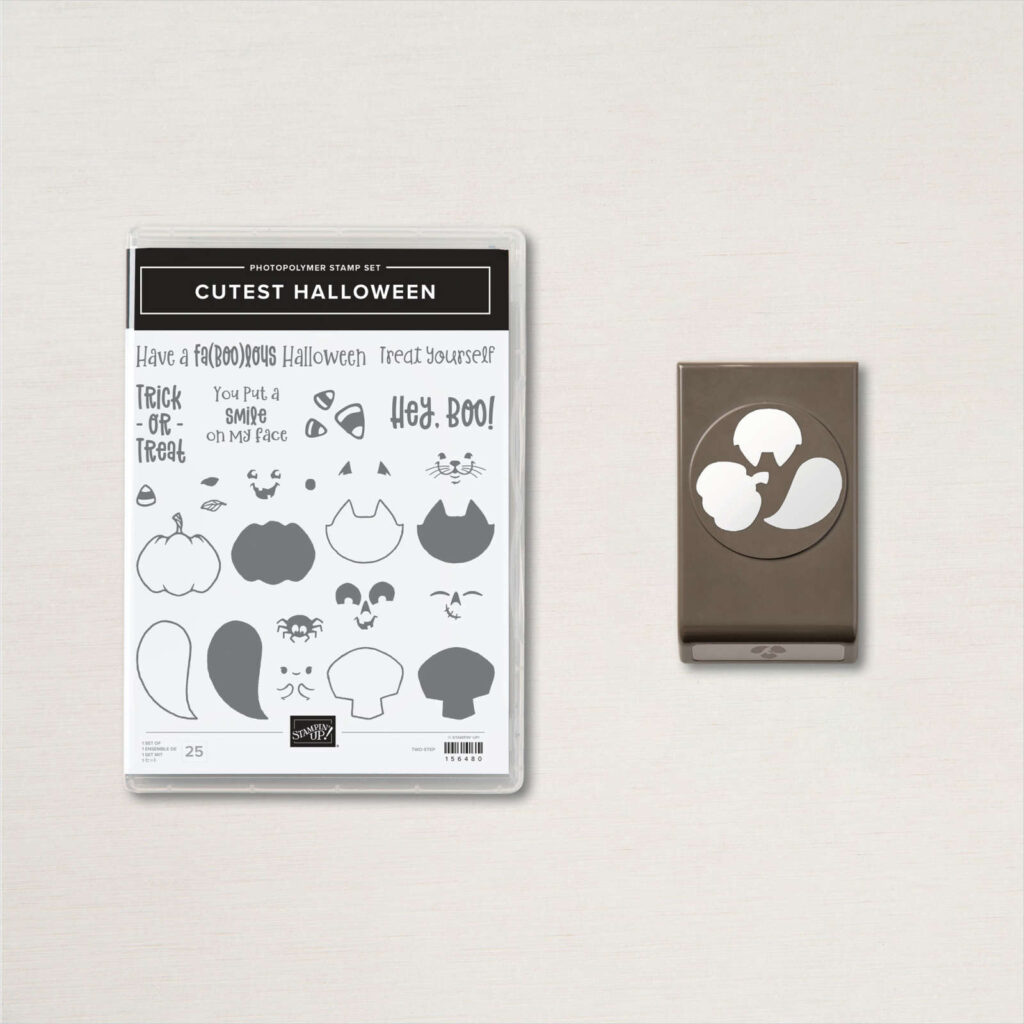
Full list of supplies needed, listed below. A die cutting machine is needed for this card.
Card Base: Basic Black Cardstock 5 1/2″ h x 8 1/2″ w scored at 4 1/4″ and folded to 5 1/2″ h x 4 1/4″ w
Background: Flirty Flamingo Cardstock 4″ h x 4″ w
DSP Strips (3): Cute Halloween Designer Series Paper 3 7/8″ w x 1″, 1 1/4″ and 1 1/2″ h
Sentiment Layer: Basic White Cardstock 5/8″ h x 1 3/4″ w (stamp first then trim)
Sentiment Matte: Flirty Flamingo Cardstock with the Scalloped Contour Dies.
Inside Layer (Optional): Basic White Cardstock 5 1/2″ h x 4 1/4″ w
Let’s Create
- Affix all stamps to Acrylic Blocks.
- Fold the Card Base in half using a Bone Folder to sharpen the crease.
- Attach the DSP Strips to the Flirty Flamingo Background with Stampin’ Seal.
- Wrap the White Glittered Organdy Ribbon around the Flirty Flamingo Background and tie a bow.
- Attach the Flirty Flamingo Background with Stampin’ Dimensionals.
- Die Cut the Flirty Flamingo Sentiment Matte.
- Stamp the Sentiment in Tuxedo Black Memento Ink, trim to size and attach to the Sentiment Matte with Stampin’ Seal.
- Attach the Sentiment with Stampin’ Dimensionals.
- Fussy cut a cute little bat and attach with Stampin’ Dimensional.
- Use the Flirty Flamingo Dark Stampin’ Blend to color Basic Rhinestones, then sprinkle them on.
- Use the Flirty Flamingo Dark Stampin’ Blend to color bits of the Designer Series Paper.
- Stamp the Inside Layer to your liking and attach with adhesive of your choice.
- Decorate your envelope
- Super Cute!!! Now go make someone’s day! Put it in the mail.
Shopping List


 Designer Series Paper")

 Glittered Organdy Ribbon")

Stamper’s Toolkit
You will also need adhesive, acrylic blocks, scissors and other basic PaperCrafting items from the Stamper’s Toolkit


")


