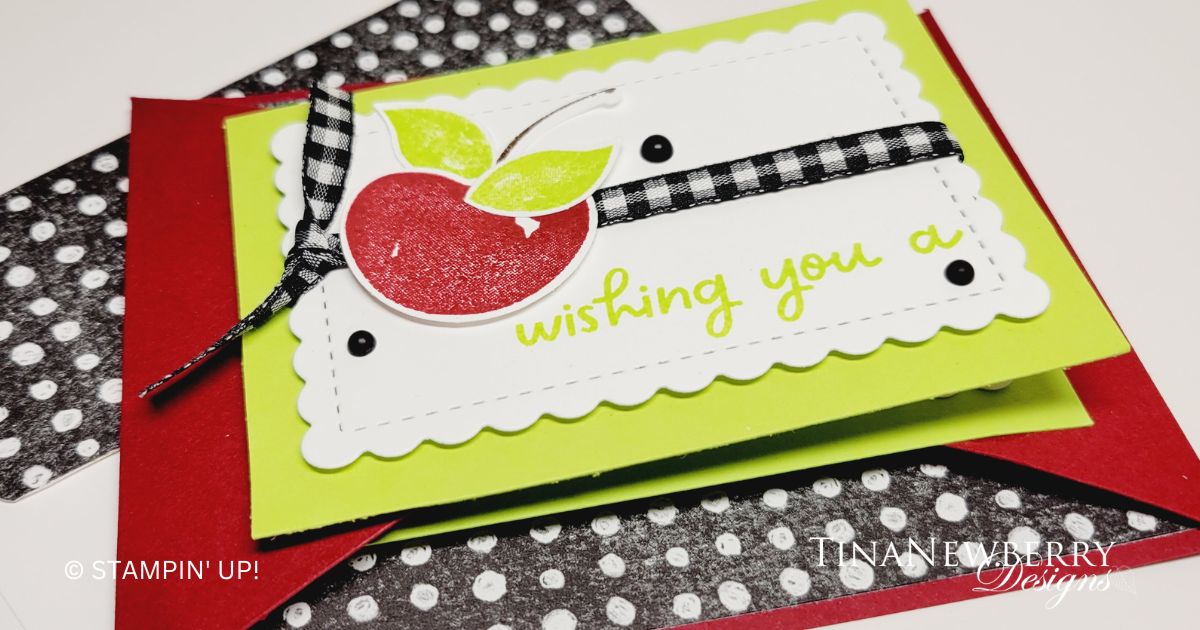
A classic combo- red, white and black! This time with a splash of bright green and a fancy fold- or maybe flip card. Unfold your heartfelt wishes for a sweet day with this fun card. I’ll show you how.
Measurements
Full list of supplies needed, listed below. A die cutting machine is needed for this card.
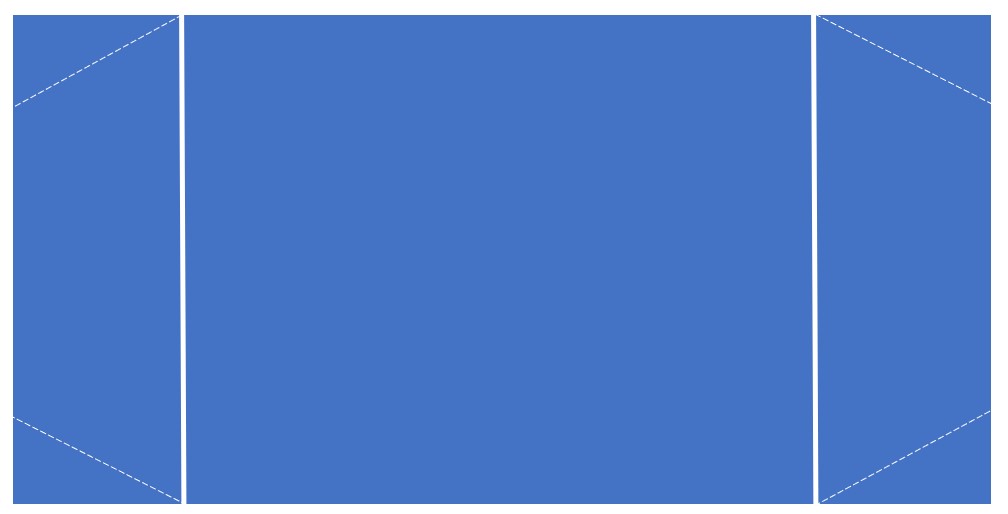
Cherry Cobbler Cardstock: 4 1/4″ h x 8 1/2″ w scored at 1 1/2″ and 7″ folded at the score lines to to 5 1/2″ h x 4 1/4″ w
Parakeet Party Cardstock: 3″ h x 4 1/4″ w (2)
Perfectly Penned Designer Series Paper (DSP): 4″ h x 5 1/4″ w
Basic White Cardstock:
- 2 1/2″ h x 4″ w (3)
- scrap for cherry, leaves and stems
Let’s Create
- Affix all stamps to Acrylic Blocks.
- Fold the Card Base in at score lines using a Bone Folder to sharpen the creases.
- On the edge of the Cherry Cobble Card Base, measure down from the top outer edge 3/4″ and up from the bottom outer edge 3/4″ on both sides. Make a mark with a pencil. Use your Stampin’ Snips to trim off from the pencil mark at a diagonal to the scroe line.
- Attach the DSP with Stampin’ Seal to the center inside background.
- Run the 2 1/2″ h x 4″ w Basic White Cardstock pieces (3) through the Stampin’ Cut & Emboss Machine with the Scalloped Countour dies.
- On one scalloped Basic White Cardstock piece, stamp “Wishing you a” in Parakeet Party ink.
- One one other scalloped Basic White Cardstock piece, stamp “Sweet” in Cherry Cobbler ink, and “day” in Parakeet Party ink.
- Attach the unstamped 2 1/2″ h x 4″ w Basic White Cardstock piece to the inside on top of the DSP.
- Wrap the “Wishing you a ” panel with Black & White Gingham ribbon, then attach to one of the Parekeet Party panels with Stampin Dimensionals before attaching to the left flap- being careful where you put the adhesive!
- Attach the “Wishing you a” to the right flap with Stampin’ Seal- also being careful where you put the adhesive.
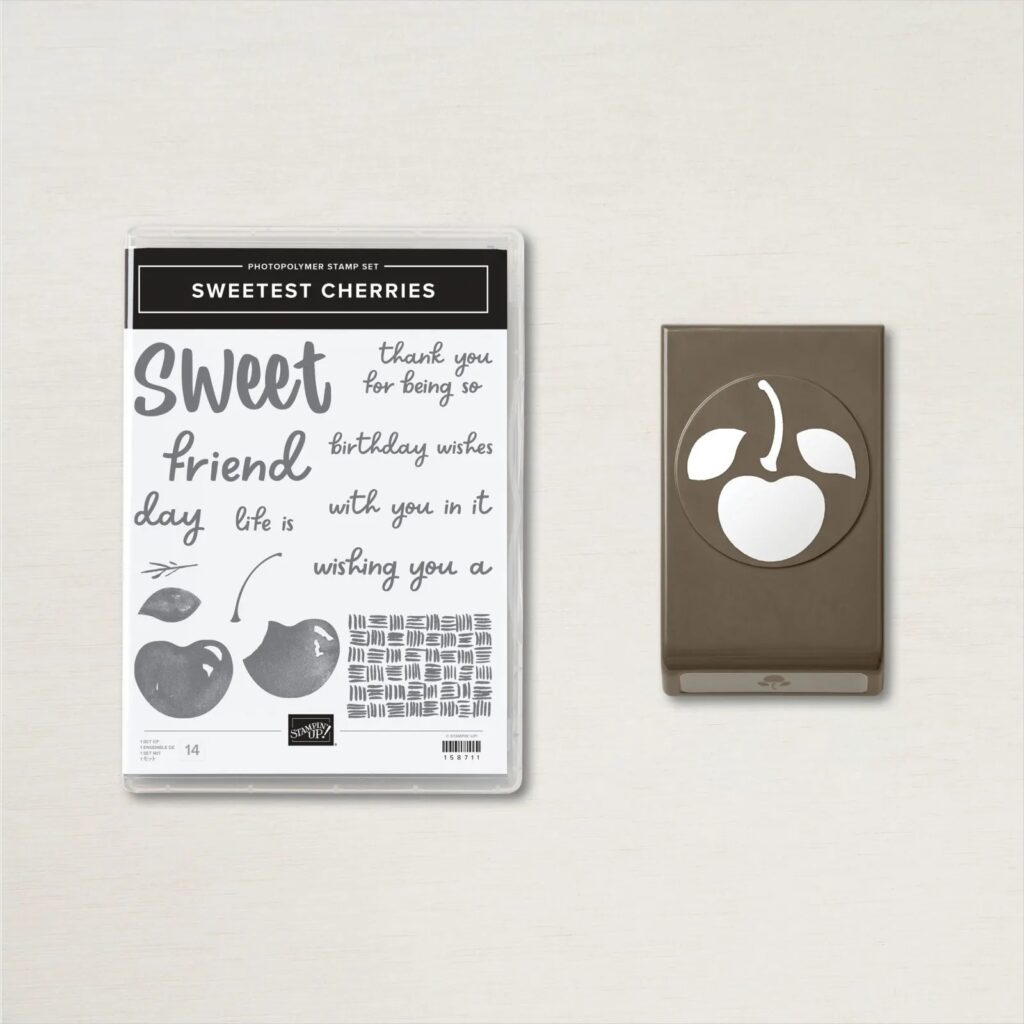
- On Basic White Cardstock scrap, stamp the cherry in Cherry Cobbler, the leaves in Parakeet Party, and the stem in Crumb Cake. Then punch out with the Cherries Builder Punch.
- Use Mini Glue Dots and Multipurpose Glue to assemble the Cherry. Attach Cherry to the front, over the Gingham ribbon with Stampin’ Seal.
- Fold in the right side and then the left.
- Sprinkle on the Black Matte Dots
- Stamp and decorate the inside.
- Decorate your envelope.
- How fun! Who will you send it to?
Shopping List
")

$19.00


 Designer Series Paper")
 Gingham Ribbon")

$7.00

$35.00
Recommended Stamper’s Toolkit ❤
Product List
$12.00

$7.00

$4.25

$5.75

$5.50

$11.00

$26.00

$7.00

$6.50

$11.00

$20.00

$11.00

$80.75

$128.00


$16.00

$13.00


