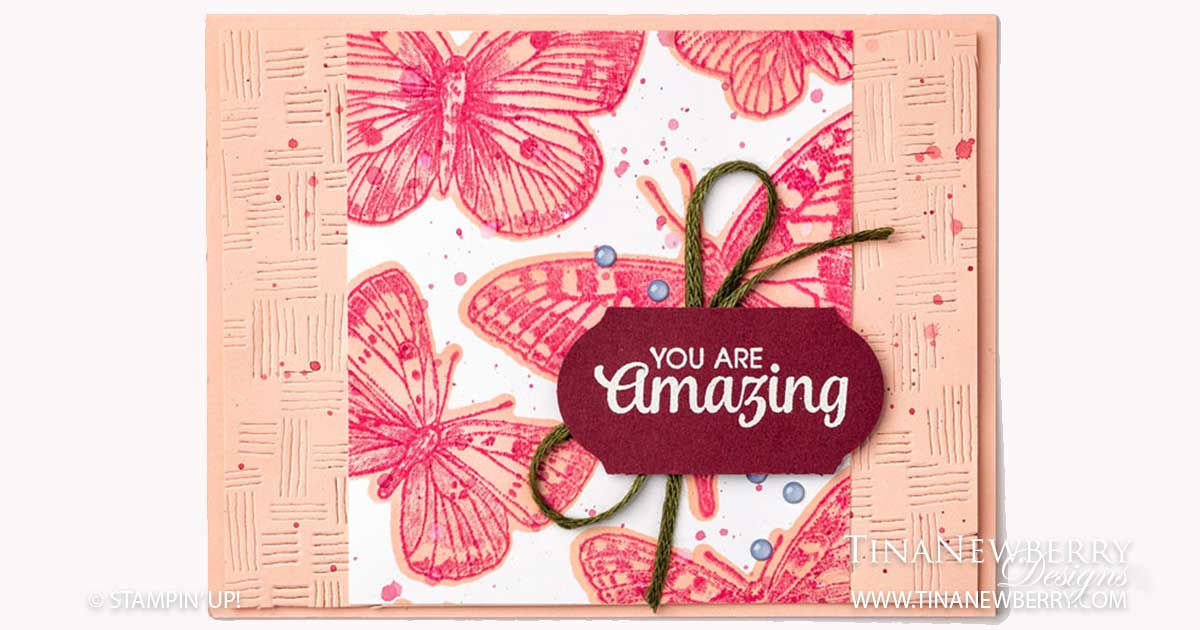
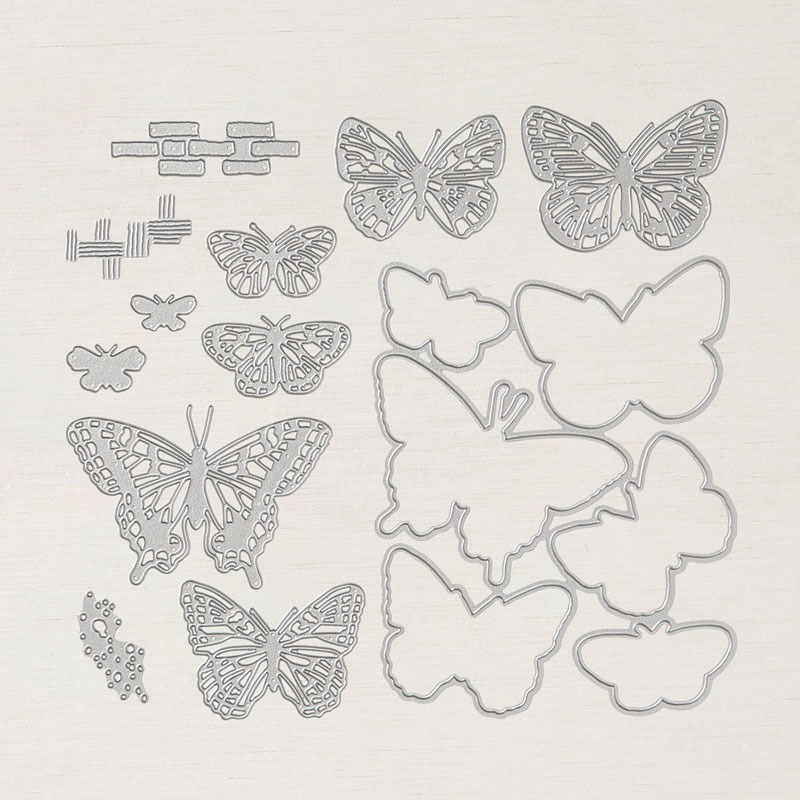
Create your own unique pattern background using the Brilliant Wings Dies to make a stencil and then and detail with the Butterfly Brilliance Stamp and create ink spots with the flick technique for this pretty card. The Stamp and large Die are each one piece and both coordinate allowing you to stamp and die cut a kaleidoscope of butterflies with minimal effort while saving time.

Measurements
Full list of supplies needed, listed below. A die cutting machine is needed for this card.
Card Base: Blushing Bride Cardstock 8 1/2 h” x 5 1/2″ w folded to 4 1/4″ h x 5 1/2″ w.
Background: Blushing Bride Cardstock 4″ h x 5 1/4″ w.
Pattern Layer: Basic White Cardstock 4″ h x 3 3/4″ w
Sentiment Layer: Merry Merlot scrap
Inside Layer: Basic White Cardstock 4″ h x 5 1/4″ w.
Let’s Create
- Affix all stamps to Acrylic Blocks.
- Fold the Card Base in half using a Bone Folder to sharpen the crease.
- Run the Background through the Die Cut & Emboss Machine several times with the crosshatch die to create a pattern on the two ends.
- Run the Brilliant Wings Die through the Die Cut & Emboss machine with a piece of scrap cardstock.
- Remove the die cut butterflies and then lay the die cut piece on top of the Pattern Layer and secure in place. Use a Blender Brush and Blushing Bride ink to color butterflies on the Pattern Layer.
- Stamp the detailed butterfly stamp in Melon Mambo ink over the Blushing Bride butterflies.
- Attach the Pattern Layer to Background.
- Flick the paint brush tip of the Melon Mambo Stampin’ Write Marker against the pen cap to ink spots all over the front of the card.
- Stamp the Sentiment in Versamark Ink on the Merry Merlot scrap cardstock. Use a Heat tool to heat emboss with White Embossing Powder.
- Punch the Sentiment with the Label Me Fancy Punch.
- Create a bow with the Mossy Meadow Braided Linen Trim and attach to the back of the Sentiment Label before attaching to the card with Stampin’ Dimensionals.
- Affix some 20-22 In Color Enamel Dots to the front.
- Decorate the Inside Layer and attach.
- Decorate the envelope.
- So Pretty! Now send it to someone special.
Shopping List


 Cardstock")


 Braided Linen Trim")


")
Stamper’s Toolkit
You will also need adhesive, acrylic blocks, scissors and other basic PaperCrafting items from the Stamper’s Toolkit


