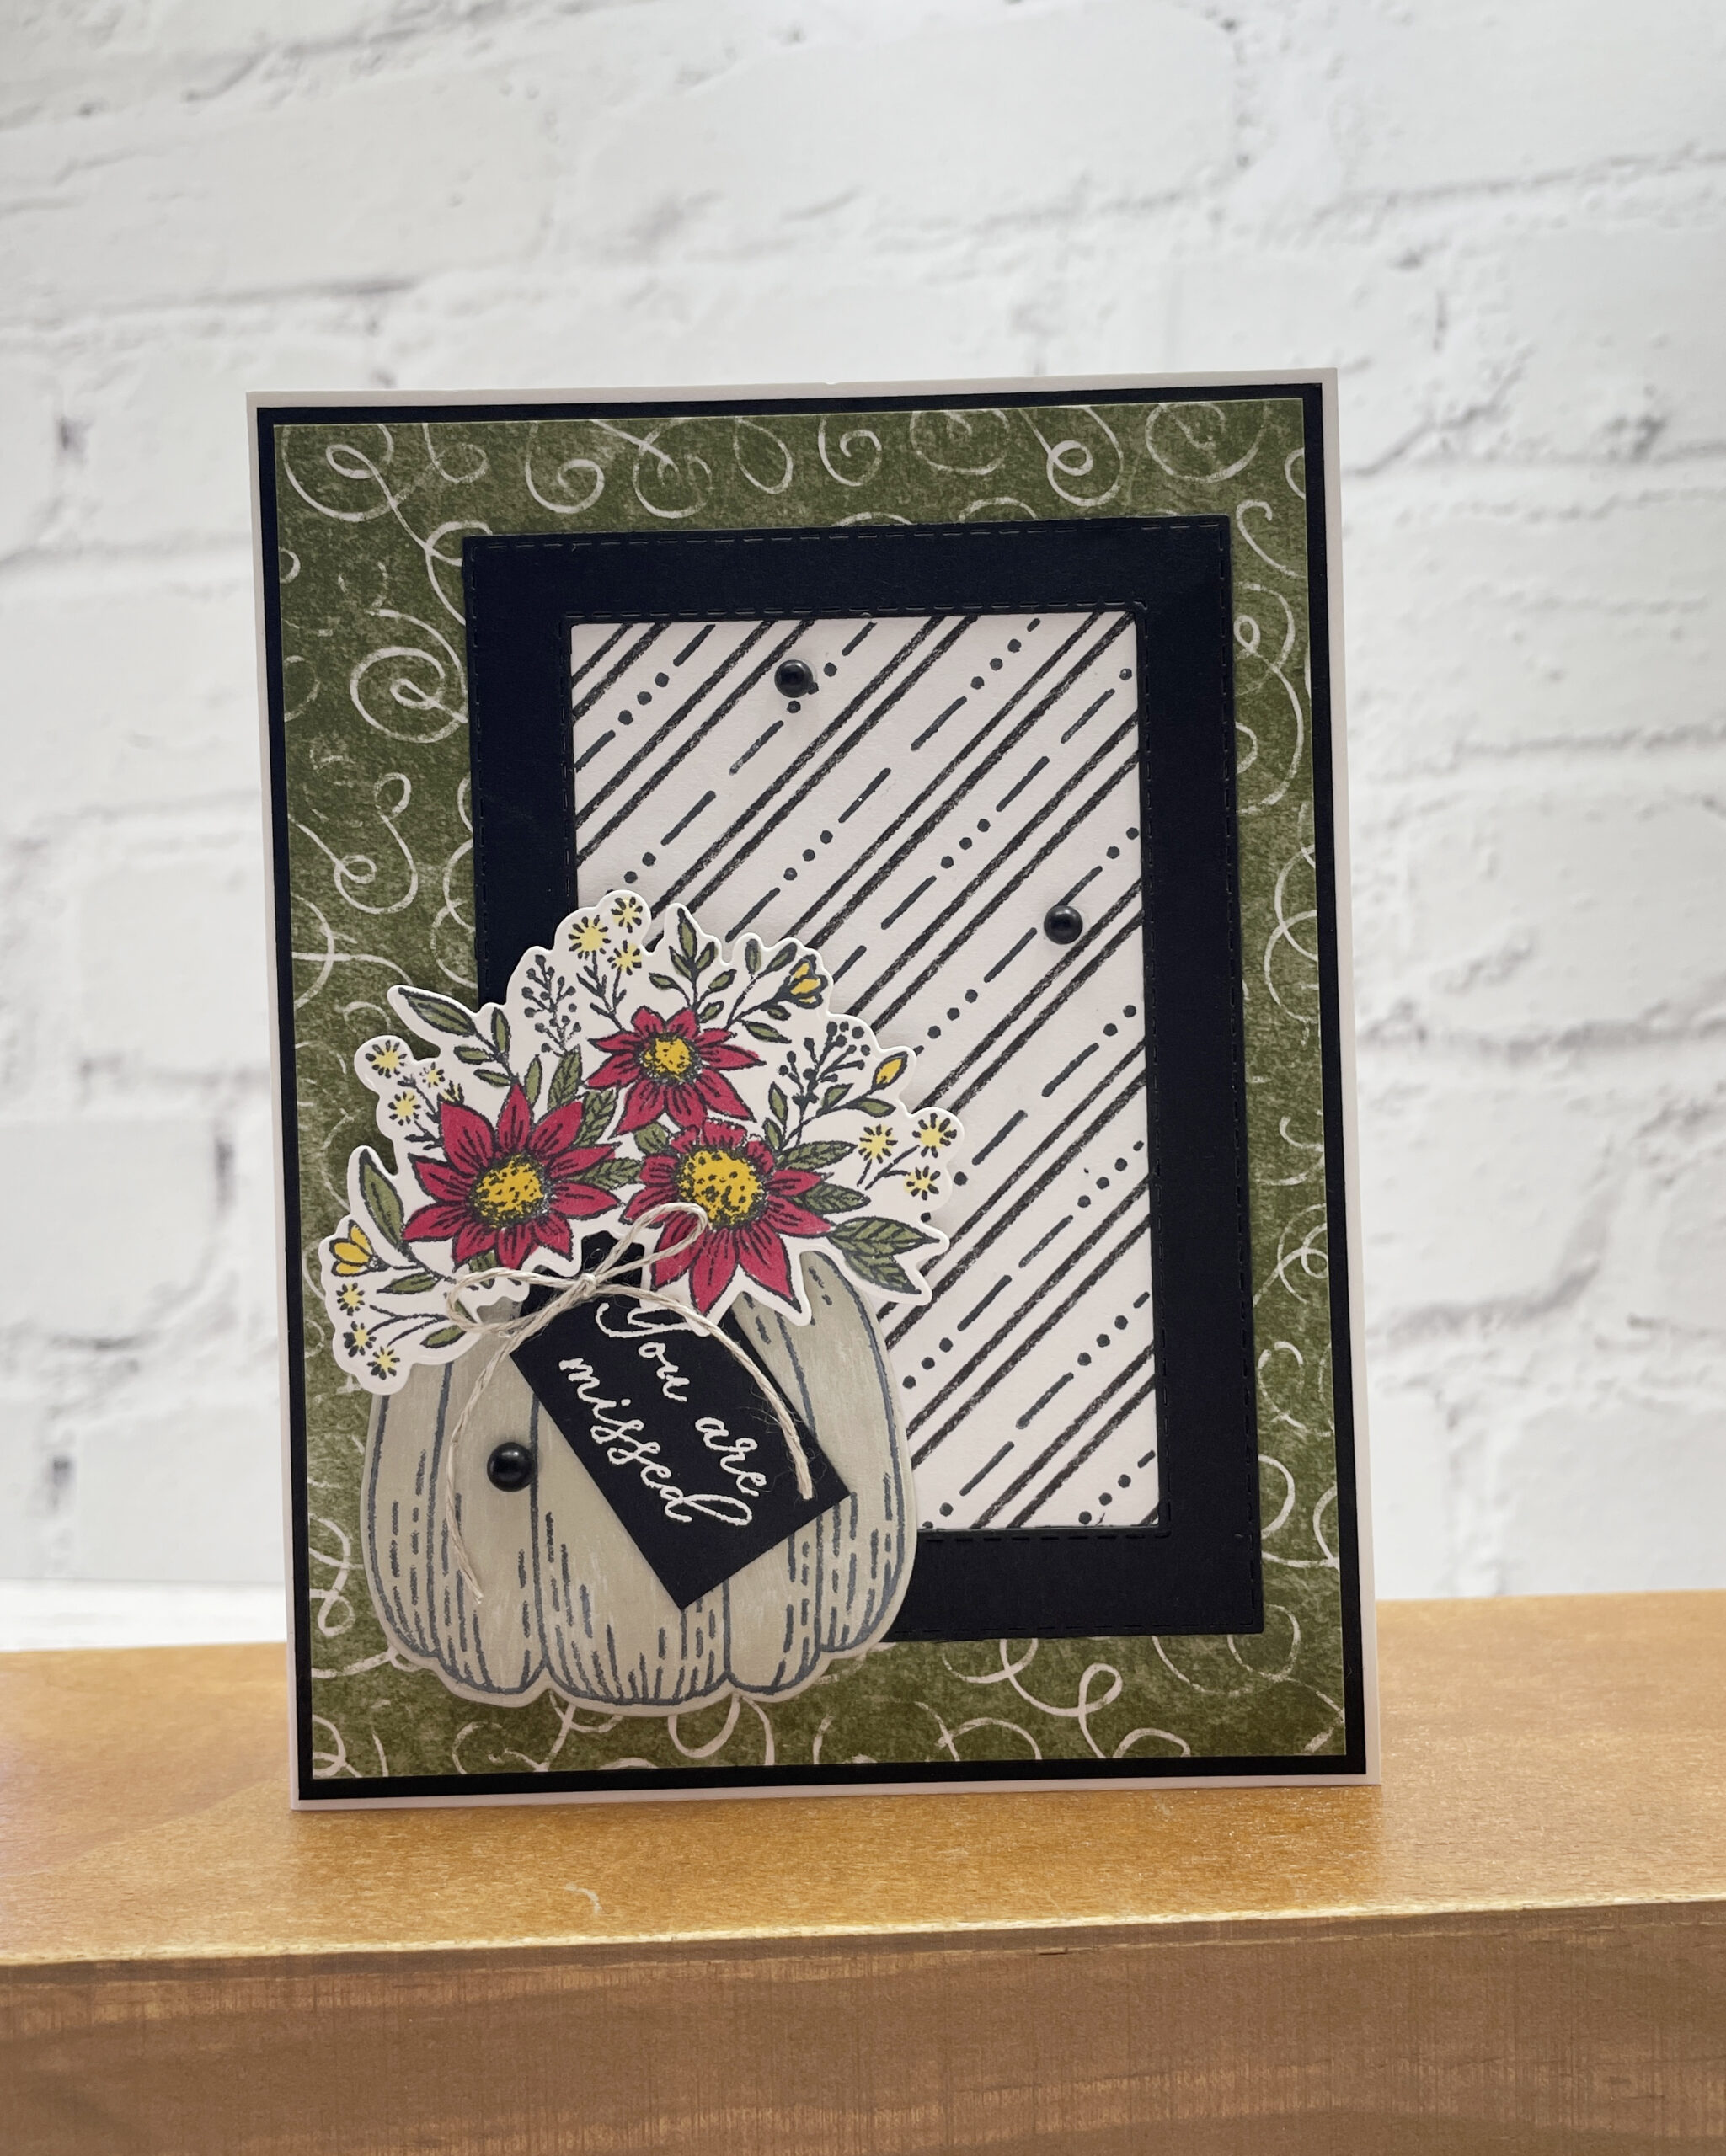
Truly this card design could be used for any season, just change up the colors. One of my favorite pumpkins is turquoise (of course! You know me. LOL)
Measurements
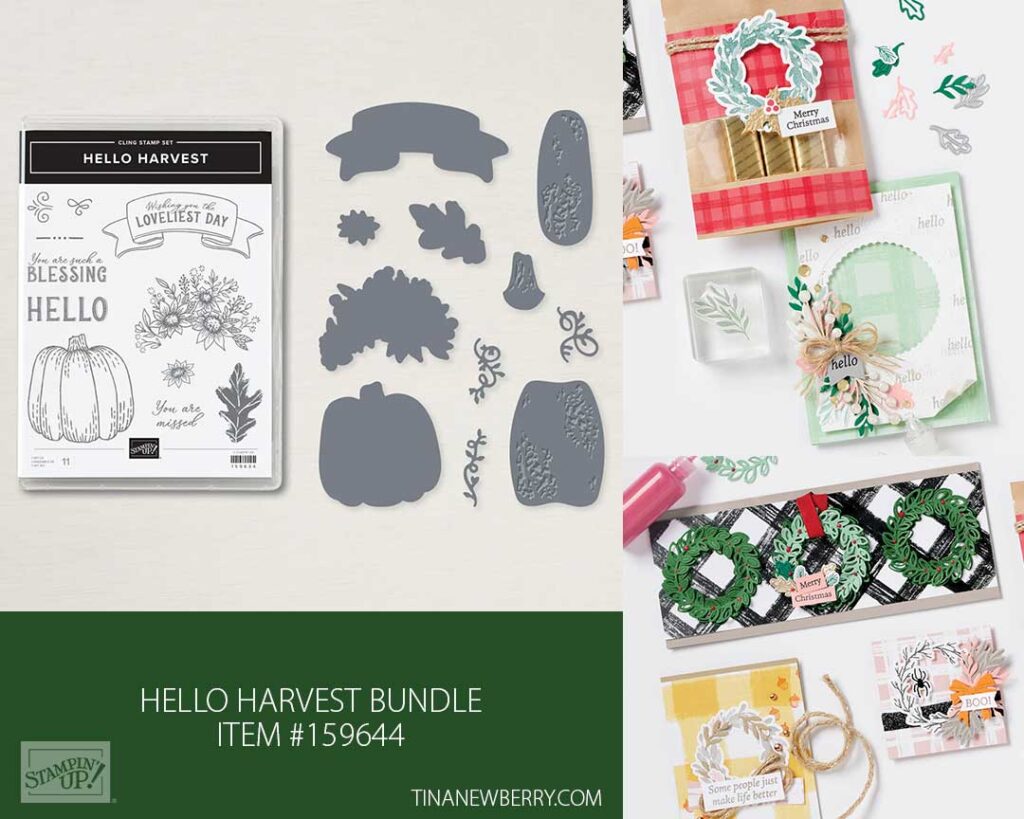
Full list of supplies needed, listed below. A die cutting machine is needed for this card.
Basic White Cardstock:
- 5 ½” h x 8 ½” w scored and folded on the long-side at 4 ¼” for Card Base
- 3 ½” x 2 ½” scrap (for stamping flowers and die cutting)
Basic Black Cardstock:
- 5 ⅜” h x 4 ⅛” w
- 4 ¾” h x 3 ½” w scrap (For die cutting frame)
- 2” w x 1 ¼” h scrap (For stamping and cutting tag)
Sahara Sand Cardstock:
- 2 ½” x 2 ½” scrap (For die cutting pumpkin)
Rustic Harvest Designer Series Paper (DSP):
- 5 ¼” x 4” (Mossy Meadow print)
- 2 ¾” x 4” (Black & White stripe print)
Let’s Create
- Affix all stamps to Acrylic Blocks.
- Fold the Card Base in half using a Bone Folder to sharpen the crease.
- Attach 5 ¼” x 4” Mossy Meadow DSP to the 5 ⅜” x 4 ⅛” Basic Black cardstock. Attach to the folded Basic White Cardbase.
- Using the Stitched Rectangle Die that measures 4 ⅜” x 3” die cut the 4 ¾” x 3 ½” Basic Black cardstock. Using the 3 ½” x 2 ¼” Stitched Rectangle Die cut the center out of the first die cut rectangle in order to create a frame.
- Using the small “lined/dot” stamp and Black Memento Ink Pad, add lines to the Black and White striped DSP. (This step is optional) Now tape this panel to the back of the frame and attach to the card closer to right side of the card.
- Using the Black Memento Ink Pad stamp the floral image onto 3 ½” x 2 ½” Basic White cardstock. Color using Stampin’ Blends and die cut using the coordinating die from Rustic Pumpkin Die Set.
- Using Black Memento Ink Pad, stamp the pumpkin onto 2 ½” x 2 ½” Sahara Sand cardstock. Die cut using the coordinating Pumpkin die from Rustic Pumpkin Die Set.
- Using Versa Mark ink, stamp the sentiment onto the 2” x 1 ¼” Basic Black cardstock. Sprinkle with white embossing powder and heat set using the heat tool. Trim the tag to 1 ½” x ¾” cutting the top corners at an angle to form a tag.
- Attach the die cut pumpkin to the lower left of the card covering the lower right corner of the frame. Using Stampin’ Dimensionals attach the flowers covering the top of the pumpkin.
- Attach the tag to the pumpkin. Tie a small bow with Linen Thread and attach to the top of the tag using a mini glue dot.
- Place 3 Matte Black Dots randomly on the card.
- Stamp and decorate the inside of your card and the envelope and let someone know how much you miss them.
Shopping List
")


 Designer Series Paper")


$9.50

$18.00


$35.00

$5.00

$7.00
Recommended Stamper’s Toolkit ❤
Product List
$12.00

$7.00

$4.25

$5.75

$5.50

$11.00

$26.00

$7.00

$6.50

$11.00

$20.00

$11.00

$80.75

$128.00

$16.00

$13.00


