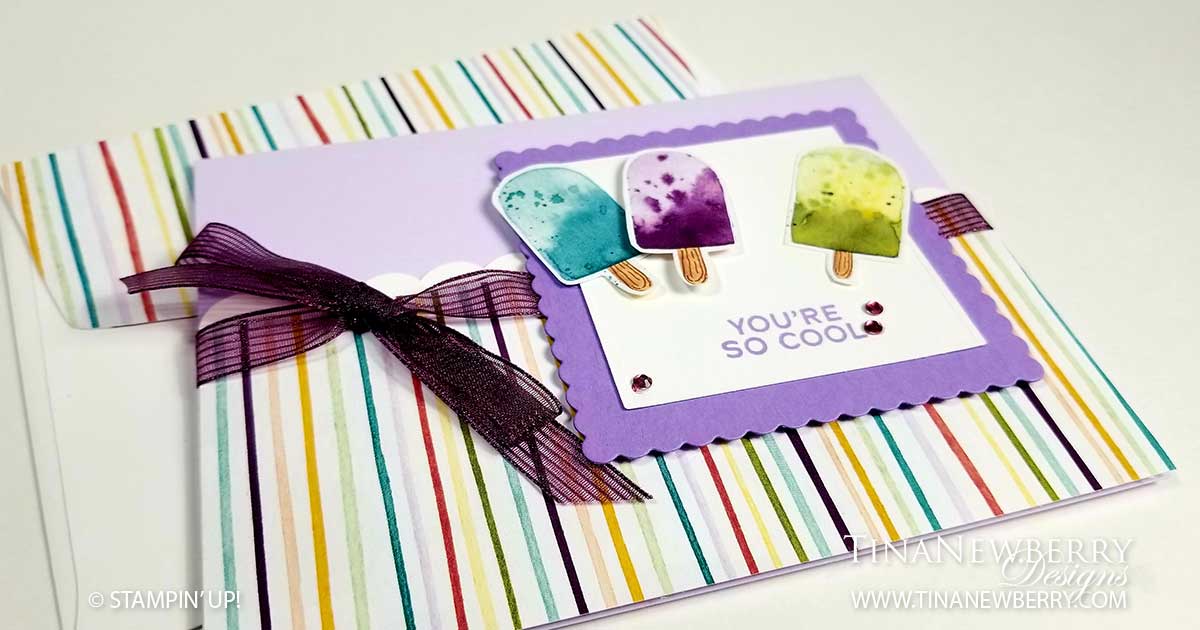
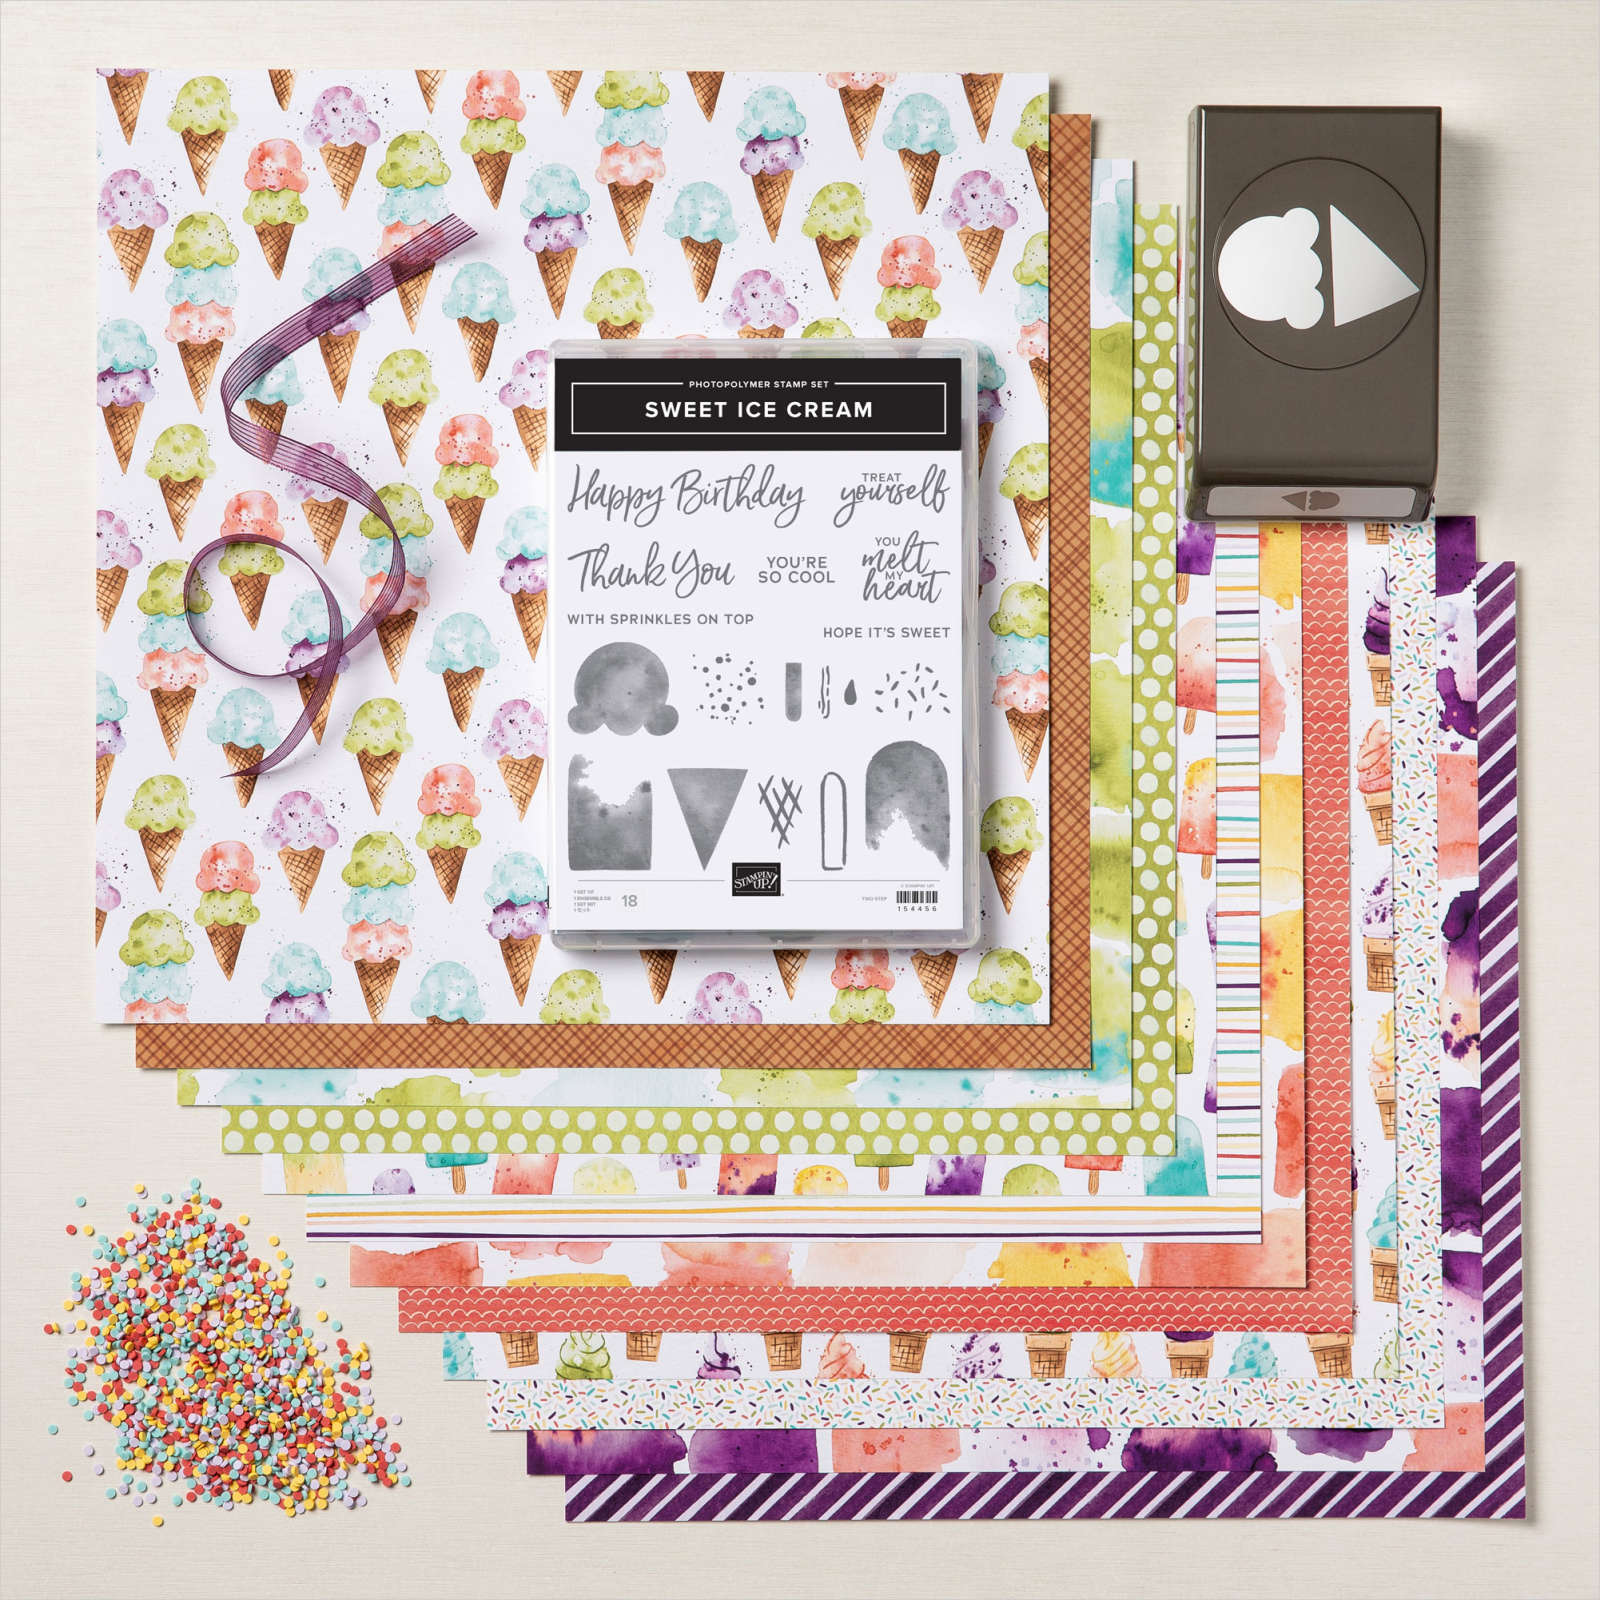
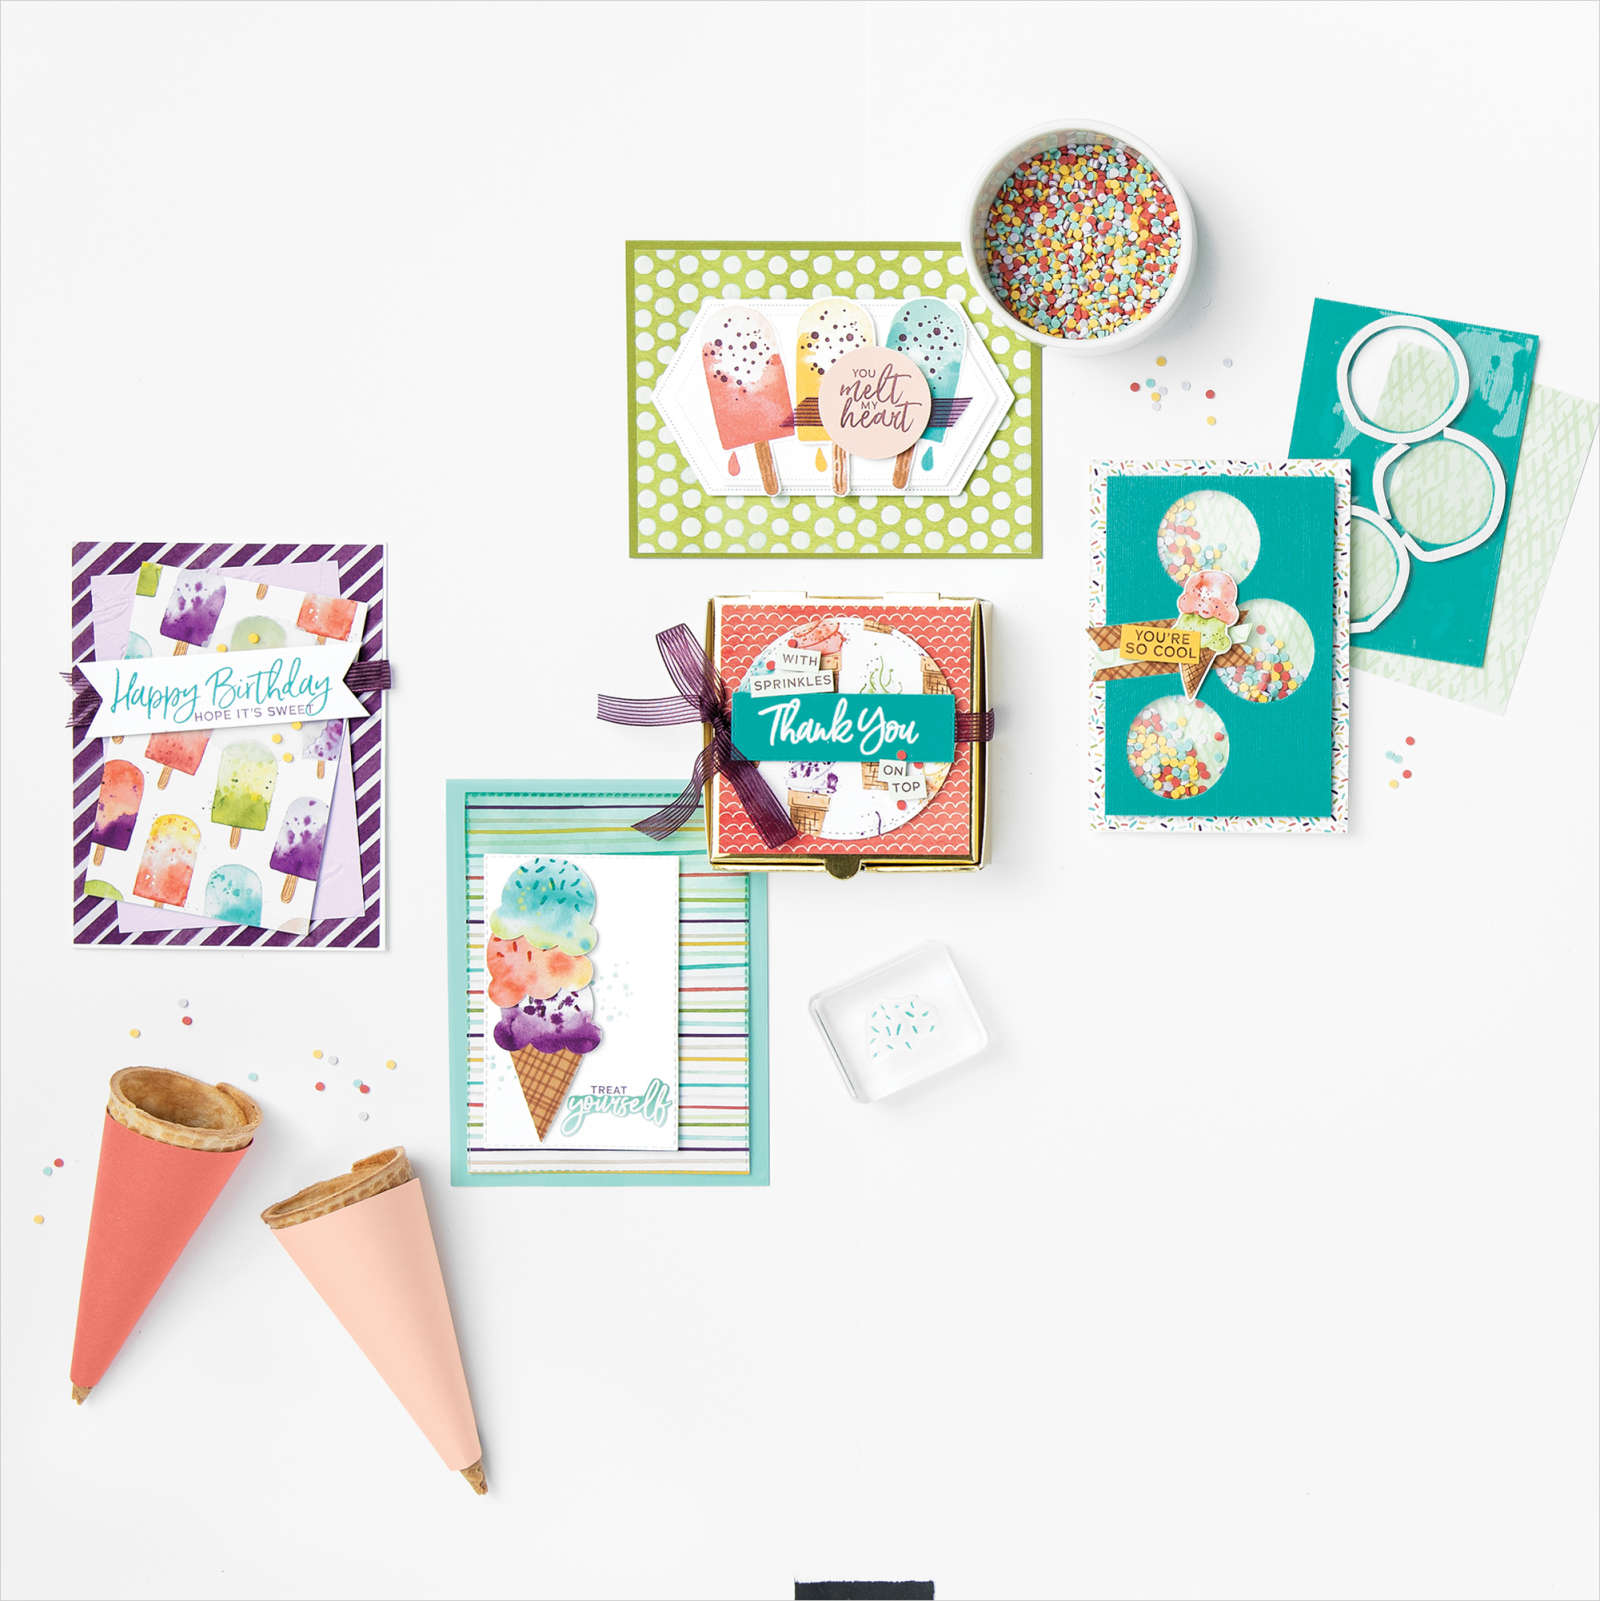
Eek! Who’s ready for summer!? The Ice Cream Corner Suite is A-Dorable. I had so much fun creating with the bright colors and cute treats in this set. I watched a presentation from the designer of this Suite. It was neat to hear her walk through the creative process. I had no idea the artists actually paint the paper first and in her case, she used the Stampin’ Up Ink Refills for her paintings. Then the paintings were digitized and turned into the Designer Series Paper. So fun! This card is inspired by Ronda Wade. Ronda created this card and used the Ice Cream Cone Punch instead of the Popsicles. I thought it was very clever how she used the bottom of the scoop of ice cream on the Punch to create the scalloped edge.
Measurements
Full list of supplies needed, listed below. A die cutting machine is needed for this card.
Card Base: Purple Posy Cardstock 8 1/2 h” x 5 1/2″ w folded to 5 1/2″ h x 4 1/4″ w.
Background (2): Basic White Cardstock and Ice Cream Corner DSP 2 1/2″ h x 5 1/2″ w
Scalloped Edge: Basic White Cardstock scraps punched with the Ice Cream Scoop punch (3-4)
Sentiment Matte: Highland Heather Cardstock 3″ Scalloped Layering Square
Sentiment Layer: Basic White Cardstock 2 3/8″ Layering Square
Let’s Create
- Affix all stamps to Acrylic Blocks.
- Fold the Card Base in half using a Bone Folder to sharpen the crease.
- Attach the two Background pieces together with the Designer Series Paper on top.
- Attach the Scalloped Edge to the Background.
- Wrap the ribbon around and tie a bow.
- Attach the Background with Stampin’ Dimensionals.
- Stamp the Sentiment in Highland Heather Ink on the Sentiment Layer and attach to the Sentiment Matte. Attach with Stampin’ Dimensionals.
- Use scissors to fussy cut three Popsicles from the Designer Series Paper and attach two to the card with adhesive and one with Stampin’ Dimensionals.
- Use the Highland Heather Dark Stampin’ Blend to color three Basic Rhinestones. Allow a few seconds to dry and then attach to the Card.
- Decorate the Inside Layer and attach.
- Decorate the envelope.
- So Cute!! Who will you send it to?
Shopping List


Stamper’s Toolkit
You will also need adhesive, acrylic blocks, scissors and other basic PaperCrafting items from the Stamper’s Toolkit


")


