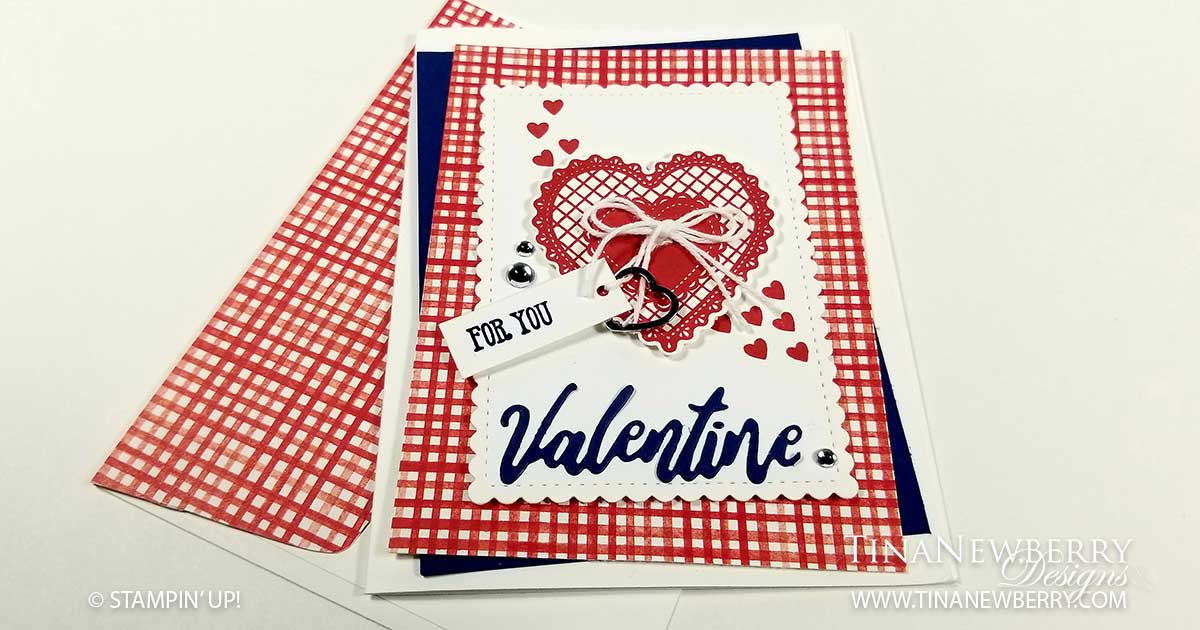
More hearts and bling! It’s easy to get lost in pinks and reds for Valentine’s cards. I was going for not only a patriotic card, but also something a little less girly. Mission accomplished!
Full list of supplies needed, listed below. A die cutting machine is needed for this card.
Card Base: Basic White Thick Cardstock 8 1/2 h” x 5 1/2″ w folded to 5 1/2″ h x 4 1/4″ w.
Background (2): Night of Navy Cardstock and Berry Blessings DSP 5″ h x 3 3/4″ w
Scalloped Rectangle: Basic White trimmed to 4″ h x 3″ with the Stitched So Sweetly Dies
Sentiment Layer: Basic White Cardstock 1/2″ h x 1 1/4″ w
Inside Layer: Basic White Cardstock 5 1/4″h x 4″w
- Affix all stamps to Acrylic Blocks.
- Fold the Card Base in half using a Bone Folder to sharpen the crease.
- Attach the two Background pieces using Stampin’ Seal.
- In Poppy Parade ink, stamp the small Hearts on the Scalloped Rectangle.
- Attach Adhesive Sheets to Night of Navy Cardstock and die cut Valentines from the Word Wishes Dies. Use Paper Snips to cut off the S.
- Attach Valentine to the Scalloped Rectangle and then attach Scalloped Rectangle to the card using Stampin’ Dimensionals.
- Stamp the Lacy Heart in Poppy Parade ink and Punch with the Scalloped Heart Punch. Attach with Stampin’ Dimensionals.
- Stamp For You on the Sentiment Layer with Night of Navy Ink. Use the Label Me Fancy Punch to add a hole.
- String a piece of Baker’s Twine through the Sentiment and add a Heart Charm. Attach the Sentiment to the Heart with a bit of Stampin’ Seal on the corner and attach the Baker’s Twine with a Mini Glue Dot.
- Tie a double string bow from Baker’s Twine and attach over the Glue Dot from the Sentiment twine.
- Sprinkle on some Clear Epoxy Droplets.
- Decorate the Inside Layer and attach.
- Decorate the envelope.
- That’s it! Now put it in the mail to someone special.
Shopping List
Recommended Stamper’s Toolkit ❤
Product List

