Hope It’s Your Best. Day. Ever Encouragement Card

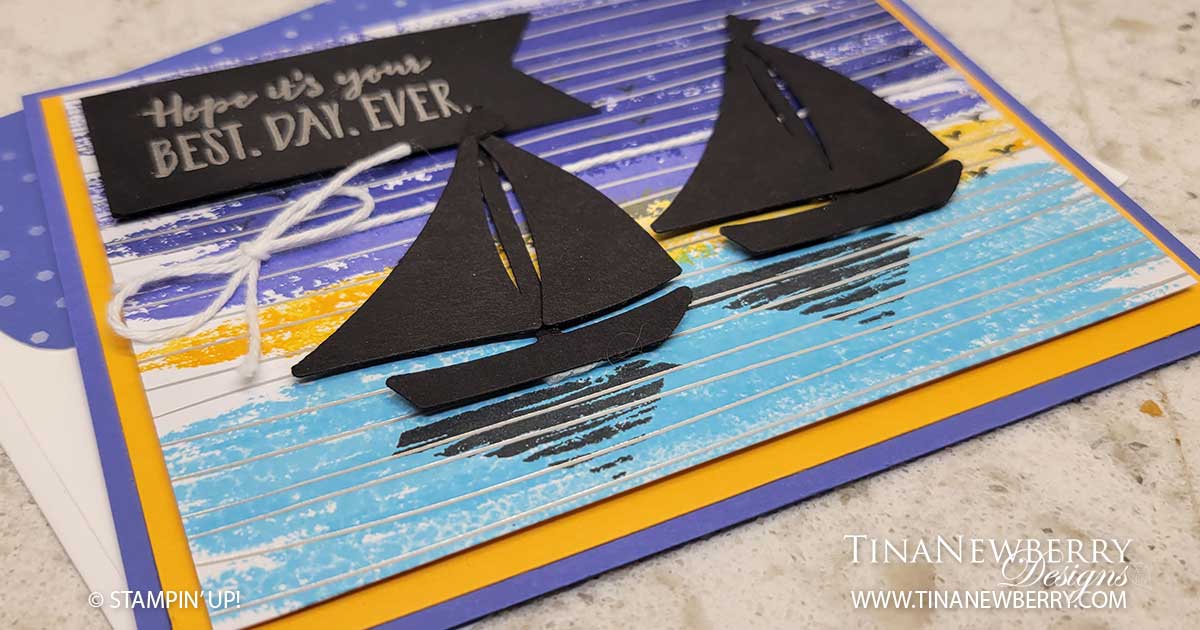
We captured a beautiful sunrise with stamps, ink and free Sale-a-bration paper. That’s right the Silver & Gold Designer Series Paper used in the background for this card, can be colored any colors you want. My cousin Joyce and I used the large water stamp to create the sky and the water for this serene quick & easy encouragement card.

Measurements

Full list of supplies needed, listed below. A die cutting machine is needed for this card.
Orchid Oasis Cardstock: 8 1/2″ h x 5 1/2″ w scored and folded on the long-side at 4 1/4″

Mango Melody Cardstock: 4″ h x 5 1/4″ w

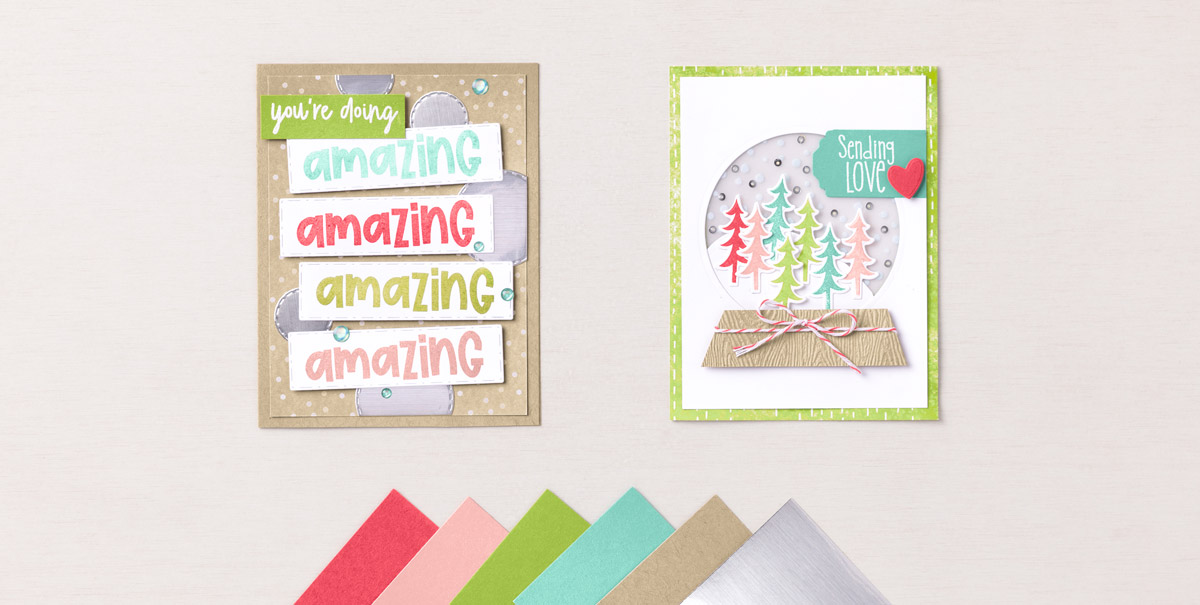
Silver & Gold Designer Series Paper (DSP): 3 3/4″ h x 5″ w

Basic Black:

  • scrap for sailboats
  • 1 1/4″ h x 2 3/4″ w for tag

Basic White Cardstock (for inside): 4″ h x 5 1/4″ w

Let’s Create

  1. Affix all stamps to Acrylic Blocks.
  2. Fold the Card Base in half using a Bone Folder to sharpen the crease.
  3. Attach the Mango Melody panel with Stampin’ Seal.
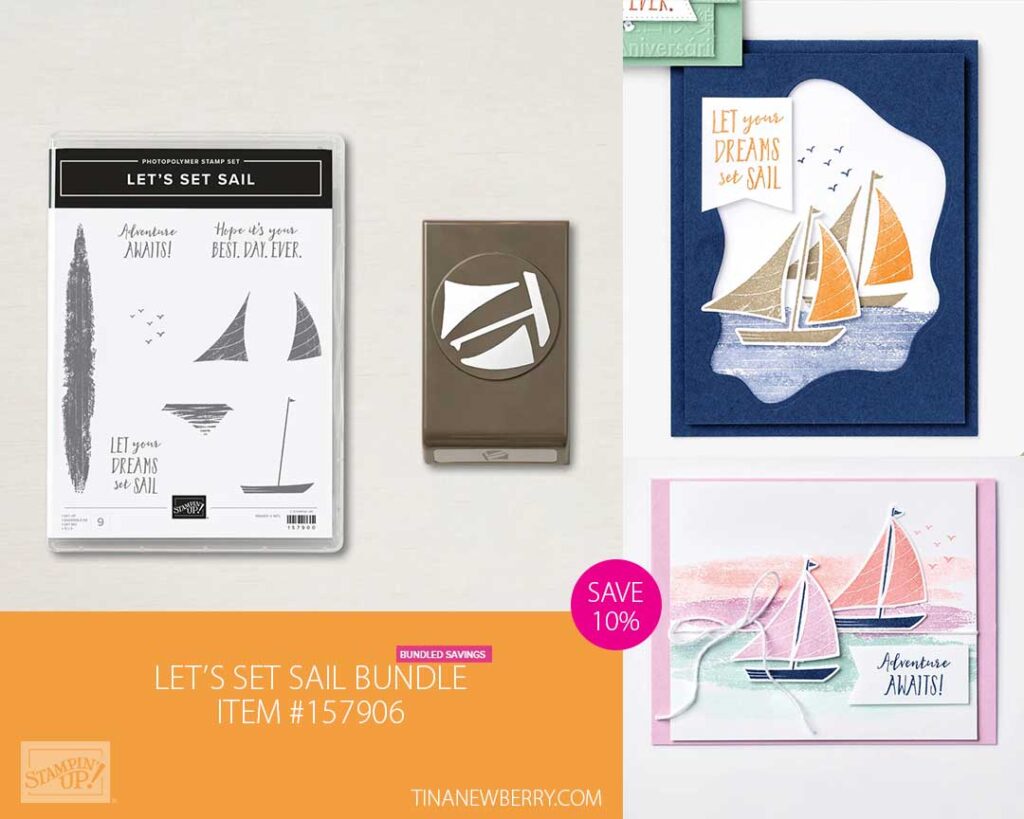
  4. With the large water stamp, use Starry Sky, Orchid Oasis, Mango Melody and Tahitian Tide to stamp the sunset and water on the Silver & Gold DSP.
  5. Punch out two boats from the Sailboat Builder Punch in Basic Black Cardstock. Assemble the sailboats using Mini Glue Dots where the sails attach to the masts.
  6. Arrange the Sailboats on the water of your stamped sunset and water panel, leaving room for your sentiment. Then stamp the reflection stamp in Tuxedo Black Memento Ink for each boat. Attach the Sailboats with Stampin’ Dimensionals.
  7. Run white Baker’s Twine around the stamped sunset and water panel and tie a bow.
  8. Flag the end of the Basic Black Tag, by using Paper Snips to cut a slit into the right edge, about halfway up the edge and in about 1/2″ to 3/4″. Then cut from each corner into the end of the slit, removing two small triangles of cardstock.
  9. Stamp sentiment in Versamark Ink on Basic Black tag, sprinkle with Silver Embossing Powder, tap off the excess and use a Heat Tool to set. Attach with Stampin’ Dimensionals.
  10. Use Starry Sky Ink to stamp some birds.
  11. Stamp and decorate the inside and attach with Stampin’ Seal.
  12. Decorate your envelope.
  13. So pretty! Who needs some encouragement? Put it in the mail.

Shopping List

Recommended Stamper’s Toolkit

Product List
Order online from the convenience of your own home or send me your order and I’ll take care of you. ❤ Either way, please use the host code ANTD9UHS. Order online AND, if your order is $50 or more using host code ANTD9UHS between now and the end of the month you’ll receive a free pack of embellishment as a THANK YOU gift from me. ❤ If your order is over $150, skip the host code, earn Stampin’ Rewards for free stuff yourself and I’ll still send you a free pack of embellishment as a THANK YOU gift from me. ❤

CASEing Color

Color inspiration can be found everywhere! We always give creatives the green light to CASE (Copy and Share Everything) our catalog projects, and color combos are always a favorite.

For this project, our Concept Artist borrowed a vibrant palette from a Christmas card she admired in the July–December 2022 Mini Catalog. The winning combination? Blushing Bride, Coastal Cabana, Crumb Cake, Granny Apple Green, Sweet Sorbet, and silver.

Using the Amazing Phrasing Stamp Set from our Sale-A-Bration brochure, she stamped the words, then die cut them using the Picture This Dies. The result was an amazing card bursting with fun energy and party-bright colors!

Why not flip through our festive new mini catalog and find color combos you’d love to CASE? (Tip: A CASEing notebook might come in handy!) In fact, you may want to spend a few minutes sharing CASEd color combos with your friends and family—or maybe even have a CASEing party! You never know what new direction your creativity may take!

Shopping List

You’re Always On Point!

Surprise the dancer in your life with this adorable card using the Hippest Hippos Stamp Set – yours free now during Sale-a-bration.

Hippest Hippos
Hippest Hippos Stamp Set and Hippos Dies – Free during Sale-a-bration thru 8/31/22

Measurements

Full list of supplies needed, listed below. A die cutting machine is needed for this card.

Polished Pink Cardstock:

  • 8 ½” w x 5 ½” h. Score on the long side at 2 ⅛” and 4 ¼” for Card Base
  • 2 ¾” w x 3” h

Celebrate Everything Designer Series Paper (DSP):

  • 2” w x 5 ¼” h
  • 2 ½” w x 2 ¾” h

Basic White Cardstock:

  • 4” w x 5 ¼” h
  • 2 ¼” w x 2 ½” h

Basic White Thick Cardstock: scrap for die cut Hippo

Let’s Create

  1. Affix all stamps to Acrylic Blocks.
  2. Score Polished Pink 8 ½” x 5 ½” at 2 ⅛” and 4 ¼”. Fold into a z shape, and burnish using a Bone Folder to sharpen the crease..
  3. Use Stampin’ Seal to attach 2” x 5 ¼” DSP to outside front left panel.
  4. Use Tuxedo Black ink to stamp sentiment on the 4” x 5 ¼” Basic White and attach to inside of card with Stampin’ Seal.
  5. Stamp Hippo in Tuxedo Black Ink on Basic White Thick scrap. Then Color with Blends:  Gray Granite, Flirty Flamingo, Petal Pink, Polished Pink, and Color LIfter.
  6. Die-cut colored Hippo.
  7. Layer and use Stampin’ Seal to attach
    1. 2 ½” w x 2 ¾” h DSP to
    2. 2 ½” w x 2 ¾” h Basic White to
    3. 2 ¾” w x 3” h Polished Pink
  8. Then use Stampin’ Dimensionals to adhere Hippo layered panel.
  9. Add Dimensionals to the left back of the the Hippo panel and attach to the left of the card front.
  10. Sprinkle on the gems.
  11. Decorate your envelope.
  12. So cute! Now send it to someone special.
Product List

Recommended Stamper’s Toolkit

Product List
Order online from the convenience of your own home or send me your order and I’ll take care of you. ❤ Either way, please use the host code ANTD9UHS. Order online AND, if your order is $50 or more using host code ANTD9UHS between now and the end of the month you’ll receive a free pack of embellishment as a THANK YOU gift from me. ❤ If your order is over $150, skip the host code, earn Stampin’ Rewards for free stuff yourself and I’ll still send you a free pack of embellishment as a THANK YOU gift from me. ❤

Love You a Ton

Use your FREE Sale-a-bration Hippest Hippos and Hippo Dies to create adorable cards like this one. Love you a ton is a perfect sentiment for this cutie.

Shop the FREE Sale-a-bration Items

Measurements

Full list of supplies needed, listed below. A die cutting machine is needed for this card.

Granny Apple Green Cardstock:

  • 8 ½” w x 5 ½” h. Score on the long side at 2 ⅛” and 4 ¼” for Card Base
  • 2 ½” x 3”

Celebrate Everything Designer Series Paper(DSP):

  • 2” w x 5 ¼” h
  • 2 ¼” w x 2 ¾” h

Basic White Cardstock: 4” x 5 ¼”

Basic White Thick Cardstock: 2” w x 2 ½” h


Let’s Create

  1. Affix all stamps to Acrylic Blocks.
  2. Fold the Card Base into a z-shape using a Bone Folder to sharpen the crease.
  3. Use Stampin’ Seal to adhere:
    1. the 2” x 5 ¼” Designer Series Paper to outside front left panel.
    2. the 4” x 5 ¼” Basic White Cardstock to inside of card. Stamp sentiment in Tuxedo Black Ink.
  4. Use Stampin’ Seal to adhere 2 ¼” x 2 ¾ Celebrate Everything DSP to the 2 ½” x 3” Granny Apple Green Cardstock
  5. Use Tuxedo Black Ink to stamp hippo on Basic White Thick 2” x 2 ½” Cardstock
  6. Color Hippo with Blends:  Gray Granite, Flirty Flamingo, Poppy Parade, Granny Apple Green, Petal Pink, Crumb Cake and Color Lifter.
  7. Use Stampin’ Seal to adhere Hippo to 2 ½” x 3” panel. Add Stampin’ Dimensionals to the left of this panel and attach to the card front.
  8. Sprinkle on the gems.
  9. Decorate your envelope.
  10. A-dorbs!! Now send it to someone special.

ShoppingList

Recommended Stamper’s Toolkit

Product List
Order online from the convenience of your own home or send me your order and I’ll take care of you. ❤ Either way, please use the host code ANTD9UHS. Order online AND, if your order is $50 or more using host code ANTD9UHS between now and the end of the month you’ll receive a free pack of embellishment as a THANK YOU gift from me. ❤ If your order is over $150, skip the host code, earn Stampin’ Rewards for free stuff yourself and I’ll still send you a free pack of embellishment as a THANK YOU gift from me. ❤