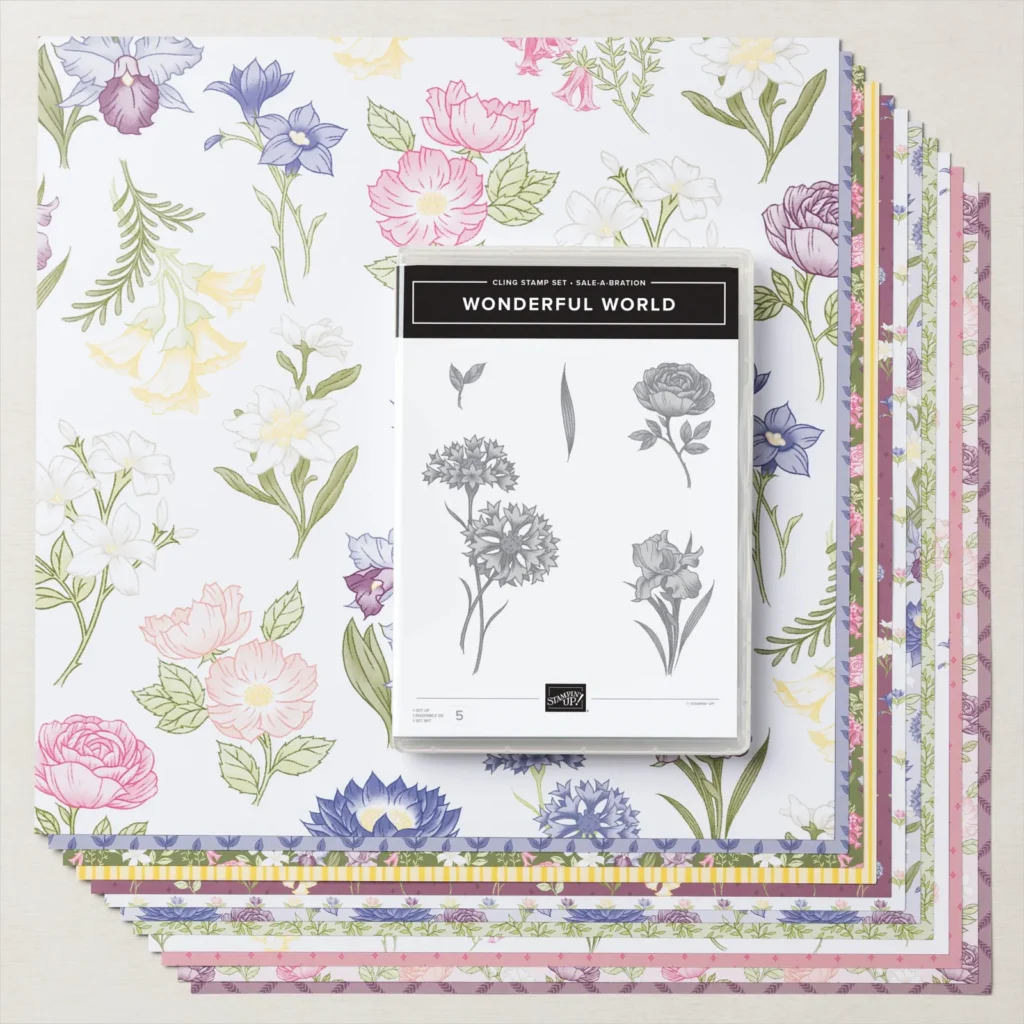
Celebrate the natural beauty found around the world with this stamp and paper bundle featuring prominent flowers from across the globe. The stamps and paper are designed to coordinate perfectly for handmade cards as beautiful as Mother Nature herself. The Wonderful World Bundle includes the Wonderful World Stamp Set and the Wonderful World 12″ x 12″ (30.5 x 30.5 cm) Designer Series Paper and is free with your $100 product order now thru August 31st.
Full list of supplies needed, listed below. A die cutting machine is needed for this card.
Basic White Thick Cardstock: 4 ¼” h x 11” w folded to 4 1/4″ h x 5 1/2″ w
Mossy Meadow Cardstock:
4″ h x 5 1/4″ w
scraps
Wonderful World Designer Series Paper:
Print 1: 1 ⅛” h x 5” w
Print 2: 1 ½”h x 5” w
Daffodil Delight Cardstock: 1”h x 5”w
Casic White Carstock: scraps
Let’s Create
Affix all stamps to Acrylic Blocks.
Fold the Card Base in half using a Bone Folder to sharpen the crease.
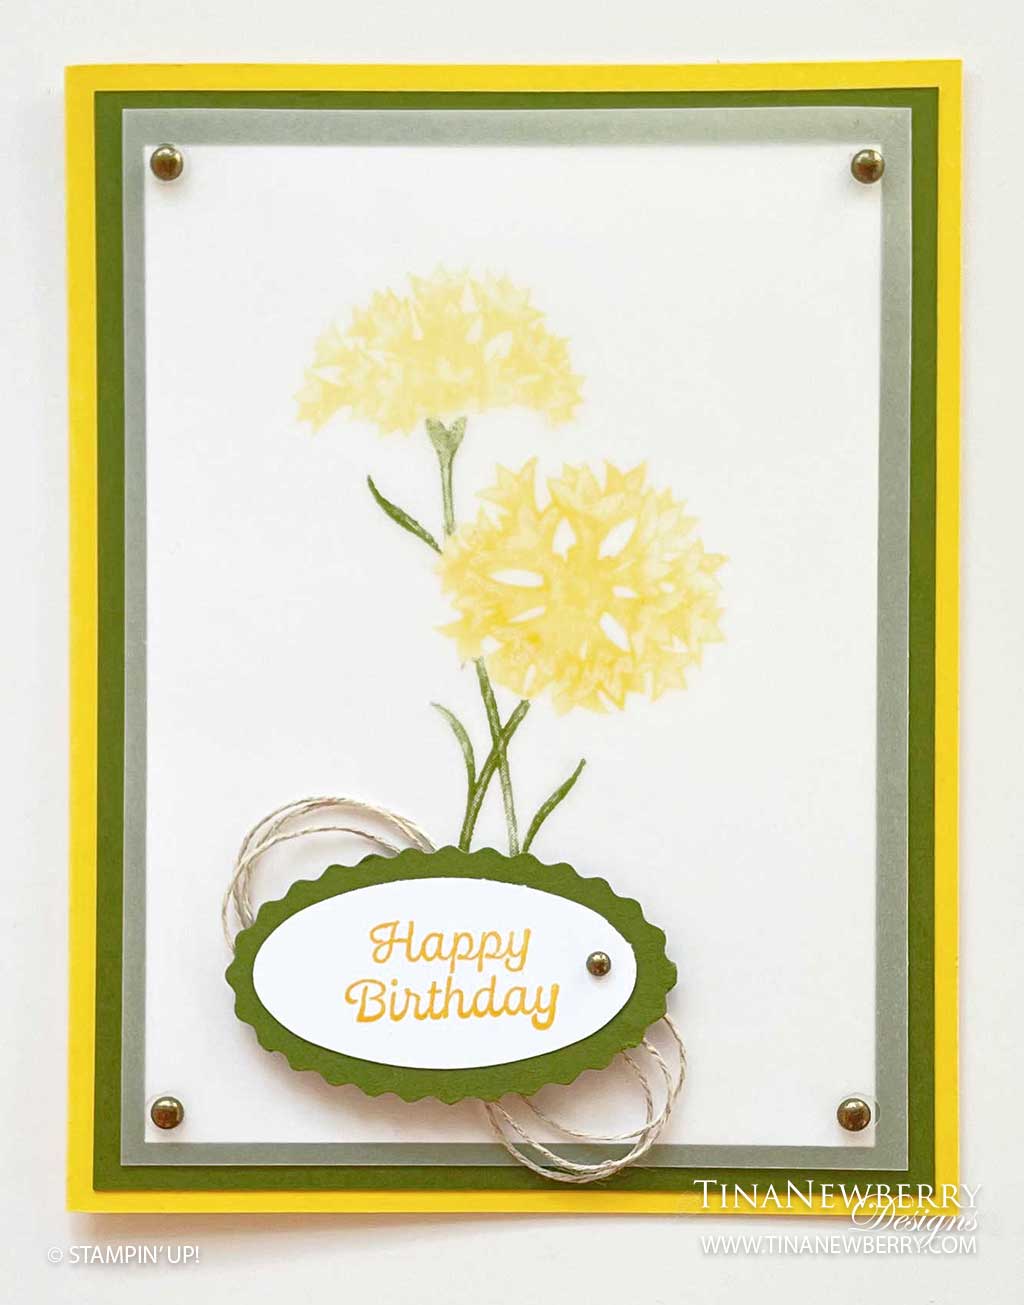
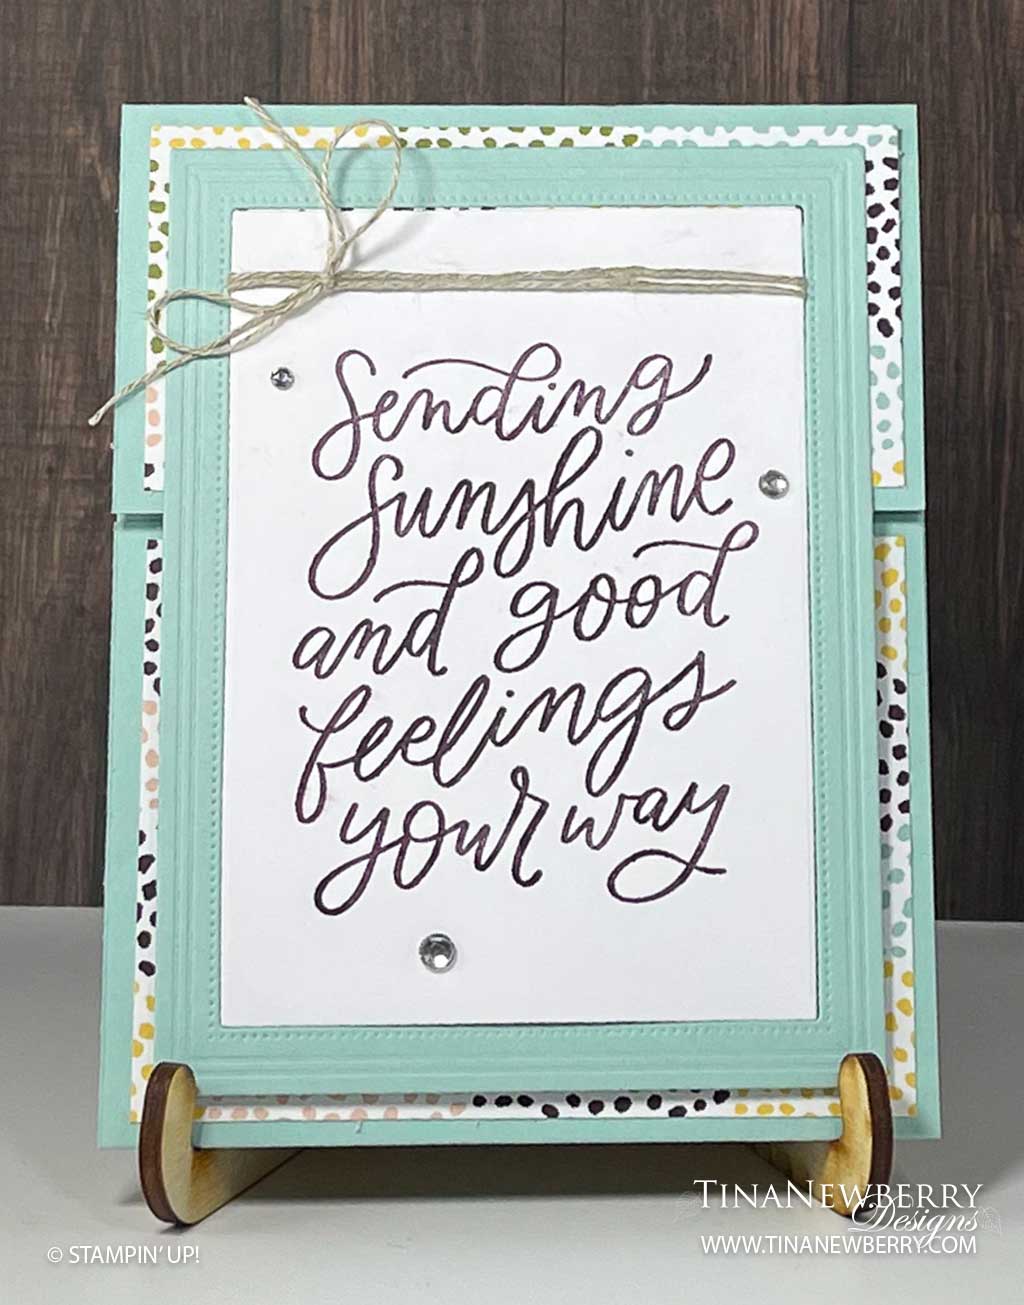
Stamp the sentiment with Daffodil Delight Stampin’ Pad onto a scrap of Basic White cardstock.
Punch around the sentiment with the Label Me Fancy Punch.
Punch a plain scrap of Mossy Meadow with the Label Me Fancy Punch.
Cut the Mossy Meadow punched label in half vertically so you can adhere it to the backside of the sentiment label and frame both ends.
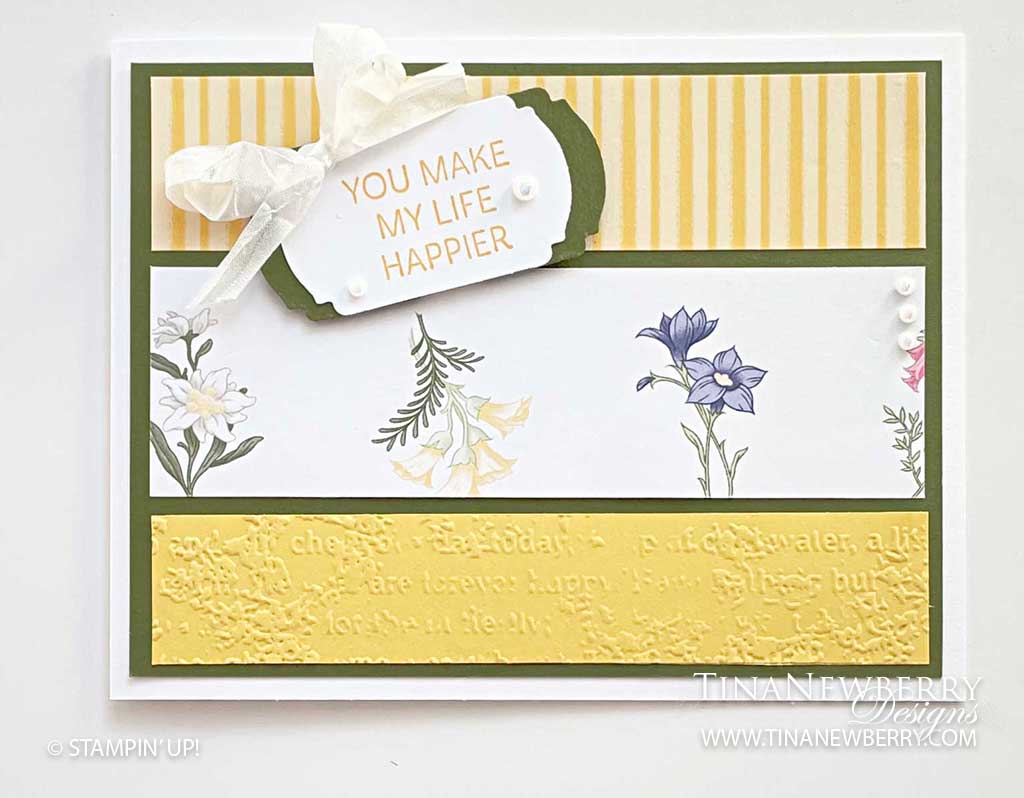
Emboss the 1”h x 5”w Daffodil Delight cardstock layer with the Scripty 3D Embossing Folder in your Stampin’ Cut and Emboss Machine.
Use Stampin’ Seal to adhere the 2 layers of Wonderful World DSP and embossed Daffodil Delight cardstock onto the 4″ h x 5 1/4″ w Mossy Meadow cardstock layer, space them so that there is margin between the layers.
Adhere the Mossy Meadow layer onto the front of the Basic White card base with Stampin’ Seal.
Use Dimensionals to adhere the sentiment labels onto the card front.
Cut 2 strands of the Whisper White Crinkled Seam Binding Ribbon and tie a bow with both strands.
Adhere the double bow onto the sentiment labels, I like to use the Mini Glue Dots.
Embellish the sentiment label and card front with Iridescent Pearl Basic Jewels.
Stamp the Iris image with Daffodil Delight Stampin’ Pad onto the interior of the card.
Repeat and stamp the Iris image with Daffodil Delight Stampin’ Pad onto the front of the envelope.
Order online from the convenience of your own home or send me your order and I’ll take care of you. ❤ Either way, please use the host code ANTD9UHS. Order online AND, if your order is $50 or more using host code ANTD9UHS between now and the end of the month you’ll receive a free pack of embellishment as a THANK YOU gift from me. ❤ If your order is over $150, skip the host code, earn Stampin’ Rewards for free stuff yourself and I’ll still send you a free pack of embellishment as a THANK YOU gift from me. ❤
Choose the Wonderful World Bundle for free with your $100 order during Sale-A-Bration. For every $50 and $100 you spend, you’ll earn an exclusive Sale-A-Bration item for free! Depending on the amount you spend, you’ll be able to mix and match the Sale-A-Bration items you earn. We have a stunning variety of stamp sets and Designer Series Paper for you to choose from—take a look! Now through 31 August.
Full list of supplies needed, listed below. A die cutting machine is needed for this card.
Basic White Thick Cardstock: 4 ¼” h x 11” w folded to 4 1/4″ h x 5 1/2″ w for Card Base
Pear Pizzazz Cardstock: 5 1/4″ h x 4″ w
Wonderful World Designer Series Paper: 3 ¾” h x 5” w
Basic White Cardstock: scrap for stamped flower
Let’s Create
Affix all stamps to Acrylic Blocks.
Fold the Card Base in half using a Bone Folder to sharpen the crease.
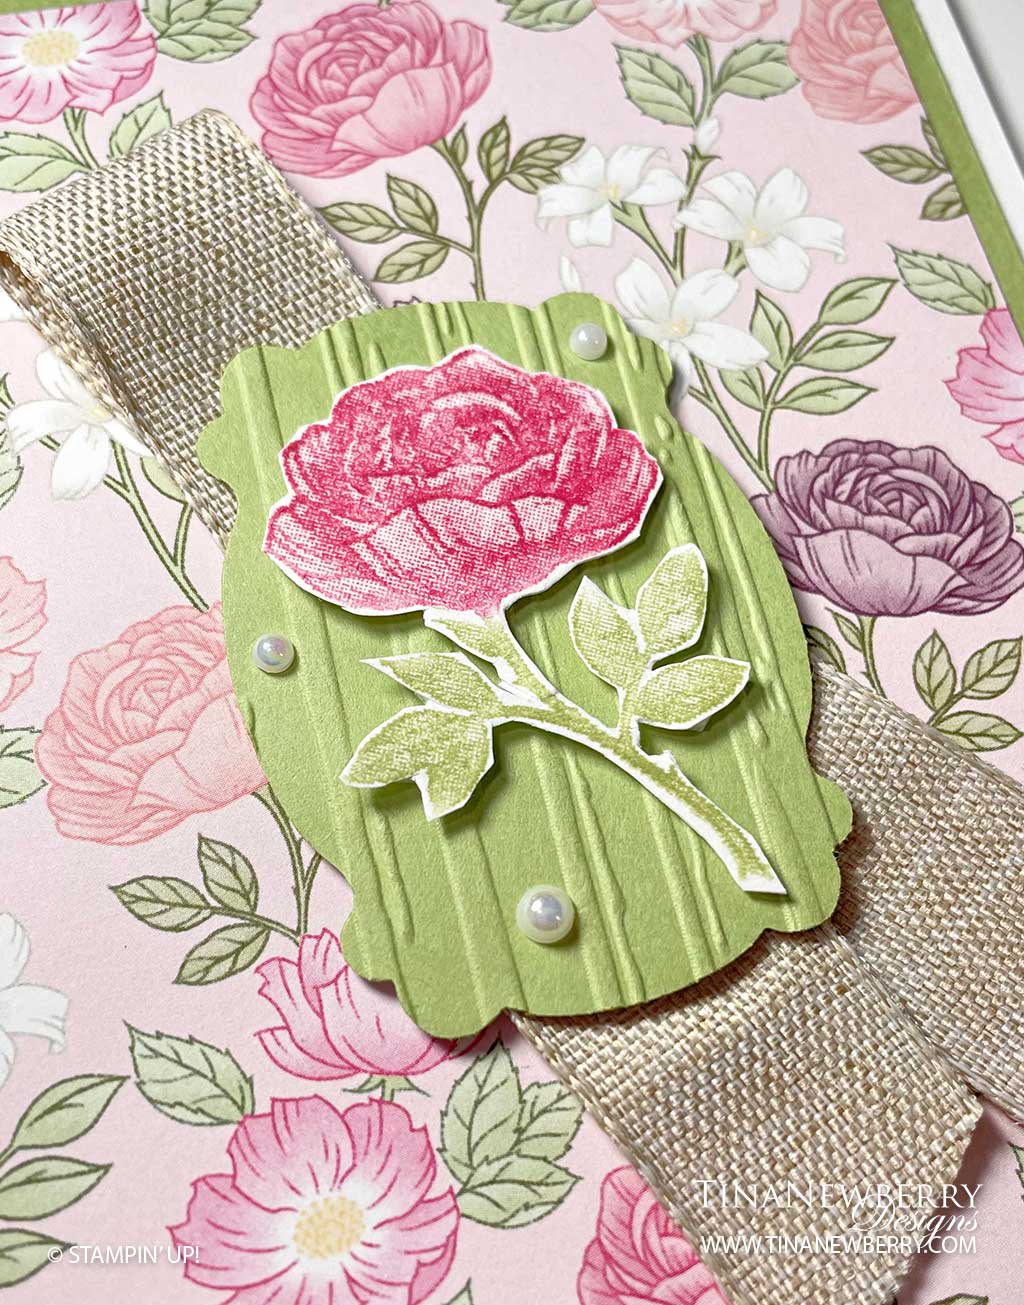
Use the Pear Pizzazz 5 1/4″ w x 4″ w layer and punch a label from the middle with the Lasting Label Punch.
Place the Pear Pizzazz label into the Strips 3D Embossing folder and run it through the Stampin’ Cut and Emboss Machine.
Place the Rose stamp image onto a clear block. Color the rose with a Melon Mambo Stampin’ Write Marker and the stem and petals with a Pear Pizzazz Stampin’ Write Marker. Breath heavily “huff” onto the colored stamp image to hydrate with your breath and stamp onto a scrap of Basic White cardstock.
Use Paper Snips to cut out around the rose image.
Use Mini Dimensionals to adhere the rose to the Stripes Embossed Pear Pizzazz label.
Stamp the sentiment with Pear Pizzazz Stampin’ Pad onto the interior of the card.
Adhere the Pear Pizzazz cardstock layer onto the front of the Basic White Thick card base.
Adhere the Wonderful World Designer Series Paper layer onto the Pear Pizzazz card front, covering the hole you punched.
Fold a length of Natural Finish Ribbon and adhere it with Mini Glue Dots to the backside of the embossed label. Mini Glue Dots will also be helpful between the ribbon layers. Trim the ribbon tails as you prefer.
Use Dimensionals to adhere the label onto the card front.
Sprinkle on some Irridescent Pearls.
To decorate your envelope, adhere a 4 ⅝” h x 1” w strip of the same Wonderful World Designer Series Paper onto the envelope front.
Order online from the convenience of your own home or send me your order and I’ll take care of you. ❤ Either way, please use the host code ANTD9UHS. Order online AND, if your order is $50 or more using host code ANTD9UHS between now and the end of the month you’ll receive a free pack of embellishment as a THANK YOU gift from me. ❤ If your order is over $150, skip the host code, earn Stampin’ Rewards for free stuff yourself and I’ll still send you a free pack of embellishment as a THANK YOU gift from me. ❤
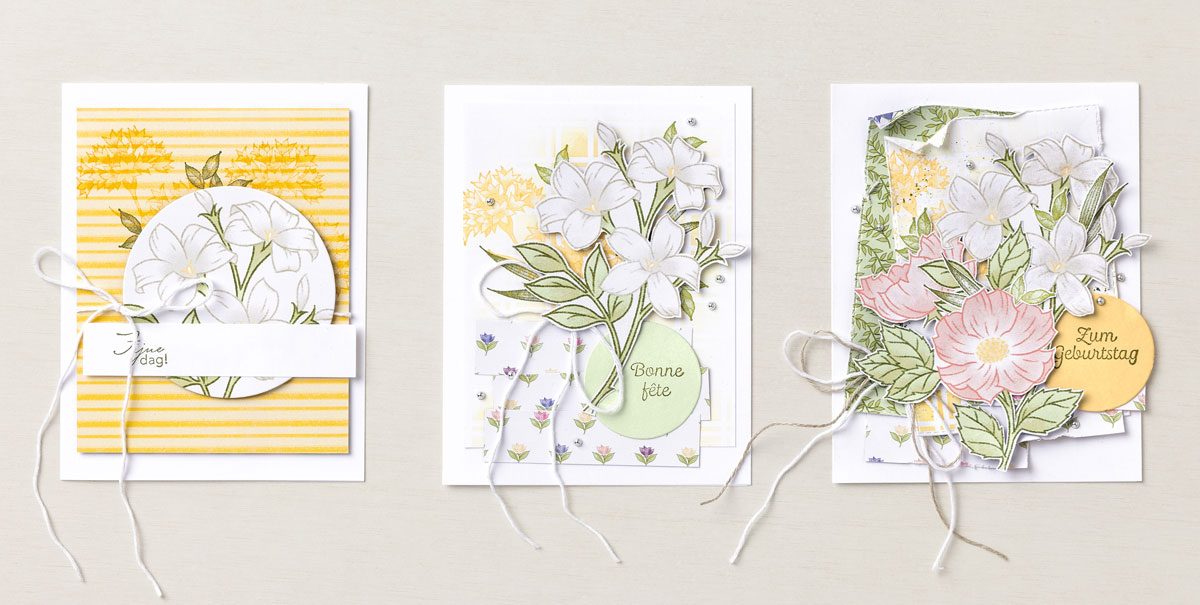
This week we made some stunning cards using the Wonderful World Stamp Set and Designer Series Paper. If you like what you see, join Sale-A-Bration now until the end of August for access to these unique products!
Casual For our Fijne dag card we used the Layering Circles Dies to cut out a bundle of lovely white lilies from the Designer Series Paper. Then we stamped some floral images on the yellow Designer Series Paper panel and tied a piece of white Baker’s Twine around it. We then positioned the die-cut piece as the focal point of the card, taking care that it wouldn’t cover our stamped images.
Avid For our Bonne fête card we used the Artistic Mix Decorative Masks and a Blending Brush to add a fun design to the panel. We applied varying degrees of pressure with the Blending Brush, depending on how light or dark we wanted the color. We fussy cut the lilies from the Designer Series Paper and added a few Festive Pearls to finish the card.
Artfully Avid For our Zum Geburtstag card, we die cut the Designer Series Paper with the Stitched Rectangles Dies to create some fun background pieces. We then used Paper Snips and a Bone Folder to distress the edges of the paper, and we fussy cut the main florals and a few leaves from the Designer Series Paper. We added Wink of Stella to the flower petals for a final bit of shine.
")
")


 Crinkled Seam Binding Ribbon")


 Ribbon")

