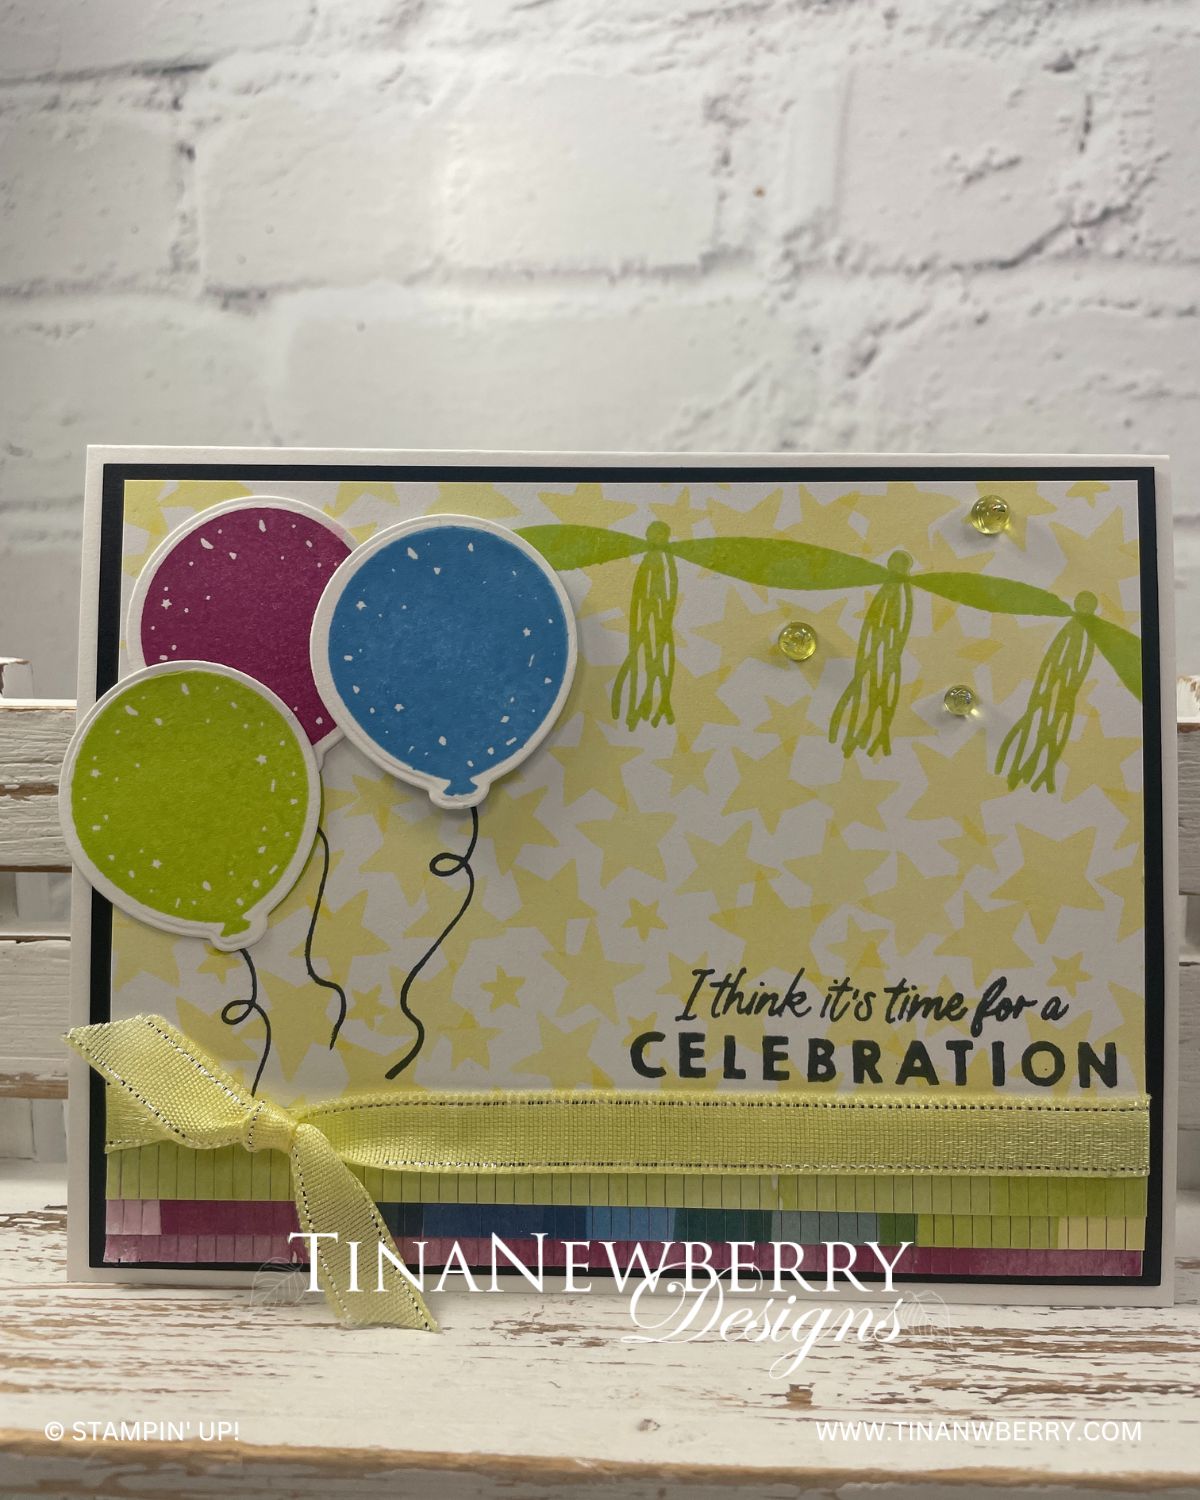
A few layers of striped patterned paper and cardstock with a deckled rectangle die cut are all you need for to set up the canvas for this fun birthday card featuring the Beautiful Balloons bundle. What can you make from your stash using this layout?
The stamps and dies of the Beautiful Balloons Bundle will make your paper crafting projects a true celebration! Play with layers of stamped and die-cut images or add peek-through elements to your cards for fun, festive projects to celebrate the people around you!
Measurements
Full list of supplies needed, listed below. A die cutting machine is needed for this card.
Bubble Bath
11”x 4 ¼” ” scored and folded on the long-side at 5 ½”
Basic Black
4 ⅞” x 3 ½”
4 ¼” x 3”
Basic White
4 ¼” x 2”
2 ¾” x ½”
Bright & Beautiful Designer Series Paper (Pink & White Stripe)
5” x 3 ¾”
Let’s Create
Affix all stamps to Acrylic Blocks.
Fold the Card Base in half using a Bone Folder to sharpen the crease.
Using the second to the largest deckled rectangle die, die cut the pink striped designer series paper. Adhere the die cut designer series paper to the 4 ⅞” x 3 ½” Basic Black panel.
Using the Fourth largest deckled rectangle die, die cut the 4 ¼” x 3” Basic Black panel, emboss this rectangle with the cross hatching pattern embossing folder from the Embossing Basics Folder Trio. Adhere this to the center of the pink striped designer series paper panel. Adhere these layers to the Bubble Bath card base.
Using the middle sized balloon from the Beautiful Balloons stamp Set, stamp one balloon in each of the following colors – Bubble Bath, Lemon Lime Twist and Coastal Cabana. Die cut these balloons using the coordinating die.
Cut a 3” – 4” length of White Twine for each of the balloons. Using a glue dot adhere one end of the twine to the back of the balloon.
Using Stampin’ Dimensionals, adhere to balloons to the card over towards the top of the Basic Black embossed panel, over lapping just a bit. Bring the white twine together in the middle and attach to the card with a glue dot. Tie a small bow using a piece of white twine and adhere to the card holding the “balloon strings” together with a glue dot.
Stamp the “Happy Birthday” sentiment using Black Memento ink onto the small white strip of cardstock. Using your scissors, trim each end at an angle. Attach this to the lower right side of the card using Stampin’ Dimensionals.
Randomly place 3 Iridescent Rhinestone Jewels to the card.
Decorate the inside and the envelope and your card is ready to send off to someone to wish them a Happy Birthday!
Order online from the convenience of your own home or send me your order and I’ll take care of you. ❤ Either way, please use the host code KBSZKQ3A. Order online AND, if your order is $50 or more using host code KBSZKQ3A between now and the end of the month you’ll receive a free pack of embellishment as a THANK YOU gift from me. ❤ If your order is over $150, skip the host code, earn Stampin’ Rewards for free stuff yourself and I’ll still send you a free pack of embellishment as a THANK YOU gift from me. ❤
Balloons are so festive and fun! I enjoy them on paper so much more than in person. LOL! Change up the patterned paper and stamp die-cut balloons to match for your own custom card.
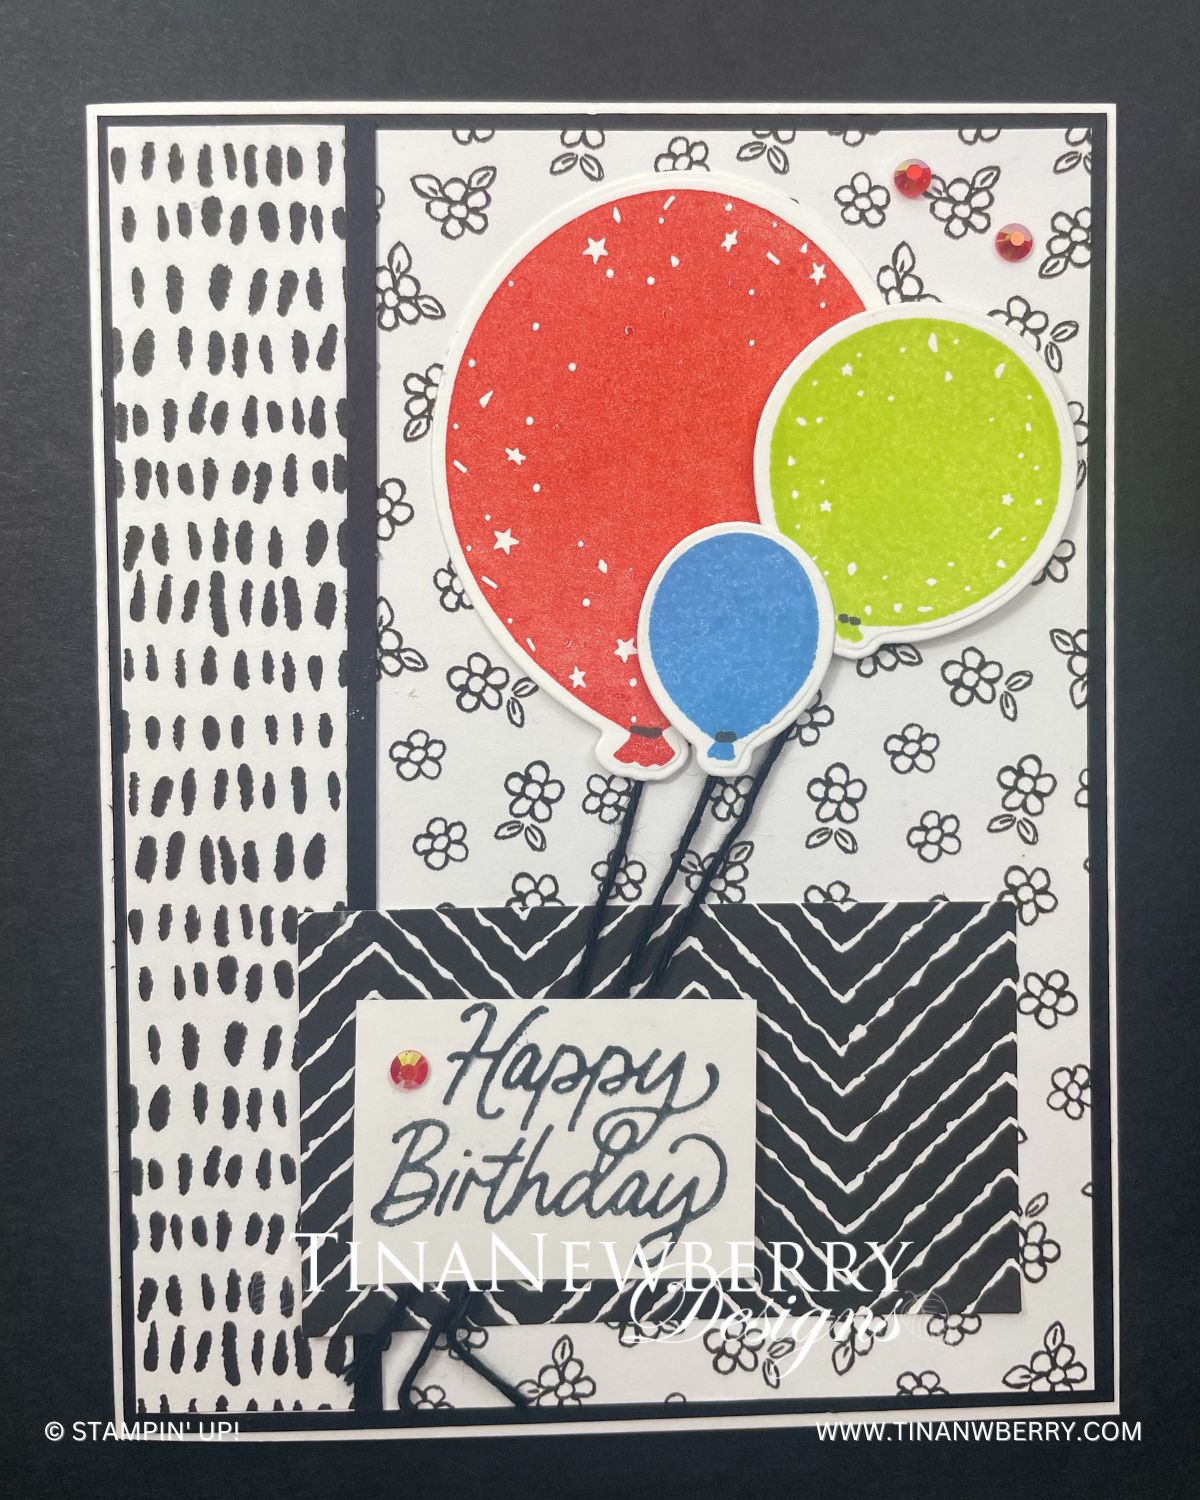
The stamps and dies of the Beautiful Balloons Bundle will make your paper crafting projects a true celebration! Play with layers of stamped and die-cut images or add peek-through elements to your cards for fun, festive projects to celebrate the people around you!
Measurements
Full list of supplies needed, listed below. A die cutting machine is needed for this card.
Basic White
5 ½” x 8 ½” (scored and folded at 4 ¼”)
1 ¾” x 1 ⅛”
5” x 2” (for stamping and die cutting balloons)
Basic Black
5 ⅜” x 4 ⅛”
5 ¼” x ⅛”
Zoo Crew Designer Series Paper
5 ¼” x 3” (black & white flowers)
5 ¼” x 1” (white with black lines)
3” x 1 ¾” (black with white zig zag)
Let’s Create
Affix all stamps to Acrylic Blocks.
Fold the card base along the score lines with a Bone Folder to sharpen the crease.
Using Poppy Parade Ink Pad, stamp the largest balloon onto the 5” x 2” Basic White cardstock. Using the Parakeet Party Ink Pad, stamp the middle sized balloon onto the same piece of Basic White cardstock. Using the Azure Afternoon Ink Pad, stamp the smallest balloon onto the Basic White cardstock. Die cut each of these balloons using their coordinating dies from the Beautiful Balloon Die set.
Using Black Memento ink, stamp the Happy Birthday sentiment onto the 1 ¾” x 1 ⅛” Basic White cardstock.
Adhere the Designer Series Papers to the 5 ⅜” x 4 ⅛” Basic Black panel. The flowers print goes along the right edge and the 1” narrow piece goes along the left edge. Adhere the skinny Basic Black strip to cover the seam of these papers. Adhere the 3” x 1 ¾” piece of Designer Series Paper towards the lower part of the card. Adhere these panels to the Basic White card front.
Cut 3 pieces of Black Twine approximately 4” each. Using a mini glue dot on the back lower part of each balloon, attach a piece of twine to each balloon. Bring these together and secure with a glue dot towards to center left of the small Designer Series Paper.
Using Stampin’ Dimensionals, adhere the sentiment, covering the glue dot that holds the pieces of twine together.
Place three Iridescent Pastel Gems randomly onto your card.
Be sure to decorate the inside of your card and your envelope.
Send this festive card off to wish someone a Happy Birthday!
Order online from the convenience of your own home or send me your order and I’ll take care of you. ❤ Either way, please use the host code KBSZKQ3A. Order online AND, if your order is $50 or more using host code KBSZKQ3A between now and the end of the month you’ll receive a free pack of embellishment as a THANK YOU gift from me. ❤ If your order is over $150, skip the host code, earn Stampin’ Rewards for free stuff yourself and I’ll still send you a free pack of embellishment as a THANK YOU gift from me. ❤
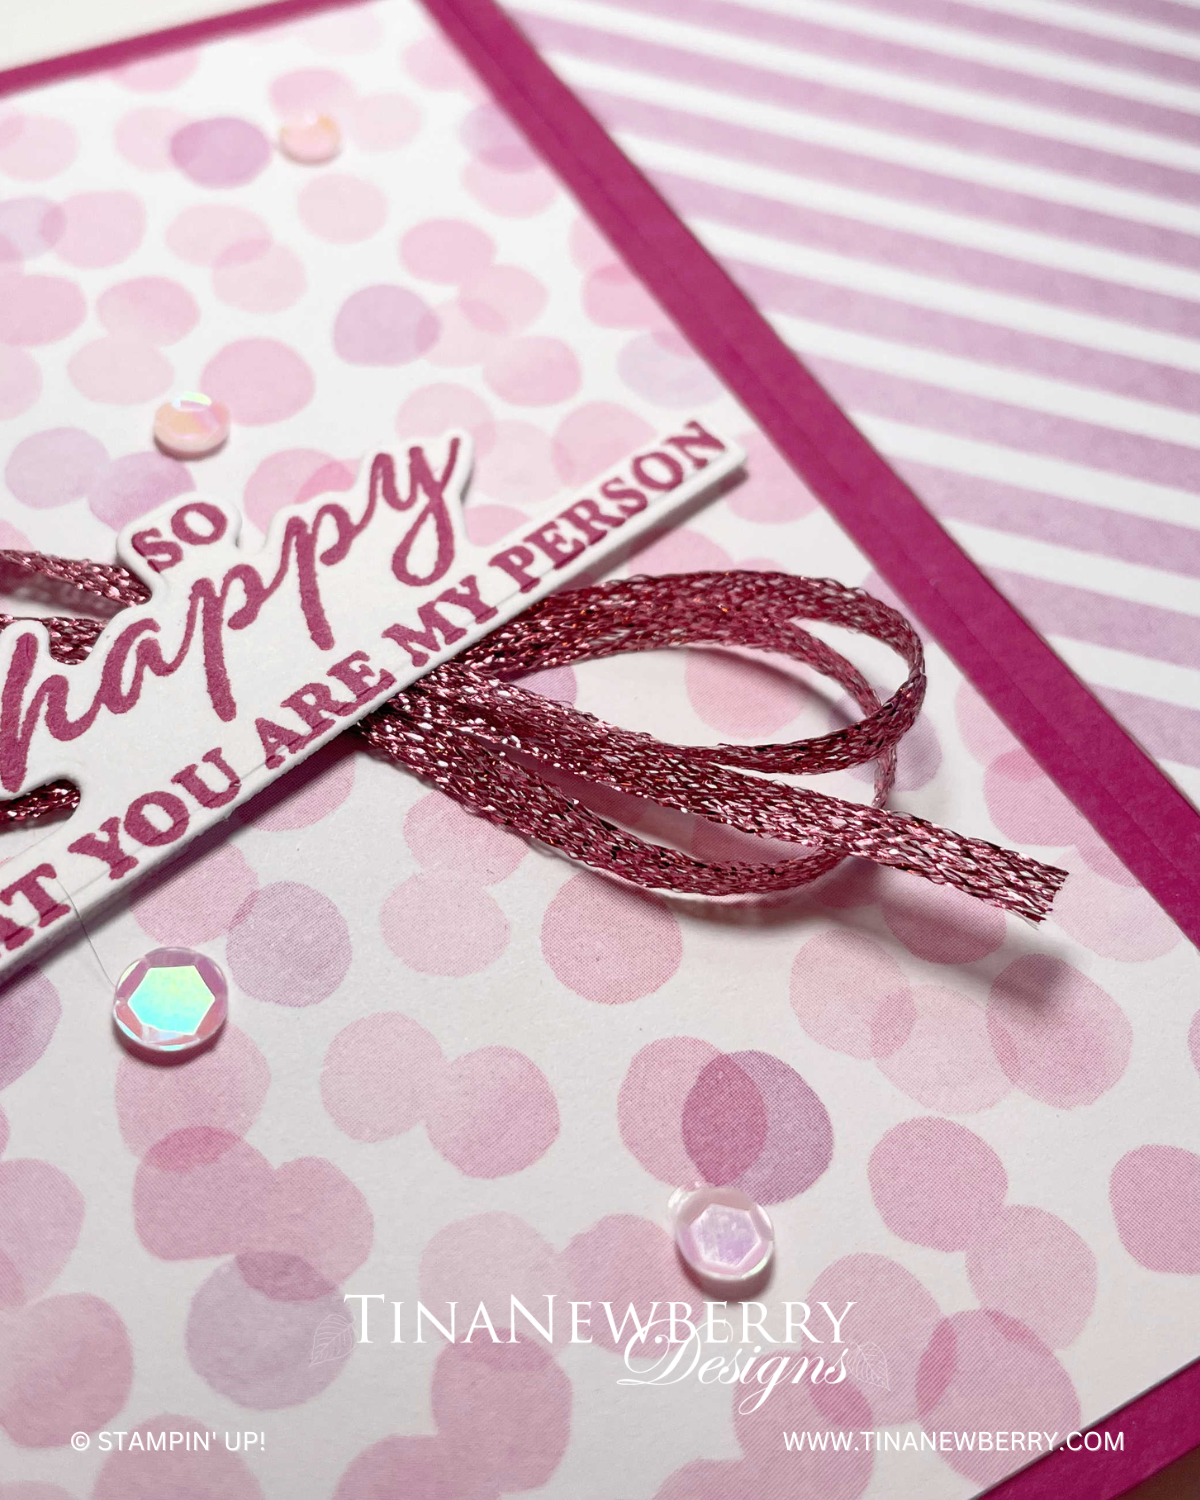
Two coordinating pieces of Berry Burst paper from the Bright & Beautiful Designer Series Paper pack, bring all the fun for this quick & easy card. Check out the Bright & Beautiful Designer Series Paper pack today- on sale through June 30, 2023.
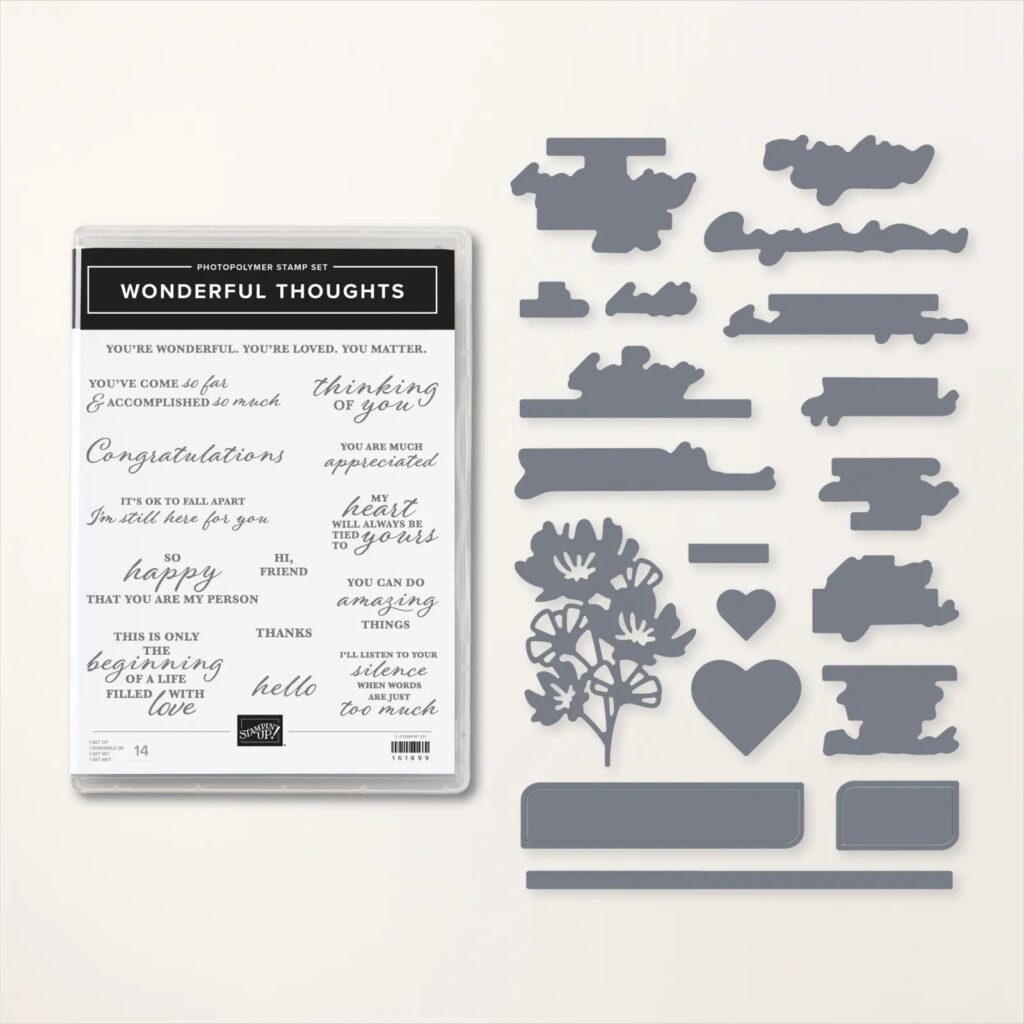
The world needs more compassion, and the Wonderful Thoughts Bundle is a great way to start sharing kindness! The stamp set includes several thoughtful sentiments that can be easily cut out with the coordinating dies. It’s the perfect set for sending encouragement and support to your loved ones!
Measurements
Full list of supplies needed, listed below. A die cutting machine is needed for this card.
Full list of supplies needed, listed below.
Card Base: Berry Burst Cardstock 4 ¼” h x 11” w, scored at 3 ¼” and 8 ¾” w
Background: Bright and Beautiful DSP, 2 prints: 4″ h x 3″ w and 4” h x 2” w
Interior layer: Basic White cardstock scrap
Sentiment Layer: Basic White cardstock scrap
Let’s Create
Affix all stamps to Acrylic Blocks.
Fold the Card Base in half using a Bone Folder to sharpen the crease.
Adhere the Bright and Beautiful DSP layer onto the card front flaps.
Stamp the sentiments with Berry Burst Stampin’ Pad on the scraps of Basic White cardstock, interior and exterior sentiments.
Die cut around the sentiments with the coordinating dies.
Adhere the interior sentiment to the card.
Adhere loops of ribbon behind the sentiment.
Use Mini Dimensionals to adhere sentiment and ribbon onto the card front.
Embellish with Pastel Adhesive Backed Sequins.
Optional to decorate your envelope, adhere a strip of Bright & Beautiful DSP 1” x 4” onto the envelope front.
Sprinkle on the gems.
Stamp and decorate the inside and attach with Stampin’ Seal.
Order online from the convenience of your own home or send me your order and I’ll take care of you. ❤ Either way, please use the host code KBSZKQ3A. Order online AND, if your order is $50 or more using host code KBSZKQ3A between now and the end of the month you’ll receive a free pack of embellishment as a THANK YOU gift from me. ❤ If your order is over $150, skip the host code, earn Stampin’ Rewards for free stuff yourself and I’ll still send you a free pack of embellishment as a THANK YOU gift from me. ❤


")
")


 Designer Series Paper")


 Designer Series Paper")


")


 Metallic Woven Ribbon")