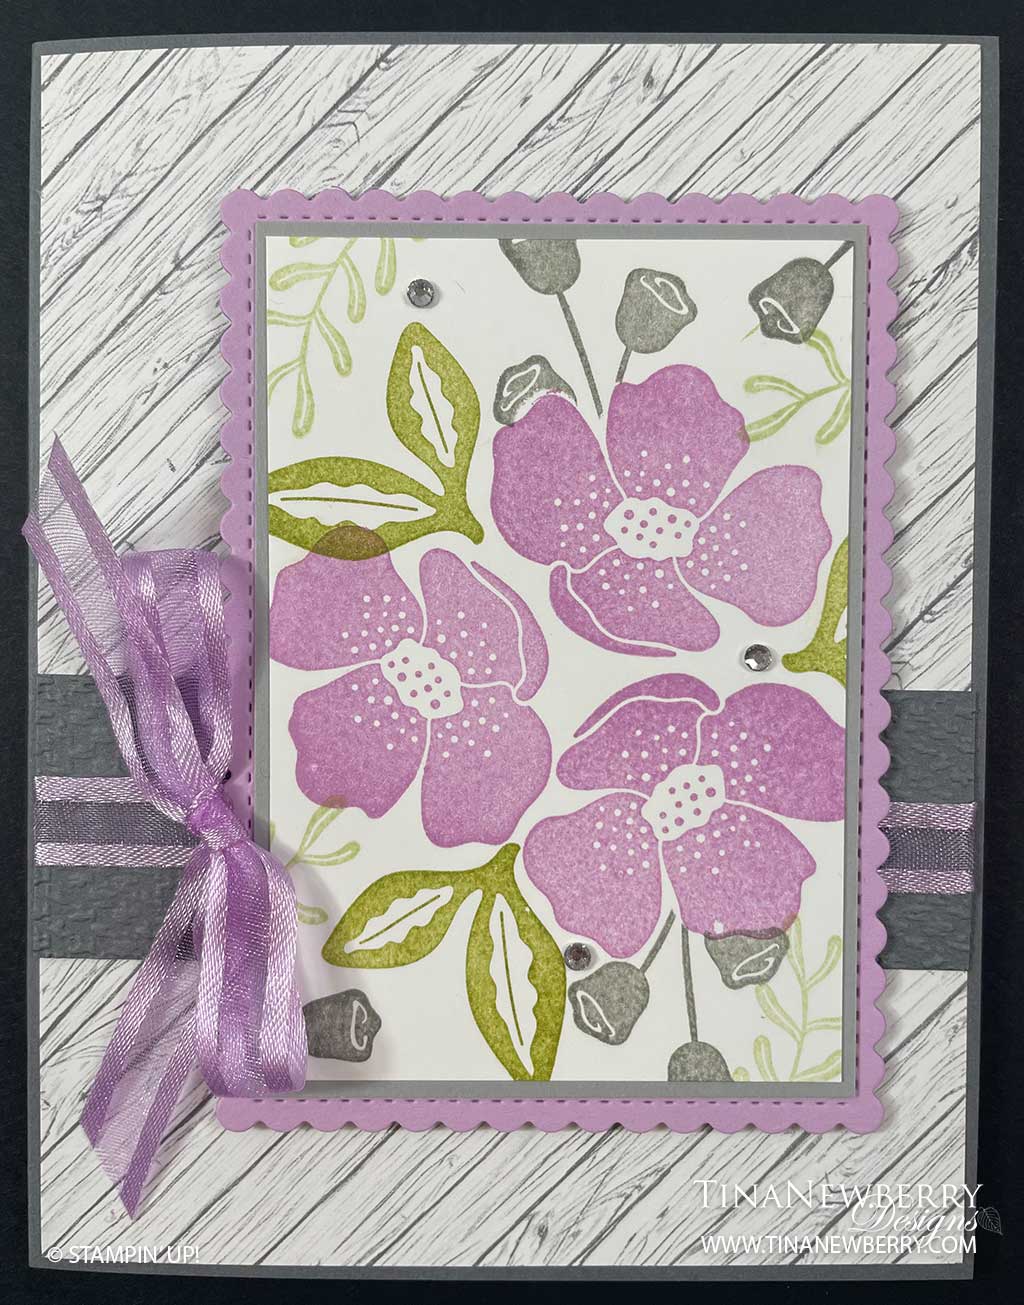
How can you create such a pretty simple card using 5 colors?! Color coordination, patterns, shapes and textures make you card come together easily.

Measurements
Full list of supplies needed, listed below. A die cutting machine is needed for this card.
Basic Gray Cardstock:
- 8 ½” x 5 ½” (score at 4 ¼”) for Card Base
- 4 ⅛ x 1 ¼”
Heart & Home Designer Series Paper: 5 ⅜” x 4 ⅛”
Fresh Freesia: 4 ¼” x 3” (for cutting scalloped rectangle)
Smoky Slate: 3 ¾” x 2 ⅝”
Basic White:
- 3 ⅝” x 2 ½”
- 5/14″ h x 4″ w for inside
Let’s Create
- Affix all stamps to Acrylic Blocks.
- Fold the Card Base in half using a Bone Folder to sharpen the crease.
- Using the Tasteful Textile Embossing Folder, emboss the 4 ⅛” x 1 ¼” piece of Basic Gray.
- Using the 2nd to the largest scalloped rectangle from the Stitched So Sweetly Dies, cut the piece of Fresh Freesia cardstock.
- With Fresh Freesia Ink, stamp the flowers 3 times on the Basic White 3 ⅝” x 2 ½” panel. Then using Pear Pizzazz ink stamp the larger leaves, using Soft Seafoam stamp the smaller sprig. With Smoky Slate, stamp the small buds.
- Use Stampin’ Seal to attach the embossed Basic Gray to the wood grain DSP about one third from the bottom.
- Wrap a piece of Fresh Freesia Open Weave Ribbon around the center of the Basic Gray Embossed Piece taping the ends on the back with Tear & Tape. Attach these layers to your Basic Gray folded card front with Stampin’ Seal.
- Use Stampin’ Seal to tape the stamped Basic White panel to the Smoky Slate piece of cardstock, and then to the die cut Fresh Freesia cardstock.
- Using Stampin’ Dimensionals adhere the stamped layers to the card, slightly toward the right side and centered in top to bottom.
- Tie a bow using the Fresh Freesia Open Weave Ribbon and adhere to the card with a Mini Glue Dot.
- Sprinkle a few small Basic Rhinestone Jewels.
- Stamp and decorate the inside and attach with Stampin’ Seal.
- Decorate your envelope.
- So cute! Now send it to someone special.
Shopping List
Recommended Stamper’s Toolkit ❤
Product List


