Use Scraps of Paper for a Fun Background

Thank you for your interest in this project. Some projects are exclusive to subscribers who will receive passwords by email.

Are you a subscriber? Awesome! Check your email for the password and enter it here to view this project.

Not yet subscribed?  We’d love for you to join us.  Subscribe to my email list and receive news, information and inspiration by email.

CASE: Boughs of Jolly

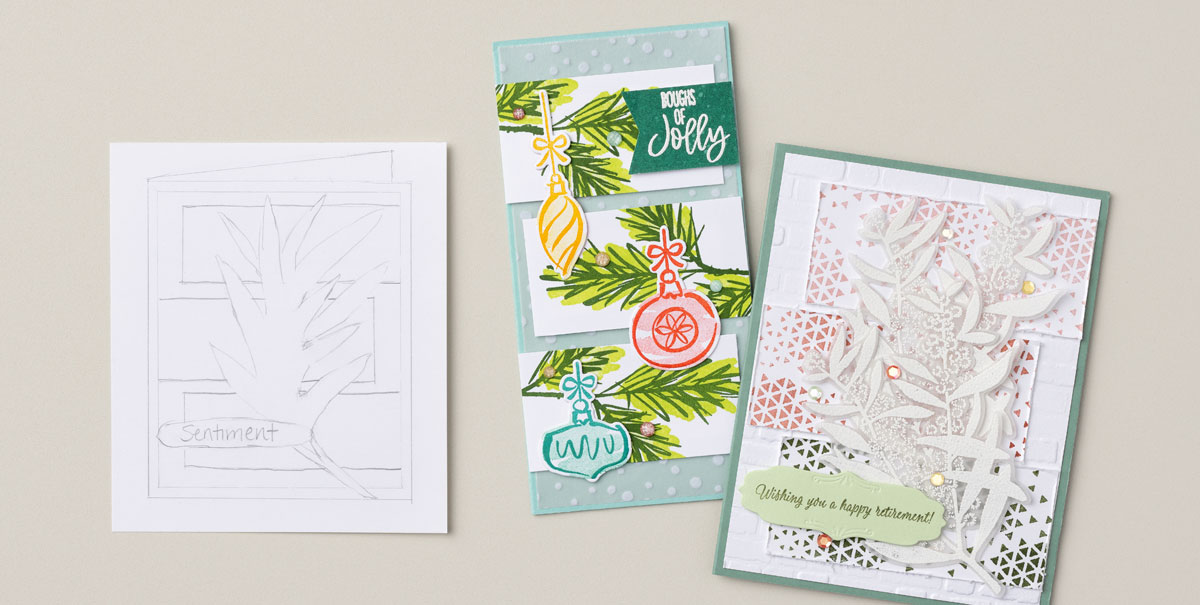
We loved the look of our Boughs of Jolly card, so we decided to CASE the layout! If you’re looking for some new ideas, try your hand at copying and sharing everything!

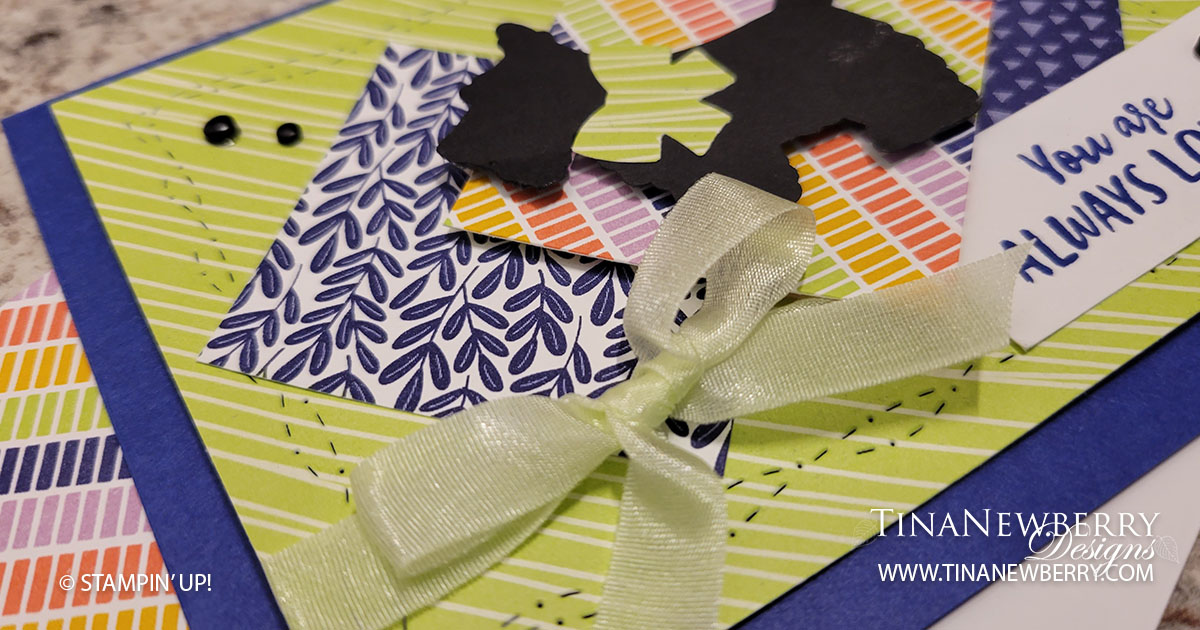
For our Wishing You a Happy Retirement card, we used the textured stamp from the Brightest Beauty Bundle to stamp on three strips of Basic White Cardstock using three different inks. Then we used Paper Snips Scissors to distress the edges. We offset the three strips and adhered them to the card base with Multipurpose Liquid Glue.

Next we stamped and heat-embossed the floral image twice on vellum. After cutting both branches out, we layered one over the other to create a larger branch image. Fun fact: this floral image was designed after the golden wattle, which is Australia’s national floral emblem. Traditionally this plant has yellow flowers and green stems, but we decided that we loved the white coloring for this project. To finish off the card we used a few Adhesive-Backed Seasonal Sequins to give the card some shine. We colored the white sequins with a Soft Sea Foam Stampin’ Blend to tie in with the other card colors.

If you like what you see, don’t be afraid to CASE it! You could copy the layout, or you could mimic the colors or the techniques—the possibilities are endless!

Shopping List

Add Sparkle and Velvet to Your Cards

Everyone loves bling and texture! This card features both as well as a cheery pattern.

Save 10% on the Christmas Scottie Bundle

Measurements

Full list of supplies needed, listed below. A die cutting machine is needed for this card.

Real Red Cardstock: 5 1/2″ h x 8 1/2″ w scored and folded on the long-side to 4 1/4″ w

Basic White Cardstock:

  • 5 ¼” h x 4” w for inside
  • 4” h x 3” w
  • Scrap for Scottie

Sweet Sorbet Cardstock: 4 ¼” h x 3 ¼” w

Sweetest Christmas Designer Series Paper (DSP): 5 ¼” h x 2 ½” w

Snowy White Velvet  Sheets: 5 ¼” h x ¾” w


Let’s Create

  1. Affix all stamps to Acrylic Blocks.
  2. Fold the Card Base in half using a Bone Folder to sharpen the crease.
  3. Use Stampin’ Seal to attach the DSP and Snowy White Velvet panels.
  4. On the 4” h x 3” w Basic White Cardstock, stamp snowflakes in Gray Granite ink and the sentiment in Real Red ink.
  5. Attach the stamped 4” h x 3” w Basic White Cardstock to the Sweet Sorbet cardstock with Stampin’ Seal and attach to the card with Stampin’ Dimensionals.
  6. Use a Mini Glue Dot to attach a Wonderful Snowflake to the 4” h x 3” w Basic White Cardstock. 
  7. Stamp a Scottie in Tuxedo Black ink and the bow in Real Red ink on Basic White Cardstock and punch out. Use the Dark Real Red Stampin’ Blend to color the Scottie’s collar. Attach the bow tie with Multipurpose Glue and attach to the Scottie with a Mini Glue Dot. 
  8. Sprinkle on some Iridescent Rhinestone Basic Jewels to the center of your stamped snowflakes. 
  9. Stamp and decorate the 5 ¼” w x h” w Basic White for the inside and attach with Stampin’ Seal.
  10. Decorate your envelope.
  11. Woof!! Put this in the mail.

Shopping List

Recommended Stamper’s Toolkit ❤


Show Off Your Patterned Paper

There are endless possibilities with this simple layout featuring your Designer Series or other patterned paper. What will you create?

Save 10% on the Christmas Scottie Bundle

Measurements

Full list of supplies needed, listed below.

Starry Sky Cardstock: 4 ¼” h x 11” w scored and folded at 5 ½” for Card Base

Butterfly Kisses Designer Series Paper (DSP): 

  • 4” h x 5 ¼” w
  • Scrap for bow tie
  • 2” square (3)

Basic Black Cardstock: Scrap for Scottie

Basic White Cardstock:

  • 4” h x 5 ¼” w
  • 1” h x 2 ⅛” w

Let’s Create

  1. Affix all stamps to Acrylic Blocks.
  2. Fold the Card Base in half using a Bone Folder to sharpen the crease.
  3. Run the 4” h x 5 ¼” w DSP through the Stampin’ Cut & Emboss Machine with the Stitched with Whimsy Dies.
  4. Layout the three 2” square DSP pieces in diamond shape overlapping on the Stitched with Whimsy DSP. Attach the outer two with Stampin’ Seal and the middle one with Stampin’ Dimensionals. 
  5. Wrap 18” of Soft Sea Foam ribbon around the Stitched with Whimsy DSP and tie a bow. 
  6. Attach the Stitched with Whimsy DSP to the Card Base with Stampin’ Dimensionals. 
  7. Punch a Scottie our of Basic Black Cardstock and a bow tie out of DSP. Use Stampin’ Seal to attach the bow tie to the Scottie and then attach the Scottie with a Stampin’ Dimensional to the middle diamond.
  8. Stamp Sentiment in Starry Sky on the 1” h x 2 ⅛” w Basic White and then attach to the card with Stampin’ Seal. 
  9. Sprinkle on some black Classic Matte Dots.
  10. Stamp and decorate the 5 ¼” w x h” w Basic White for the inside and attach with Stampin’ Seal.
  11. Decorate your envelope.
  12. Woof!! Who will you send it to?

Shopping List

Recommended Stamper’s Toolkit ❤


October Creative Challenge

Join our monthly challenge and let your creativity shine! This month our challenge involves masking. Don’t worry, we aren’t challenging you to wear a mask—even though it’s almost Halloween! Instead, we challenge you to use Masking Paper in your next project. Don’t be afraid to get super creative in your projects—we love to see your unique style come through!

Masking Paper is tacky like a Sticky Note and easy to use for scene-building projects like this. To make our card, we stamped out the witches and the boiling cauldron on Masking Paper and cut out the shapes. We put a custom piece of Masking Paper on the bottom of a panel of Basic White Cardstock, then we stamped the first witch image on the card base. We added the coordinating mask directly on top. Then we stamped cauldron and the second witch, overlapping the first witch with the second witch. We added the mask for the second witch and the cauldron, making sure to align them just right so the Masking Paper covered the stamped images completely.

Next we made a night sky using Blending Brushes to blend four colors across the panel. Then we removed the Masking Paper and colored the stamped witch and cauldron images using Watercolor Pencils. With a few die-cut bats and some embellishments from the Sparkle & Shine Sequins Assortment, this card is sure to cast a spell on anyone!

This month, try and use Masking Paper in your projects. If you share your creations on social media, don’t forget to use #CreativeChallengeSU so we can follow along!

Product List