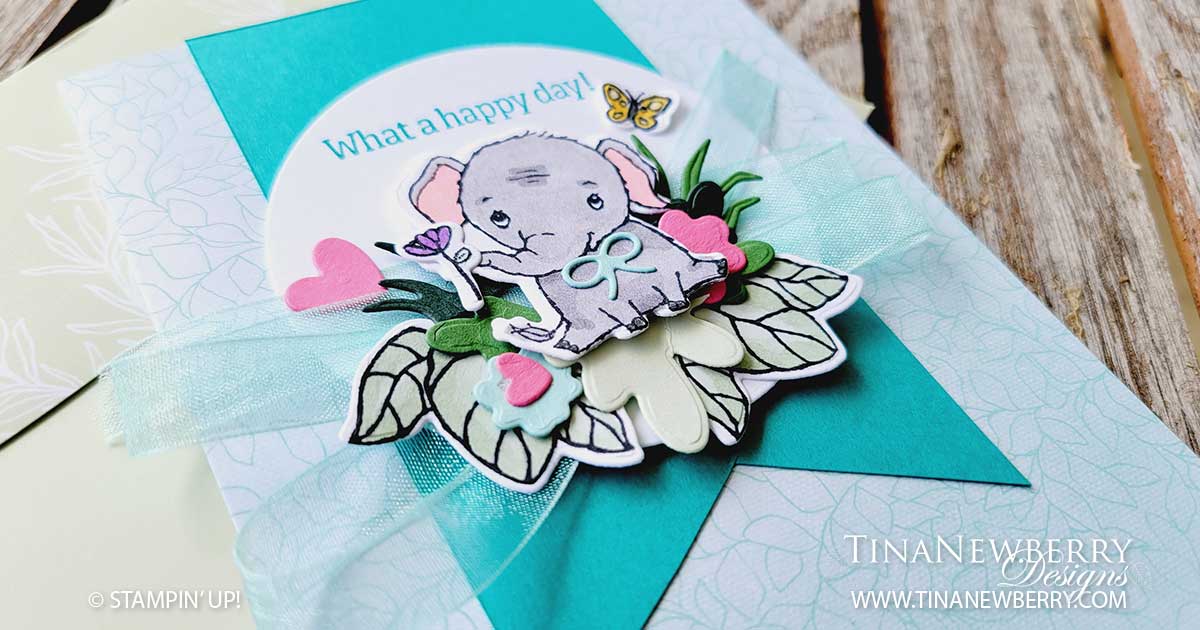
CASE – Copy and Share Everything – the catalog and create your own adorable Elephant Card. For my card base I used the Pool Party and Soft Sea Foam Cards & Envelopes. So cute!
Measurements
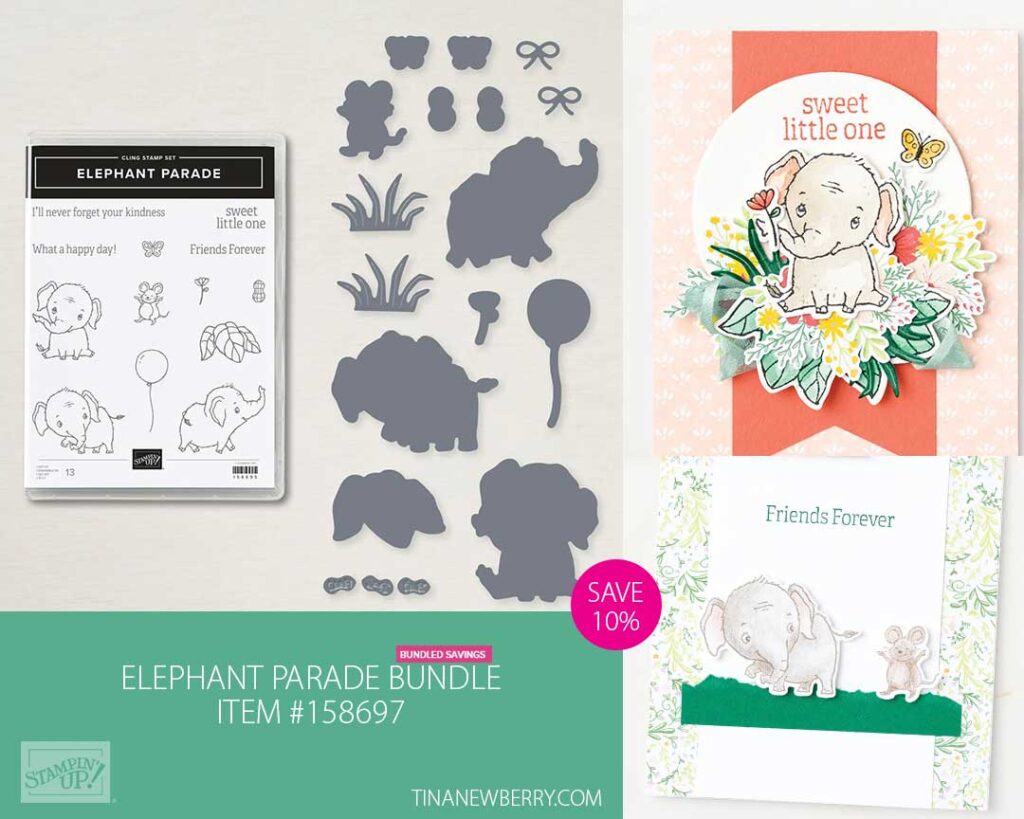
Full list of supplies needed, listed below. A die cutting machine is needed for this card.
Soft Seafoam and Pool Party Sale-a-bration Card Base and Envelope
Bermuda Bay Cardstock:
- 4 ½’ h x 2 ½” w x
Basic White Cardstock:
- 3 ½” square
- 5 1/4″ h x 4″ w for inside
Basic White Thick Cardstock
- Scrap for leaves, elephant, flower and butterfly
Scrap cardstock:
- Soft Seafoam, Pool Party, Polished Pink, Garden Green, Evening Evergreen
Let’s Create
- Affix all stamps to Acrylic Blocks.
- Fold the Card Base at score line using a Bone Folder to sharpen the crease.
- Make the Banner Tip: With Paper Snips, add a ½” to ¾” slice in the middle of the short end of the Bermuda Bay Cardstock.. Then cut from each corner to the top of the slice and remove the triangle pieces to make the banner tip.
- Attach the Bermuda Bay banner with Stampin’ Seal.
- Die cut the 3 ½” Basic White square with the 3” layering circle die. Stamp the sentiment toward the top in Bermuda Bay ink and attach with Stampin’ Dimensionals.
- Zigzag some Tear & Tape on the bottom of the stamped circle and attach a piece of Pool Party Sheer Ribbon.
- On Basic White Thick Cardstock scrap, use Tuxedo Black Memento Ink to stamp the elephant, leaves, flower and butterfly. Use Stampin’ Blends to color them all in and then die cut from the Elephant Dies. I used Smoky Slate and Flirty Flamingo on the elephant, Daffodil Delight on the butterfly, Highland Heather on the flower and Mint Macaron on the leaves.
- Next die cut several leaves, hearts, flowers and a bow using the Elephant Dies, Teacup Dies and Perfect Plants dies from various cardstock. I used Polished Pink, Soft Sea Foam, Garden Green, Pool Party and Evening Evergreen.
- Use Mini Glue Dots to create a nest of leaves, flowers and hearts, then place the Elephant on top. Add the flower and bow before attaching everything to the car dwith several Mini Glue Dots. Then add the butterfly in the upper right of the circle.
- Decorate the remaining Basic White panel and attach to the inside with Stampin’ Seal.
- Decorate your envelope.
- So fun!! Put it in the mail today and make someone’s day!
Shopping List
")


 Sheer Ribbon")

$35.00

$11.00

$32.00

$27.00
Recommended Stamper’s Toolkit ❤

$12.00

$7.00

$4.25

$5.75

$5.50
$11.00

$26.00

$7.00

$6.50

$11.00

$20.00

$11.00

$80.75

$128.00

$16.00

$13.00


")


 Designer Series Paper")


