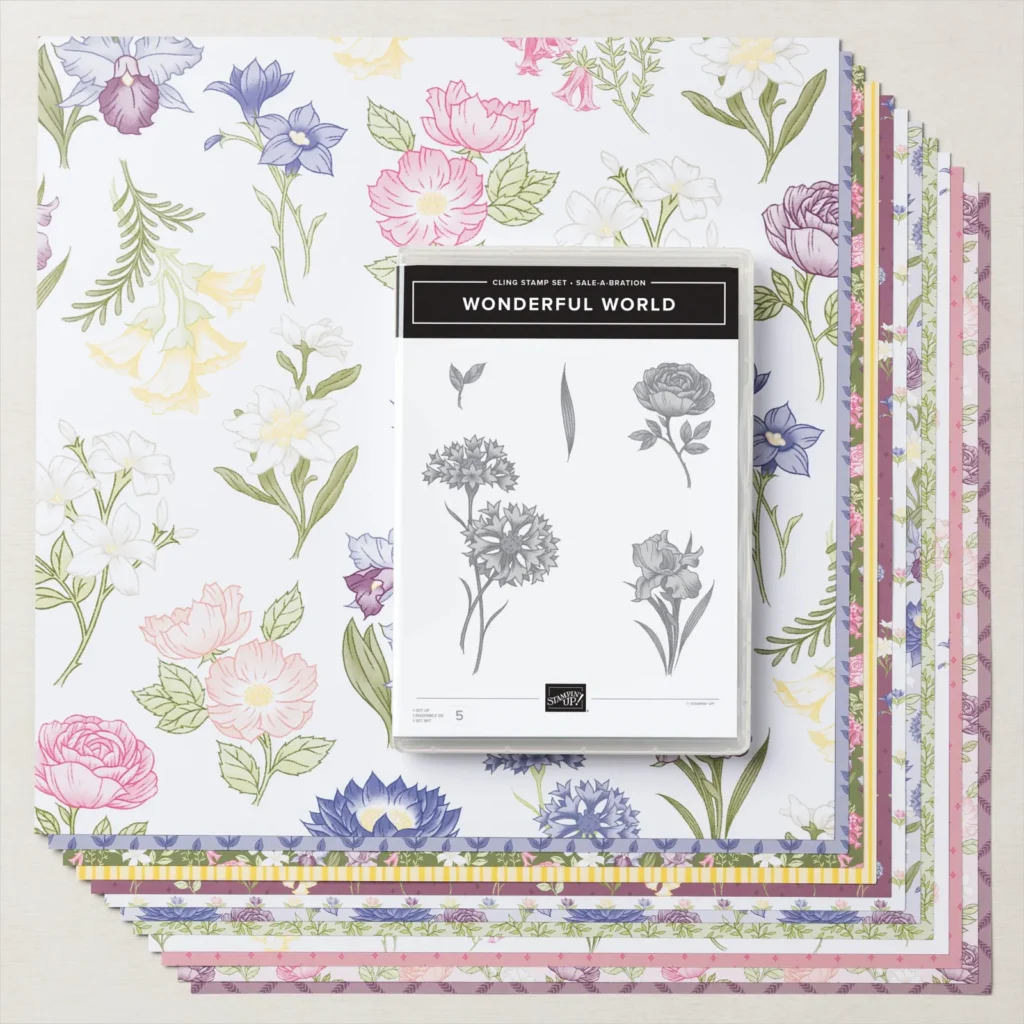
Celebrate the natural beauty found around the world with this stamp and paper bundle featuring prominent flowers from across the globe. The stamps and paper are designed to coordinate perfectly for handmade cards as beautiful as Mother Nature herself. The Wonderful World Bundle includes the Wonderful World Stamp Set and the Wonderful World 12″ x 12″ (30.5 x 30.5 cm) Designer Series Paper and is free with your $100 product order now thru August 31st.
Measurements
Full list of supplies needed, listed below. A die cutting machine is needed for this card.
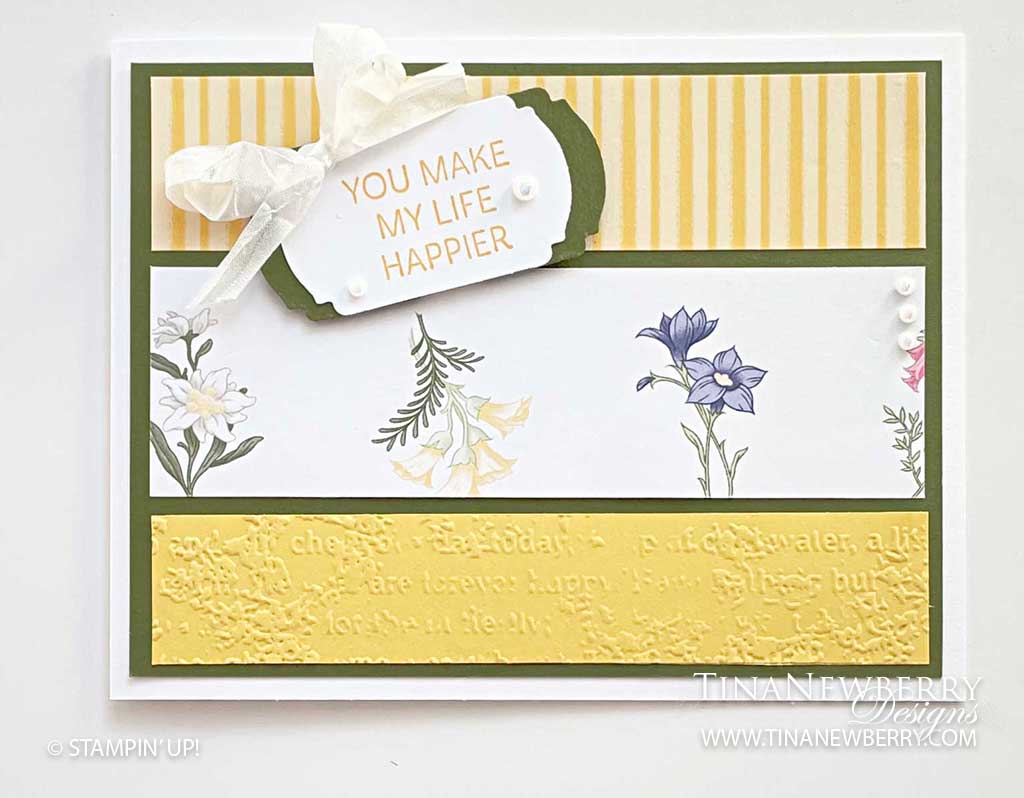
Basic White Thick Cardstock: 4 ¼” h x 11” w folded to 4 1/4″ h x 5 1/2″ w
Mossy Meadow Cardstock:
- 4″ h x 5 1/4″ w
- scraps
Wonderful World Designer Series Paper:
- Print 1: 1 ⅛” h x 5” w
- Print 2: 1 ½”h x 5” w
Daffodil Delight Cardstock: 1”h x 5”w
Casic White Carstock: scraps
Let’s Create
- Affix all stamps to Acrylic Blocks.
- Fold the Card Base in half using a Bone Folder to sharpen the crease.
- Stamp the sentiment with Daffodil Delight Stampin’ Pad onto a scrap of Basic White cardstock.
- Punch around the sentiment with the Label Me Fancy Punch.
- Punch a plain scrap of Mossy Meadow with the Label Me Fancy Punch.
- Cut the Mossy Meadow punched label in half vertically so you can adhere it to the backside of the sentiment label and frame both ends.
- Emboss the 1”h x 5”w Daffodil Delight cardstock layer with the Scripty 3D Embossing Folder in your Stampin’ Cut and Emboss Machine.
- Use Stampin’ Seal to adhere the 2 layers of Wonderful World DSP and embossed Daffodil Delight cardstock onto the 4″ h x 5 1/4″ w Mossy Meadow cardstock layer, space them so that there is margin between the layers.
- Adhere the Mossy Meadow layer onto the front of the Basic White card base with Stampin’ Seal.
- Use Dimensionals to adhere the sentiment labels onto the card front.
- Cut 2 strands of the Whisper White Crinkled Seam Binding Ribbon and tie a bow with both strands.
- Adhere the double bow onto the sentiment labels, I like to use the Mini Glue Dots.
- Embellish the sentiment label and card front with Iridescent Pearl Basic Jewels.
- Stamp the Iris image with Daffodil Delight Stampin’ Pad onto the interior of the card.
- Repeat and stamp the Iris image with Daffodil Delight Stampin’ Pad onto the front of the envelope.
- Decorate your envelope.
- So pretty! Now who will you send it to?
")
")


 Crinkled Seam Binding Ribbon")


$10.00

$19.00
Recommended Stamper’s Toolkit ❤
Product List
$12.00

$7.00

$4.25

$5.75

$5.50

$11.00

$26.00

$7.00

$6.50

$11.00

$20.00

$11.00

$80.75

$128.00


$16.00

$13.00


