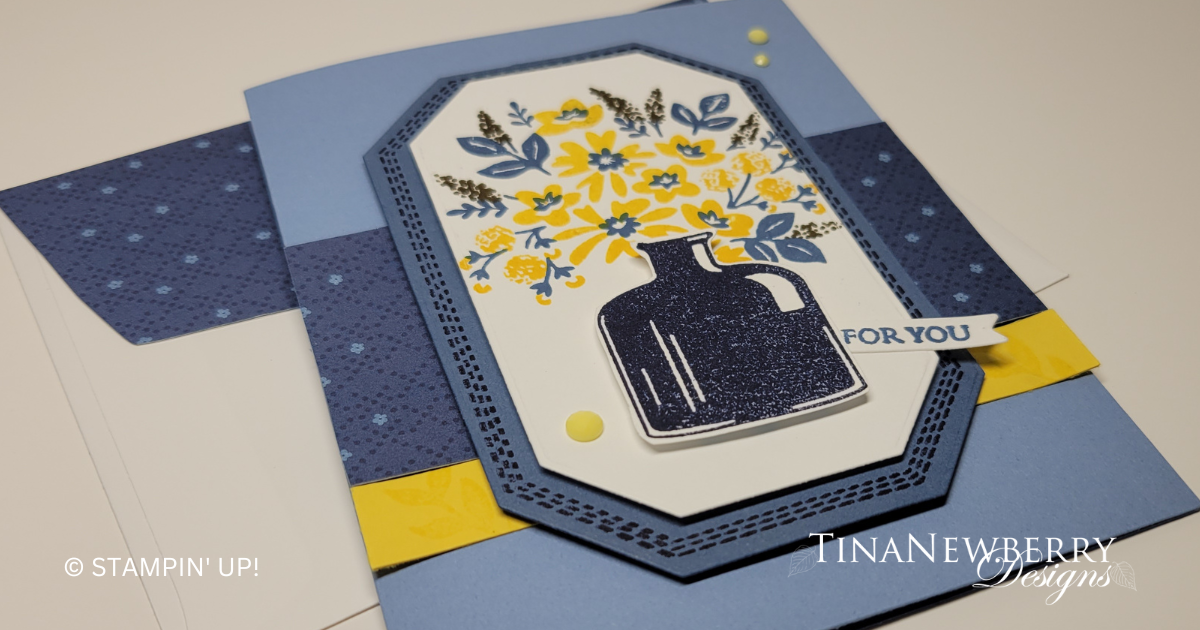
A bit of an advanced card using die cutting, two-step stamping, watermarking, coloring stamps, and fussy cutting! Had a fun time making a version with some of the Moose Friends!
Measurements
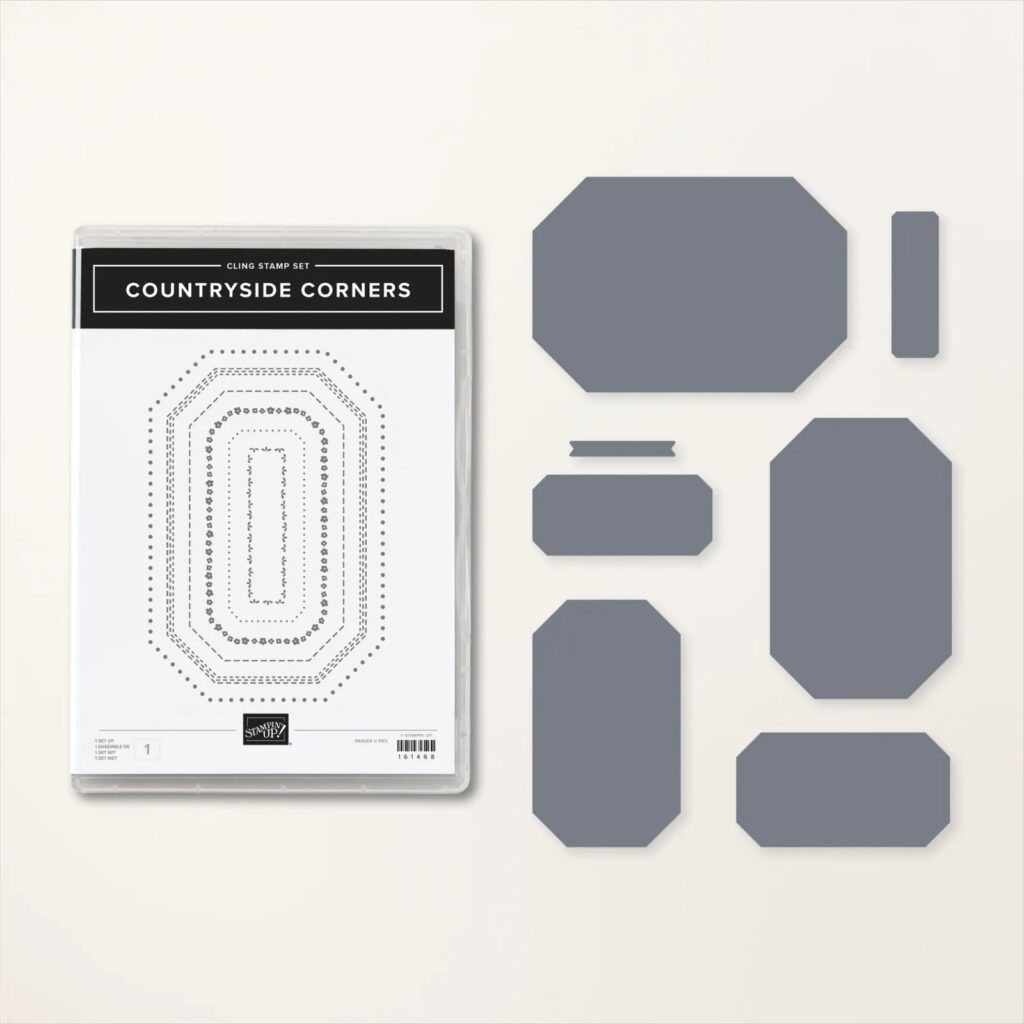
Full list of supplies needed, listed below. A die cutting machine is needed for this card.
Boho Blue Cardstock:
- 5 1/2″hw x 8 1/2″ w folded to 5 1/2″ h x 4 1/4″ w
Misty Moonlight
- 5” h x 3 ½” h
Basic White Cardstock:
- 4 ½” h x 3” w
- Scrap for tag, and bottle
- 5 ¼” h x 4” w for inside
Daffodil Delight
- ½” x 4 ¼” w
Countryside Inn Designer Series Paper (DSP)
- 2” h x 4 ¼” w
Let’s Create
- Affix all stamps to Acrylic Blocks.
- Fold the Card Base in half using a Bone Folder to sharpen the crease
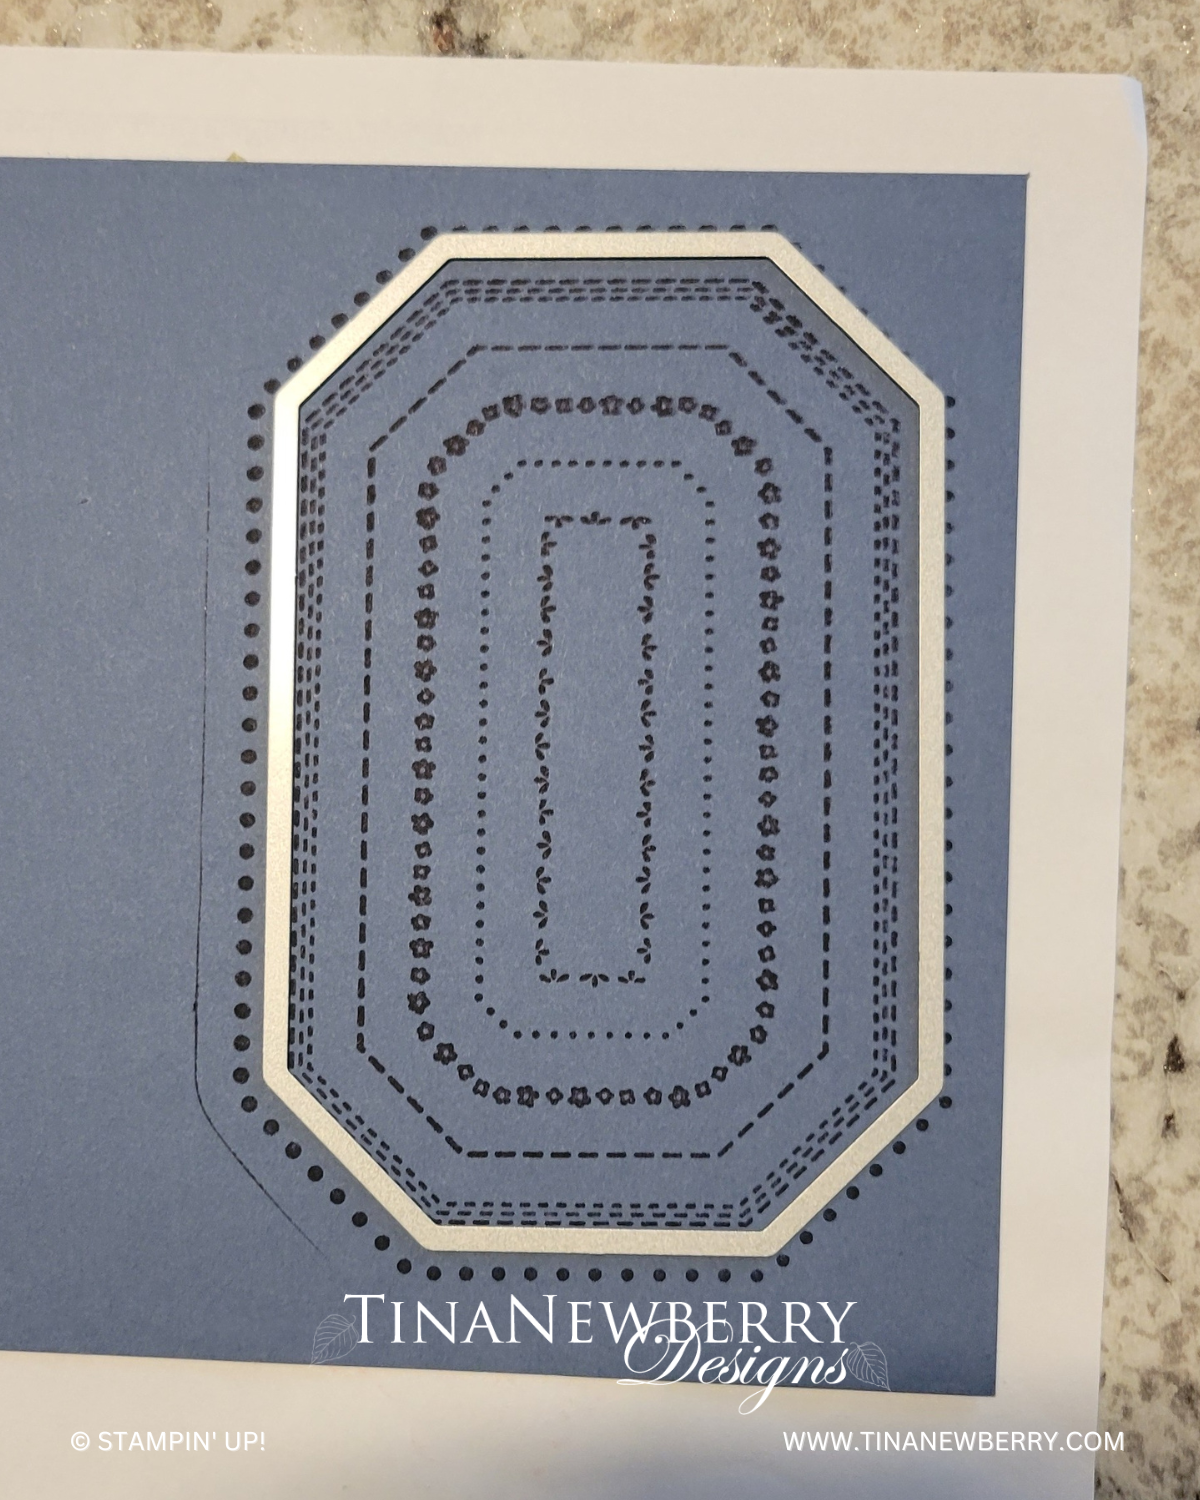
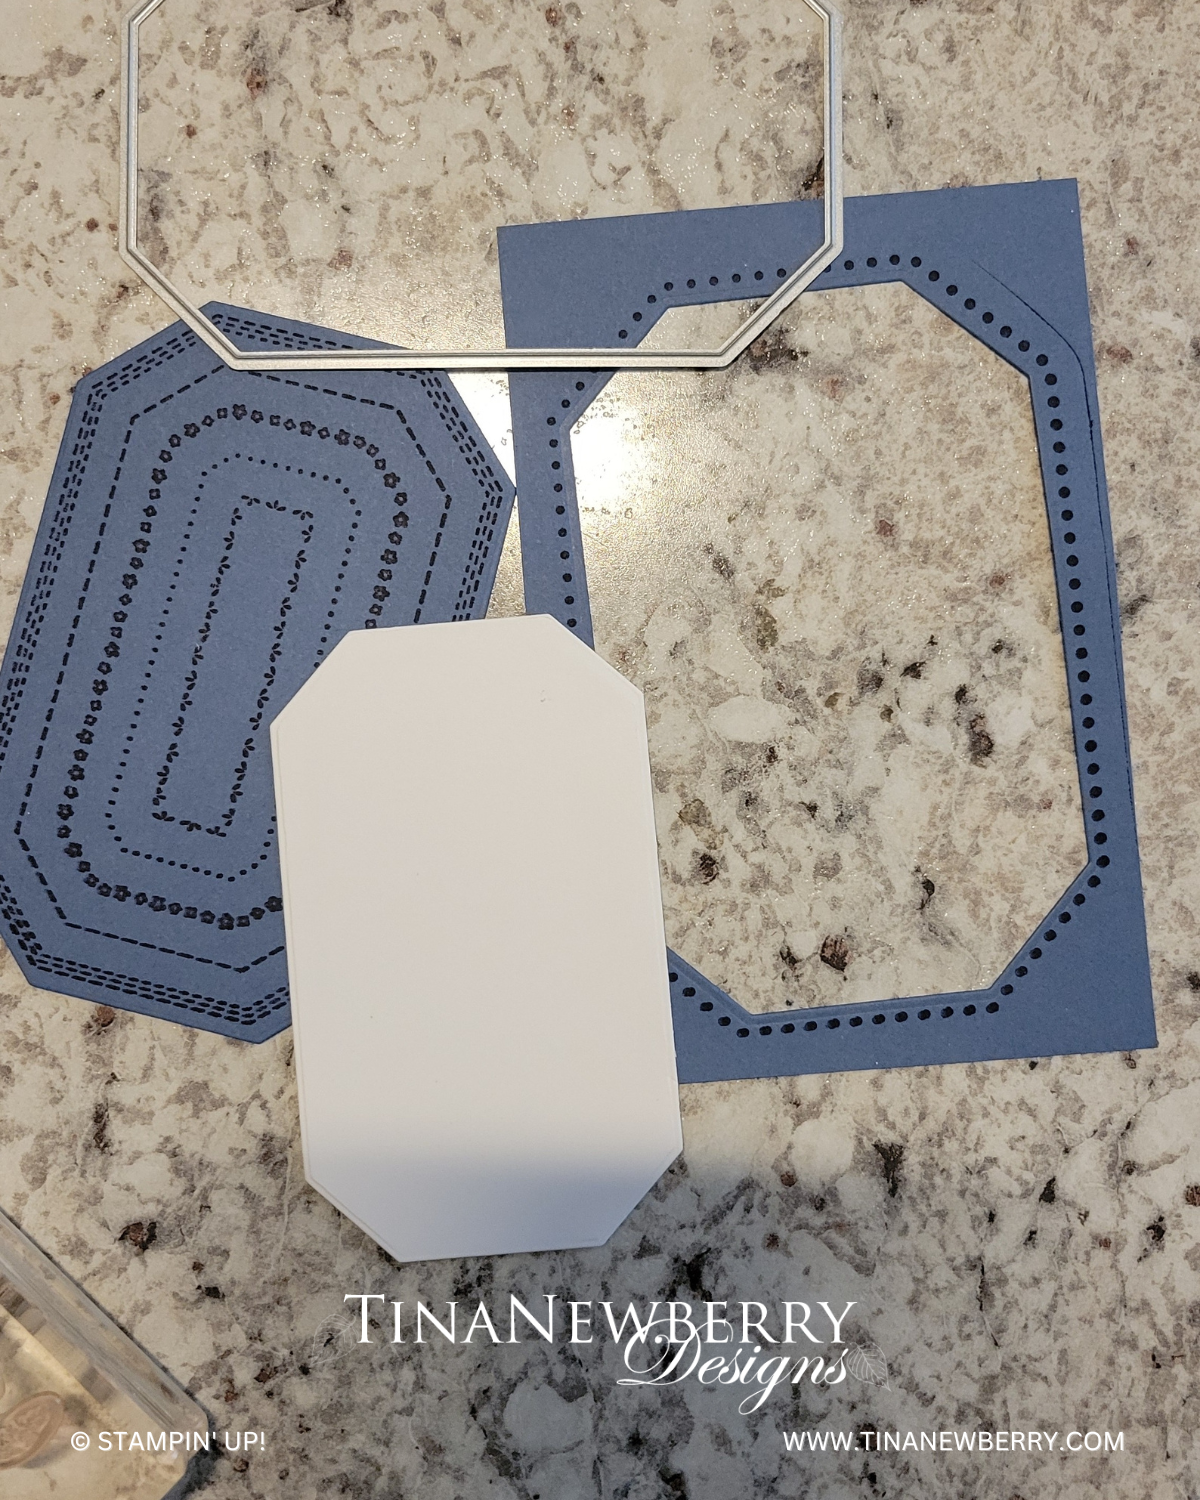
- Stamp the Countryside Corners Stamp in Misty Moonlight Ink on the Misty Moonlight and die cut down to the 3 dashed lines (see picture).
- Stamp the bottle in Night of Navy Ink on Basic White scrap and use Paper Snips to fussy cut.
- Die cut the 4 ½” h x 3” w Basic White with the die smaller than than the Misty Moonlight.
- Ink the Flower Stamp with Daffodil Delight and then color the tall flowers with Early Espresso Stampin’ Write marker. Huff on the stamp to re-wet the ink and stamp on the Basic White tag. Stamp the leaves and flower centers stamp over the flowers stamp withBoho Blue ink to finish the image.
- Stamp the For You sentiment on Basic White scrap and die cut with the flagged tag die.
- Use Versamark ink to stamp the edges of the Daffodil Delight strip.
- Attach the Versamarked strip and the DSP to the front of the Card Base using Stampin’ Seal.
- Attach the die cut Misty Moonlight stamped layer with Stampin’ Dimensionals.
- Attach the Stamped Basic White layer with Stampin Dimensionals.
- Attach the Bottle with Stampin’ Dimensionals.
- Trim the sentiment tag and attach with Multipurpose glue.
- Sprinkle on some gems
- Attach a ribbon (optional)
- Stamp and decorate the remaining 5 1/4″ w x 4″ h for the inside and attach with Stampin’ Seal.
- Decorate your envelope.
- Pretty! Who will you send it to?!
Shopping List

$45.75
")
")


 Designer Series Paper")

Recommended Stamper’s Toolkit ❤
Product List
$12.00

$7.00

$4.25

$5.75

$5.50

$11.00

$26.00

$7.00

$6.50

$11.00

$20.00

$11.00

$80.75

$128.00


$16.00

$13.00


