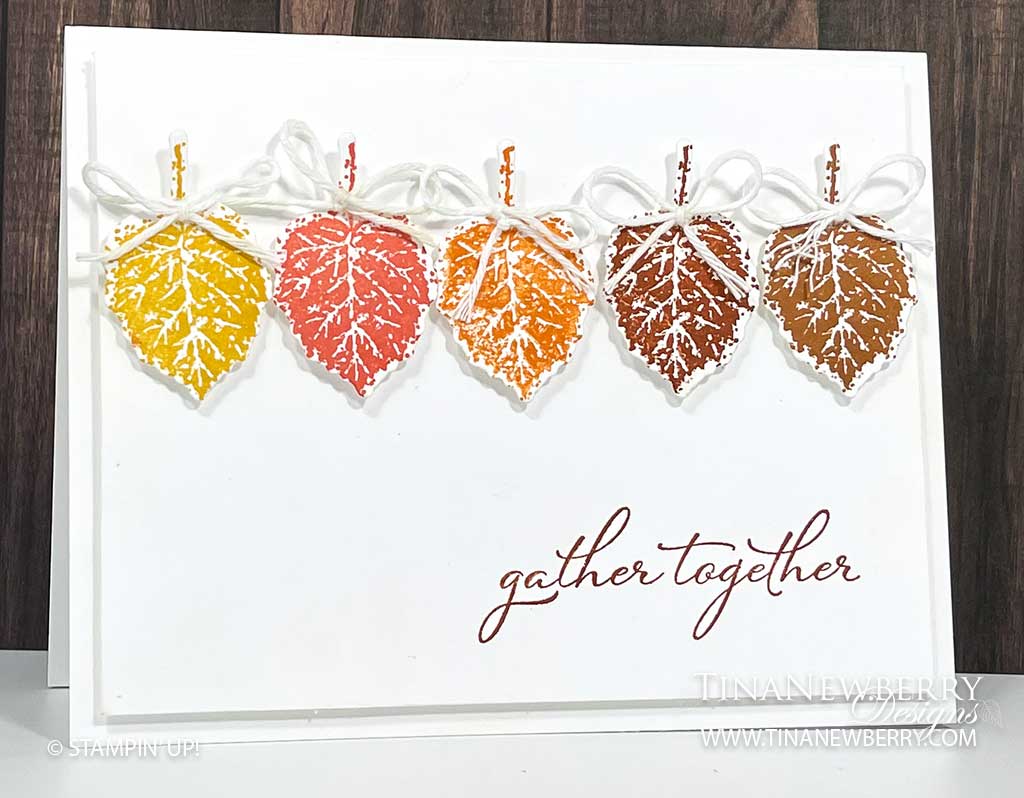
Ooh my favorite cards are white-on-white and this one is no exception. The simple elegance and sweet sentiment of it make my heart happy and get me in the mood for fall!
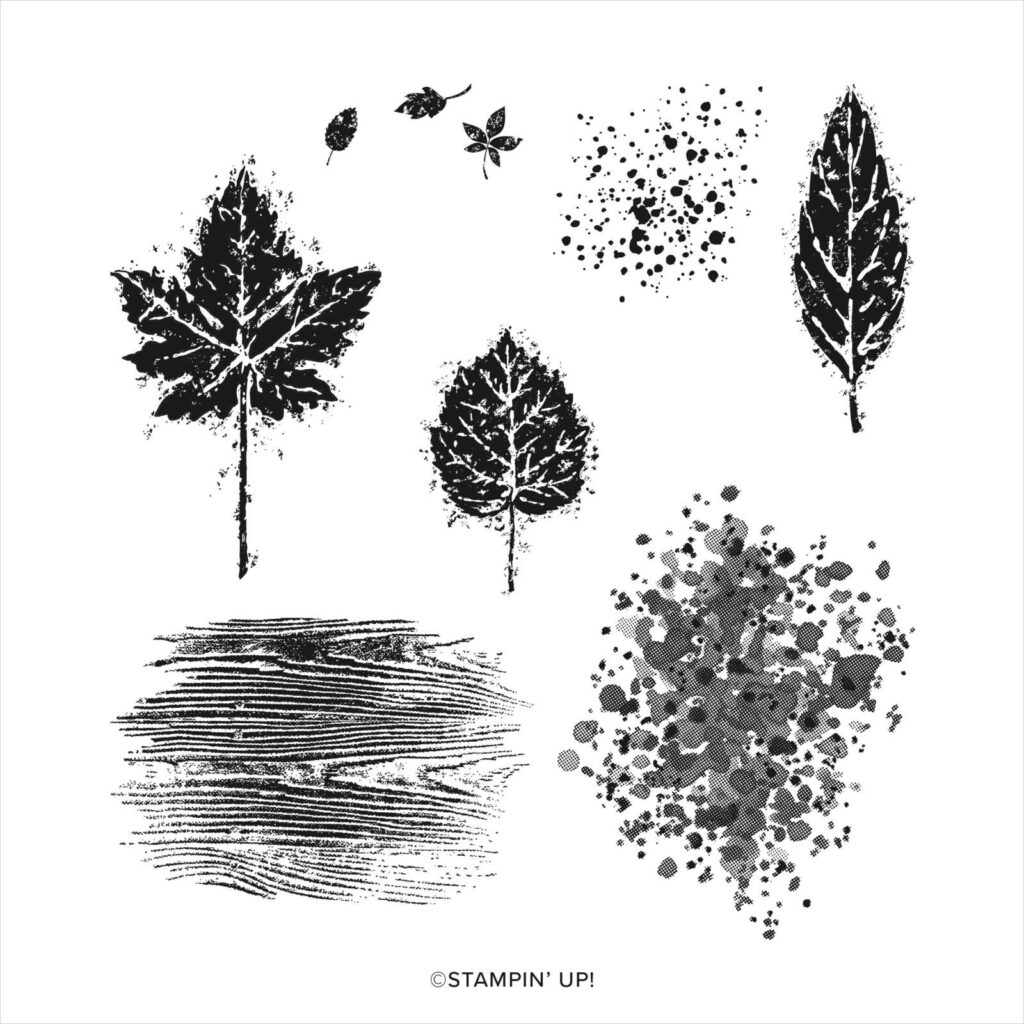
Gorgeous Leaves Stamp Set 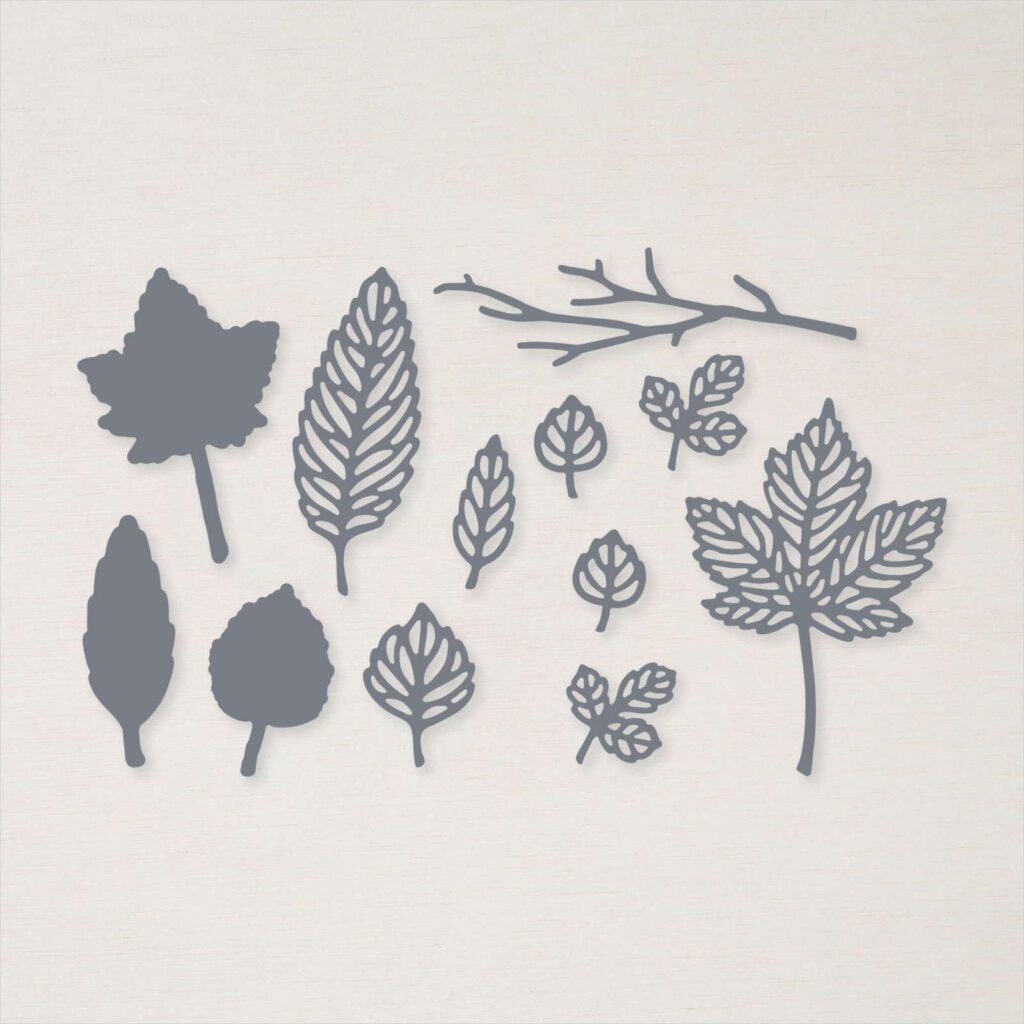
Intricate Leaves Dies
Measurements
Full list of supplies needed, listed below. A die cutting machine is needed for this card.
Card Base: Basic White Thick Cardstock 8 ½” h x 5 ½” w, scored on the long side at at 4 ¼”
Background: Basic White Cardstock 5 1/4″ h x 4″ w
Leaves: Basic White Cardstock scrap
Inside Layer (Optional): Basic White Cardstock 4″ h x 5 1/4″ w
Let’s Create
- Affix all stamps to Acrylic Blocks.
- Fold the Card Base in half using a Bone Folder to sharpen the crease.
- Stamp leaves on a piece of Basic White scrap paper in Bumble bee, Calypso Coral, Pumpkin Pie, Cajun Craze and Cinnamon Cider. I did a “second generation” image for most of the leaves. This is also known as “stamping off.” I inked up the leaf, stamped it off to the side, then stamped it again. This second-generation image is the one I used for the card. Repeat for each color leaf and select the darkness of ink that you prefer for each leaf.
- Die-cut each leaf.
- Use Stampin Dimensionals to attach leaves. I started by placing the center leaf exactly in the middle (on the top third of the Basic White layer). Then I added the far left leaf, and the far right leaf, each one near to the edge. Then I placed the leaves in positions 2 and 4.
- Stamp your Sentiment along the bottom in Cinnamon Cider.
- Adhere this layer to the card front with Stampin’ Dimensionals.
- Create five tiny little Basic White bows and adhere to each leaf with a Mini-Glue Dot.
- Stamp the Inside Layer to your liking and attach with adhesive of your choice.
- Decorate your envelope.
- Simple and elegant!!!! Put it in the mail to make someone’s day!
Shopping List


Stamper’s Toolkit
You will also need adhesive, acrylic blocks, scissors and other basic PaperCrafting items from the Stamper’s Toolkit

$8.00

$12.00
$4.00

$5.25

$7.00
$4.00

$7.00

$10.00

$8.00

$8.00

$10.00
$25.00

$7.00

$6.00

$10.00

$8.00

$5.00

$5.00

$6.00

$71.50

$8.00

$11.75
")
$30.00

$9.50

$120.00