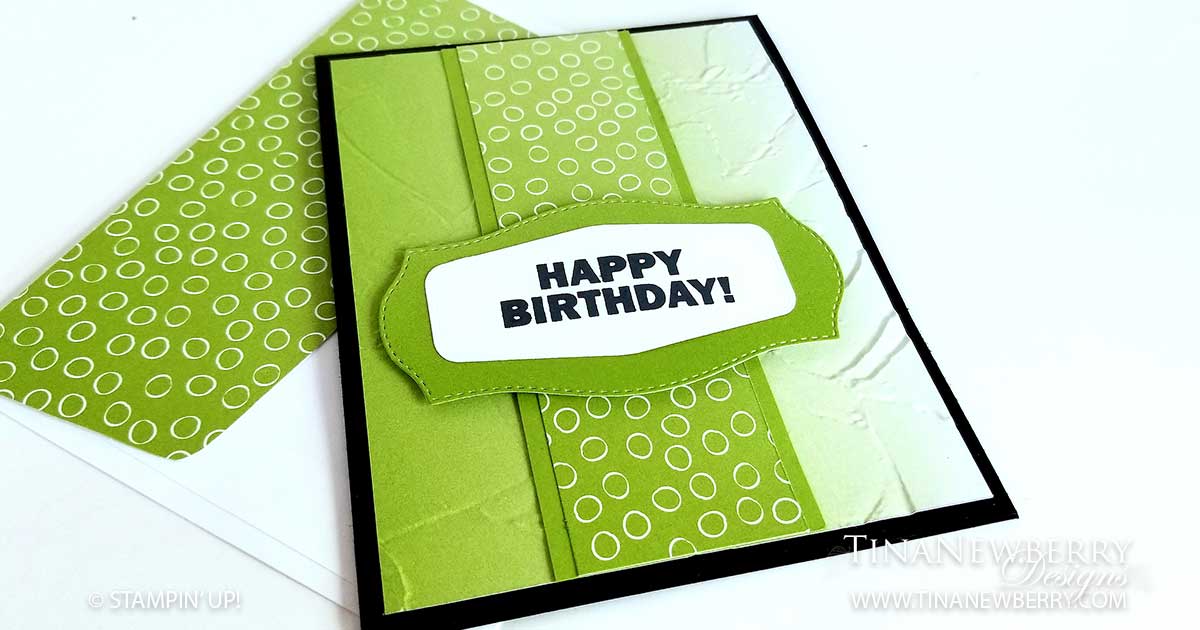
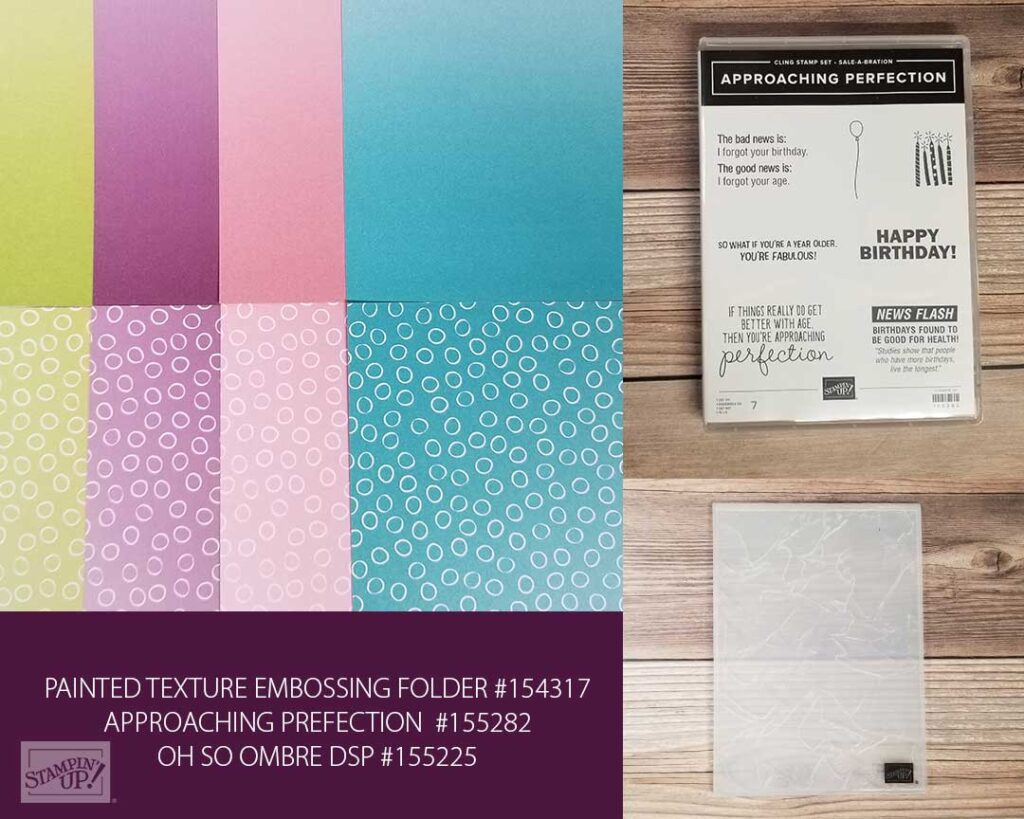
SNEAK PEAK: This quick and easy masculine birthday card uses two FREE products from the upcoming Sale-a-bration Catalog and one from the new January – June Mini Catalog. From January 5th – February 28th in addition to the FREE gift you get from me, you’ll pick FREE product from the Sale-a-bration catalog for every $50 increment purchased. I’ve used the Approaching Perfection Stamp Set and the Oh So Ombre Designer Series Paper on this pretty card. From the January – June Catalog, I’ve used the Painted Texture Embossing Folder. You’re going to love these products! And the best part, this card takes a SIP, using only Stamps, Ink and Paper for some #simplestamping.
Full list of supplies needed, listed below. A die cutting machine is needed for this card.
Card Base: Basic Black Cardstock 8 1/2 h” x 5 1/2″ w folded to 5 1/2″ h x 4 1/4″ w.
Background: Oh So Ombre DSP 5 1/4″ h x 4″ w with the Painted Texture Embossing Folder.
Decorative Layer Matte: Granny Apple Green Cardstock 5 1/4″ h x 1 3/4″ w.
Decorative Layer: Oh So Ombre DSP 5 1/4″ h x 1 1/2″ w.
Sentiment Matte: Granny Apple Green with the Tasteful Labels Dies.
Sentiment Layer: Whisper White Cardstock with the Tasteful Labels Dies.
Inside Layer: Whisper White Cardstock 5 1/4″ h x 4″ w.
- Affix all stamps to Acrylic Blocks.
- Fold the Card Base in half using a Bone Folder to sharpen the crease.
- Run the Background through the Stampin’ Cut & Emboss Machine with the Painted Texture Embossing Folder and attach to the Card Base with Stampin’ Seal.
- Use Stampin’ Seal to attach the Decorative Layer to the Decorative Matte and then attach to the Background.
- Die cut the Sentiment Matte and the Sentiment Layer.
- Stamp the Sentiment on the Sentiment Layer with Tuxedo Black Memento Ink and attach to the Sentiment Matte with Stampin’ Seal.
- Add the Sentiment Matte with Stampin’ Dimensionals.
- Decorate the Inside Layer and attach.
- Decorate the envelope.
- That was easy! Who will you send it to?
Shopping List
Recommended Stamper’s Toolkit ❤
Product List


