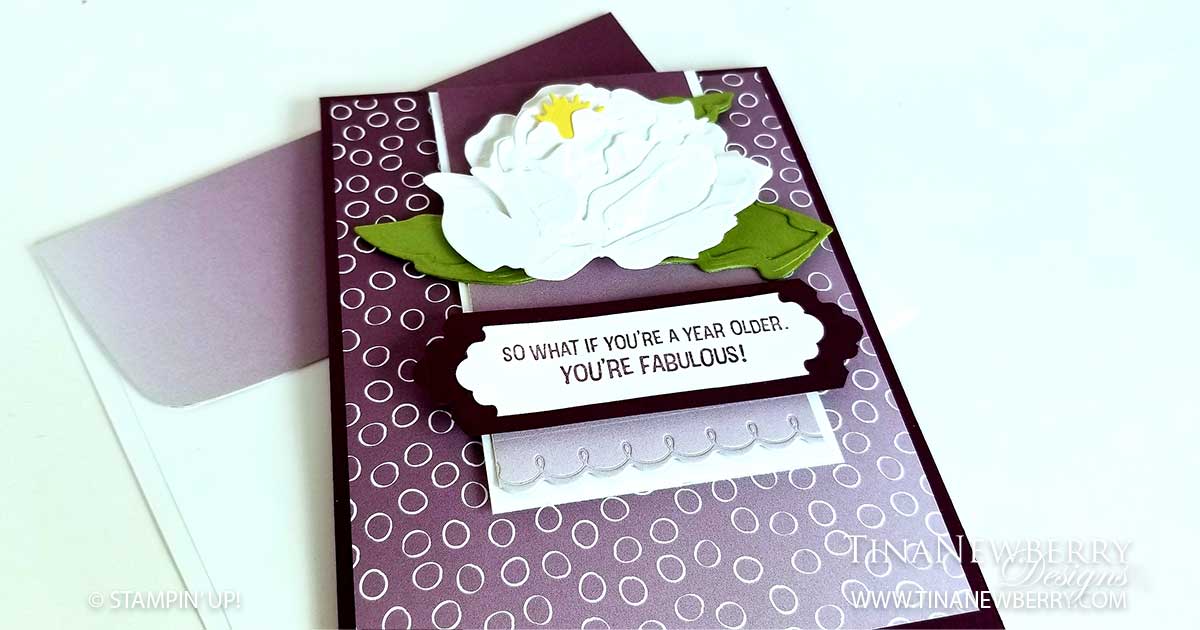
I’m on a roll making birthday cards these days. Somehow I am in short supply. I just love this sentiment from the FREE Approaching Perfection Sale-a-bration Stamp Set. For this pretty card I dug out the Peony Dies to make another beautiful 3-D flower for the focal point and then prettied up all around it with the Oh So Ombre Designer Series Paper, also FREE from the Sale-a-bration Catalog. The Lovely Labels Pick A Punch makes it quick and easy to make beautiful matted labels. Look closely, this card uses only Stamps, Ink and Paper for some #simplestamping.
Full list of supplies needed, listed below. A die cutting machine is needed for this card.
Card Base: Blackberry Bliss Cardstock 8 1/2 h” x 5 1/2″ w folded to 5 1/2″ h x 4 1/4″ w.
Background: Oh So Ombre DSP 5 1/4″ h x 4″ w
Decorative Layer Matte: Whisper White Cardstock 4″ h x 2 1/2″ w
Decorative Layer: Oh So Ombre DSP 3 7/8″ h x 2 3/8″ w
Sentiment Matte: Blackberry Bliss Cardstock 1″ h x 3 1/2″ w trimmed with the Lovely Labels Pick A Punch
Sentiment Layer: Whisper White Cardstock 3/4″ h x 2 3/4″ w trimmed with the Lovely Labels Pick A Punch
Inside Layer: Whisper White Cardstock 5 1/4″ h x 4″ w
- Affix all stamps to Acrylic Blocks.
- Fold the Card Base in half using a Bone Folder to sharpen the crease.
- Attach the Background Layer using Stampin’ Seal.
- Attach the Decorative Layer to the Decorative Layer Matte using Stampin’ Seal. Then attach to the Background using Stampin’ Dimensionals.
- Make the Peony
- Crinkle a piece of Whisper White Cardstock and then die cut the Peony.
- Die cut the leaves from Pear Pizzaz and the Pistil from Daffodil Delight.
- Assemble the Peony and secure with Mini Glue Dots.
- Attach the Pistil with a Mini Glue Dot.
- Assemble the Leaves and attach with Mini Glue Dots.
- Attach the Peony to the Decorative Layer with a Stampin’ Dimensional or a Mini Glue Dot.
- Stamp the Sentiment in Blackberry Bliss ink on Sentiment Layer and trim ends with the Lovely Labels Pick A Punch
- Attach Sentiment to the Sentiment Matte and add to card with Stampin Dimensionals
- Decorate the Inside Layer and attach.
- Decorate the envelope.
- Pretty! Put it in the mail!
Shopping List


Recommended Stamper’s Toolkit ❤
Product List


