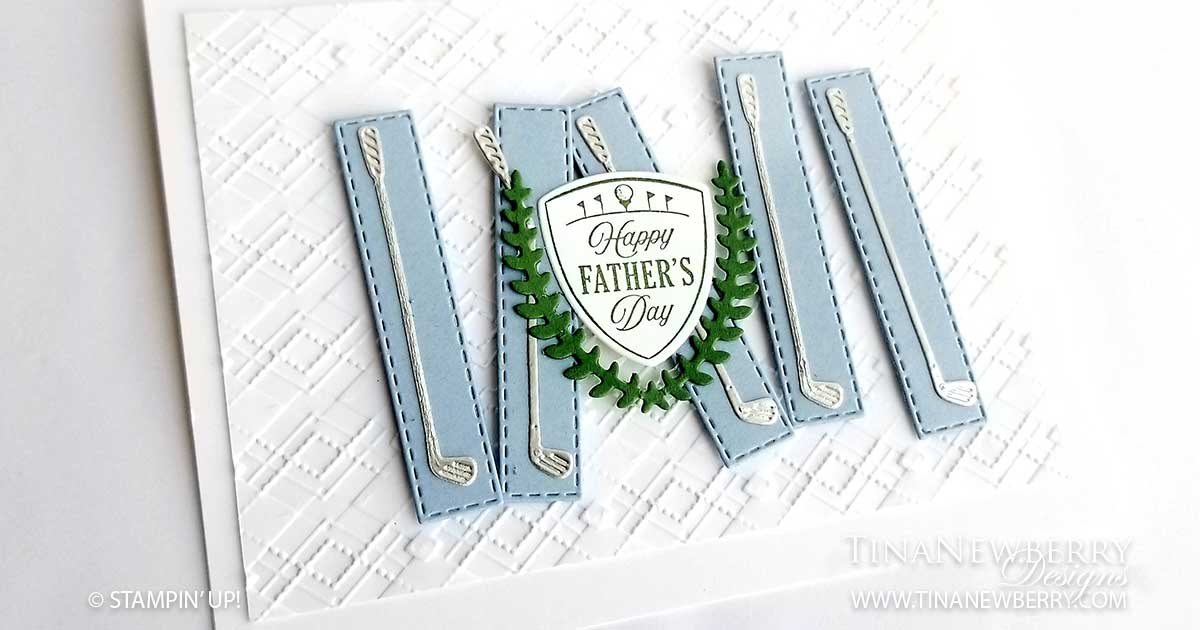
I know right? Father’s Day will be here before we know it. Don’t worry. My Dad is not on Facebook so chances are good he will not see this. LOL. This card is one of the reasons I bought the Country Club Suite. Isn’t this card divine? Su Mohr is the talented artist who designed this card. I copied it 100%. No worries! At Stampin’ Up! We CASE (copy and share everything.) Look at the putters in silver foil paper! And the Argyle Embossing Folder! What? When I saw it I knew I had to make it for my Dad. Can’t wait to send it to him.
The entire Country Club Suite is retiring. Be sure to order yours before June 2, 2020.
Cutting Dimensions
Full list of supplies needed, listed below.
Card Base: Whisper White Thick Cardstock 8 1/2 h” x 5 1/2″ w folded to 4 1/4″ w x 5 1/2″ h
Background: Whisper White 5″ h x 3 3/4″ w
Small Rectangles: Balmy Blue 1/2″ h x 2 1/2″ w Stitched Rectangles (5)
Instructions
- Fold the Card Base in half using a bone folder to sharpen the crease.
- Die Cut five putters out of Silver Foil Sheet
- Use Fine Tip Glue to adhere one Putter to each Small Rectangle
- Emboss the Background with the Argyle Embossing Folder
- Use Snail Adhesive to adhere the Argyle Background layer to the Card Base
- Use Dimensionals to adhere the Putters on Balmy Blue Small Rectangles to the Argyle Background Layer, as shown.
- Affix the Father’s Day Stamp to the Acrylic Block
- Apply Garden Green Ink to the Stamp and stamp the Sentiment on Whisper White Cardstock.
- Die cut the Happy Father’s Day Badge.
- Die cut the Greenery die from Garden Green Cardstock
- Use Snail Adhesive to adhere the Sentiment Badge and the Greenery Die Cut to the Putters.
- That’s it. Time to send it to the important man in your life!
Product List


Recommended Stamper’s Tool Kit


