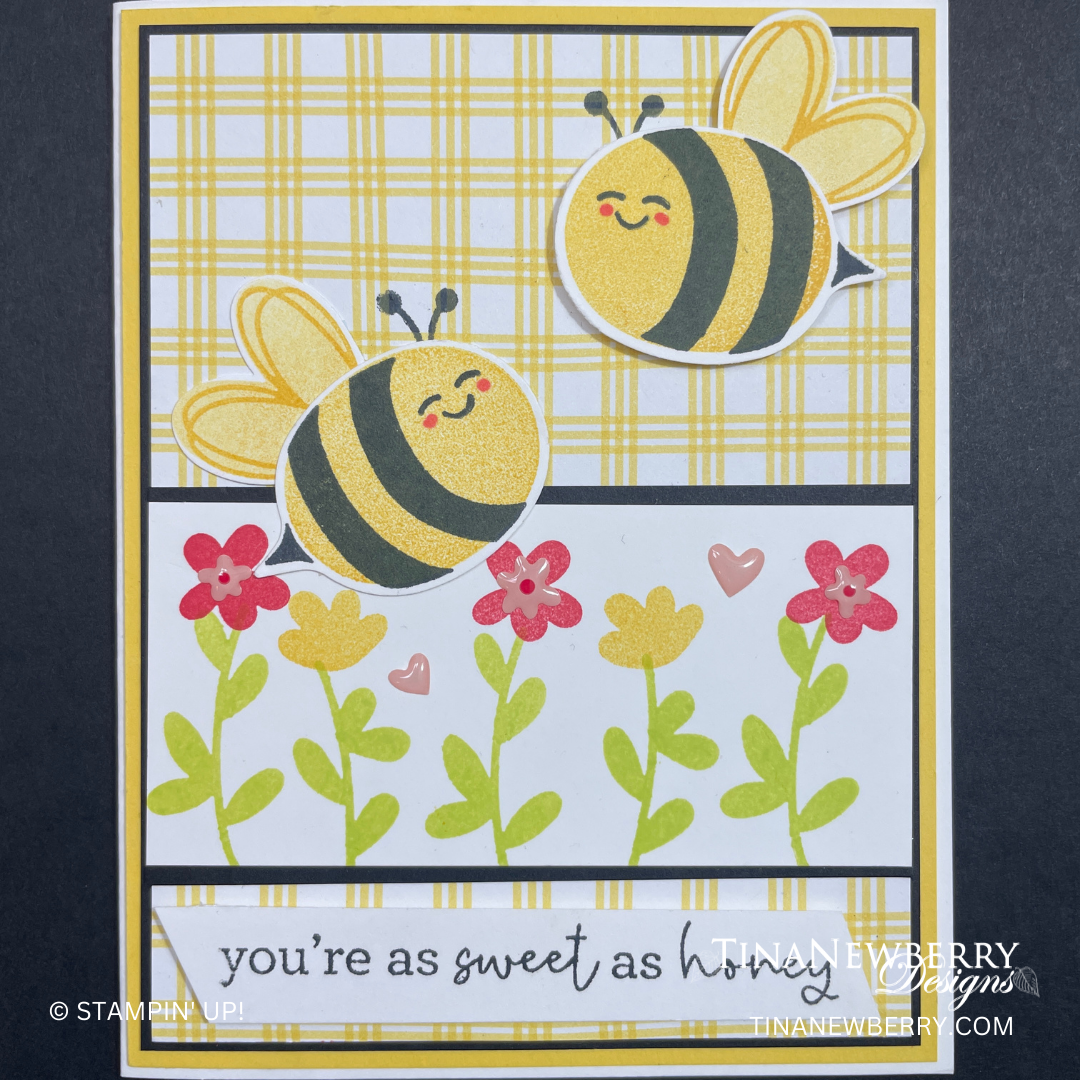
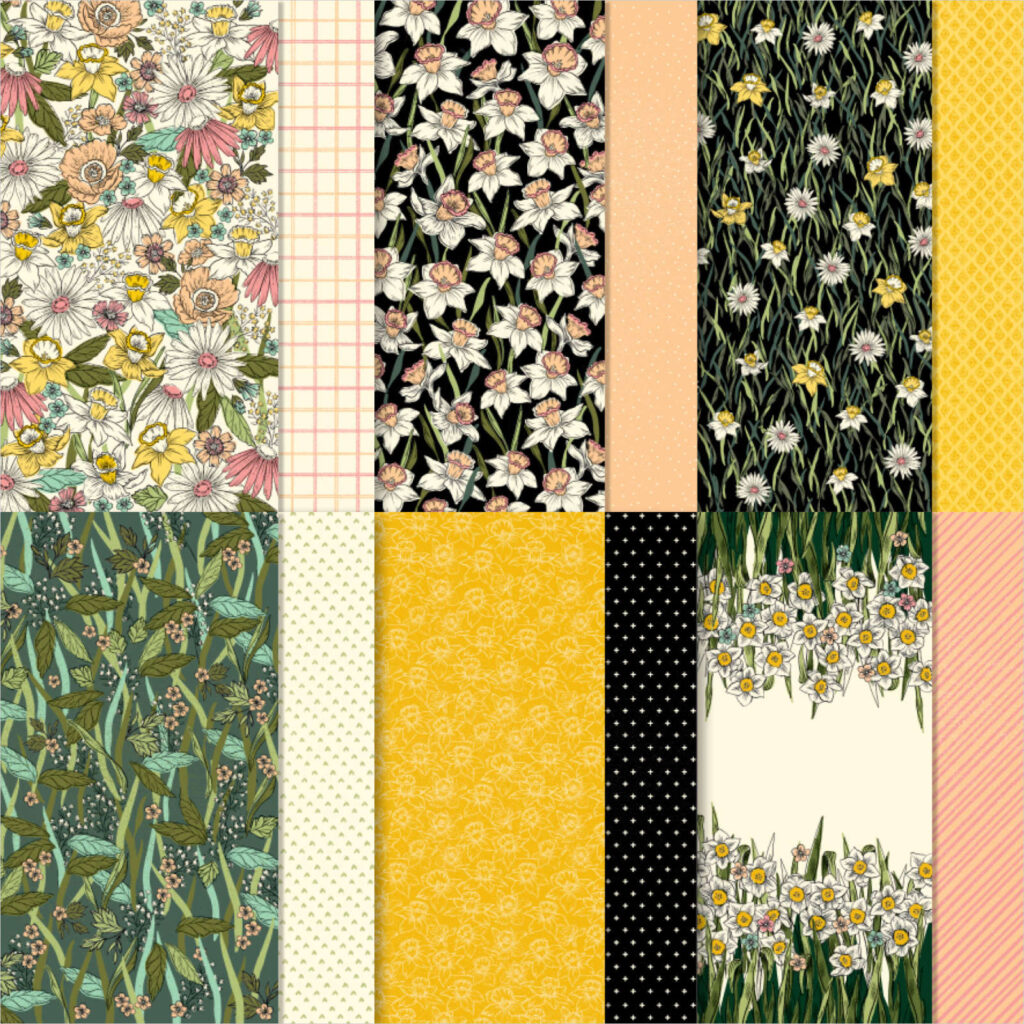
Check out the yellow plaid paper with those happy little bees! This whole card reminds me of a certain mouse that lives in Orlando. LOL. I could see this design with the Hello Lady Bug, Little Monkey, Little Dreamers, or the Rhino Ready stamp sets.
Measurements
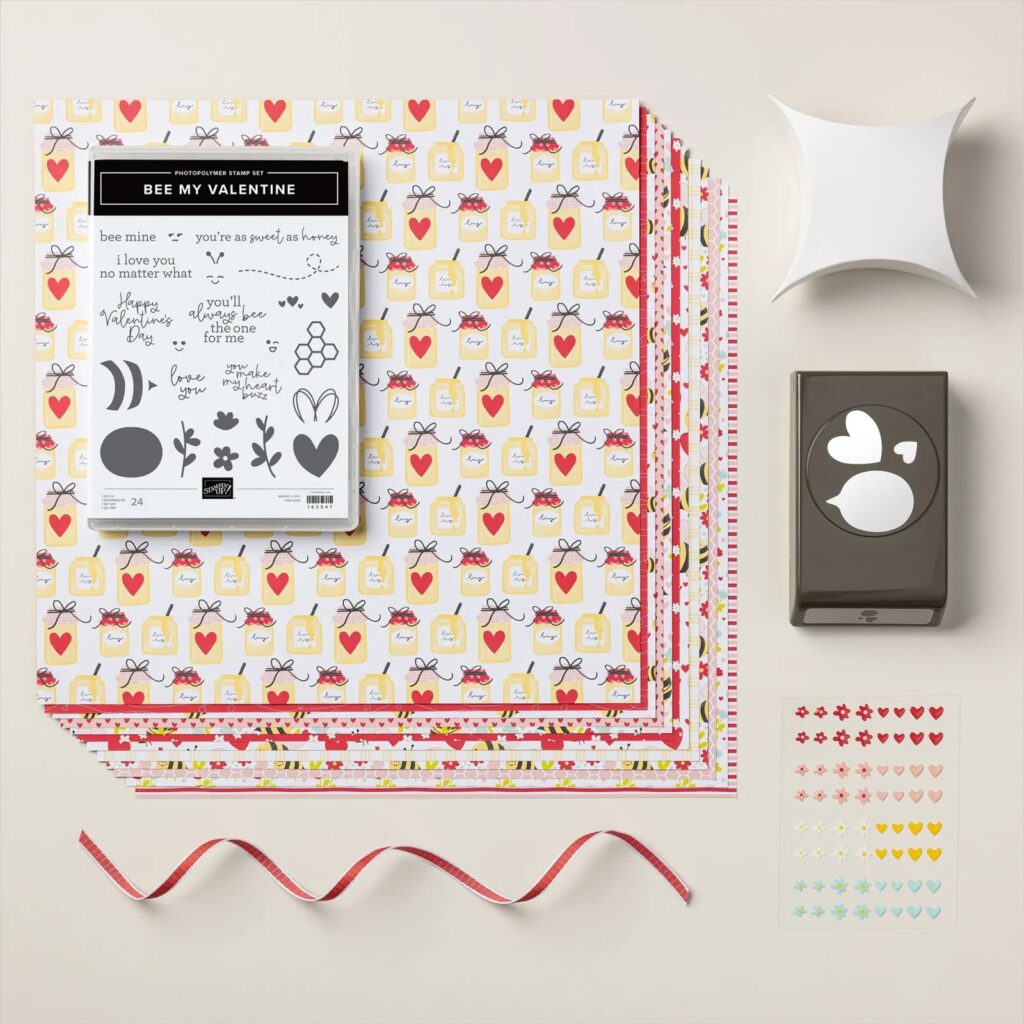
Full list of supplies needed, listed below. A die cutting machine is needed for this card.
Basic White
- 5 ½” x 8 ½” scored and folded on the long-side at 4 ¼”
- 3 ¾” x 1 ⅞”
- 3 ¾” x ⅝”
- 2 ¾” x 5” (for stamping & punching bees and wings)
Daffodil Delight
- 5 ⅜” x 4 ⅛”
Basic Black
- 5 ⅛” x 3 ⅞”
- 3 ¾” x 2”
Bee Mine Designer Series Paper
- 5” x 3 ¾” – Yellow plaid print
Let’s Create
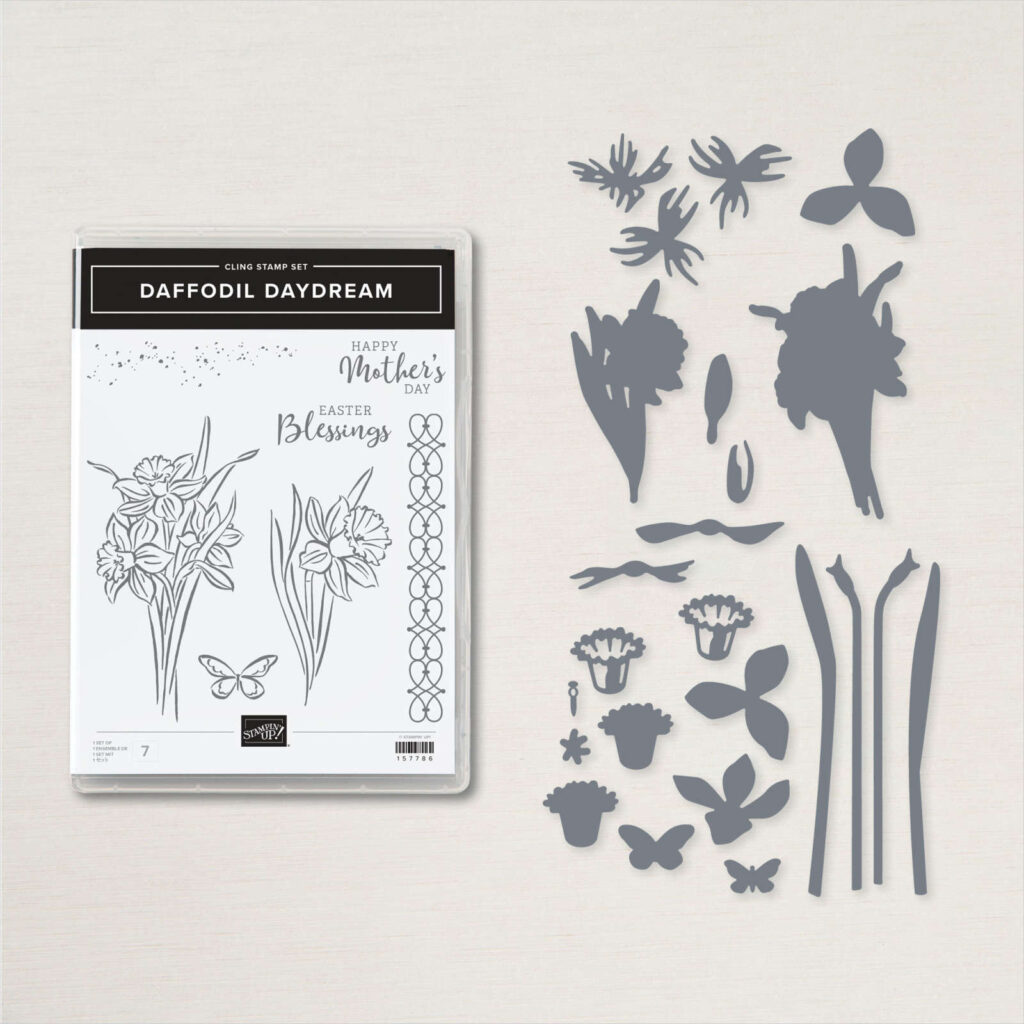
- Affix all stamps to Acrylic Blocks.
- Fold the Card Base in half using a Bone Folder to sharpen the crease.
- On the 3 ¾” x 1 ⅞” Basic White Cardstock, stamp flower stems (use both stem stamps, alternating) using Lemon Lime Twist ink pad.
- On the taller stems, stamp the 4 petal flower using Sweet Sorbet ink pad. One the shorter stems, stam the 4 petal flower using Daffodil Delight ink pad.
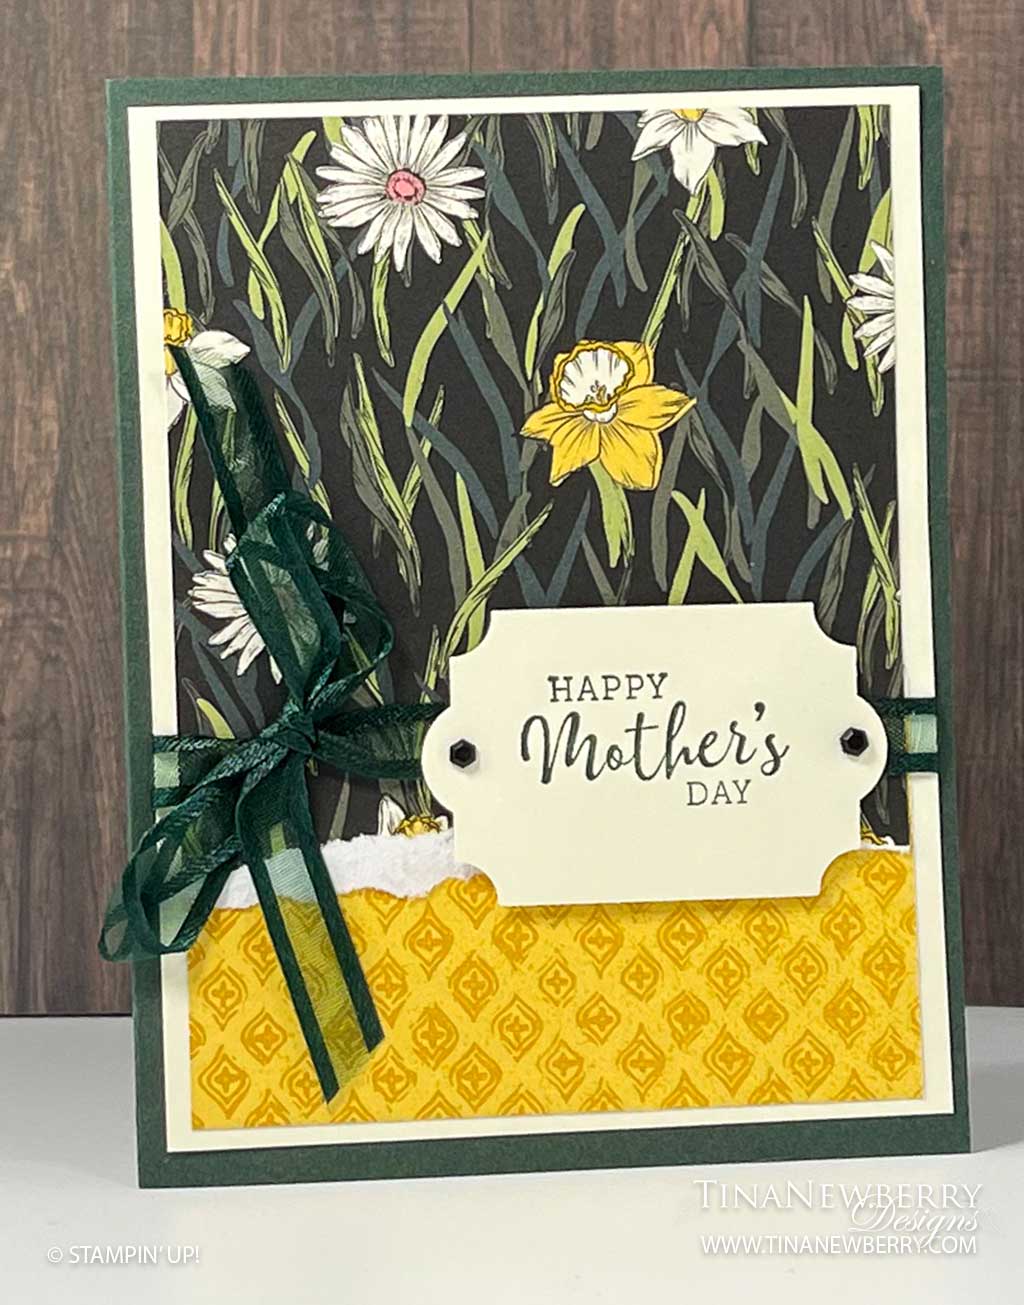
- On the 3 ¾” x ⅝” Basic White cardstock, stamp the sentiment using Black Memento ink pad. Trim each of the ends at an angle.
- On 5” x 2 ¾” Basic White cardstock, stamp 2 Bees using Black Memento and Daffodil Delight ink pads. I found that stamping the black strips first made it easier to line up the Daffodil Delight Body. Stamp the face in Black Memento ink. Be sure to make the bees facing opposite directions. When stamping the face, one of the bees will be facing the other way. Using a Sweet Sorbet light Stampin’ Blend, put small dots for the cheeks on the bee. Stamp 2 sets of wings using Daffodil Delight. The outline of the wings is straight ink, the inside part is using the same color stamped off once, Again, stamping the darker first makes it easier to line up the Daffodil Delight inside of wings (heart). Punch out all of the bee pieces using the Bee Builder Punch.
- Assembling the Card: Adhere the wings to the top of each bee.
- Adhere the stamped Basic White panel to the Basic Black cardstock that measures 3 ¾” x 2”
- Adhere the Daffodil Delight Designer Series Paper to the 5 ⅛” x 3 ⅞” Basic Black cardstock.
- Adhere these layers to the Daffodil Delight Panel.
- Using Stampin’ Dimensionals, adhere the sentiment to the lower edge of the Designer Series Paper. Just above the sentiment, adhere the stamped Basic White layers.
- Position the bees where they fit the best – do not tape down quite yet – This will give you an idea where to stamp the antennae for each bee using Black Memento ink.
- Adhere the bees to the card, the lower bee is taped flat, the bee towards the top right is adhered using Stampin’ Dimensionals.
- Place a Petal Pink adhesive-backed flower from the Adhesive-Backed “Hearts & Flowers” in the center of each of the Sweet Sorbet flowers. Position a couple of Petal Pink hearts among the flowers.
- Be sure to decorate the inside of the card and the envelope before sending it off to a sweet friend.
")
$38.50

$10.50

$10.00

$10.00
 Designer Series Paper")
$12.50

$6.50

$9.00

$9.00

$10.00

$8.00

$4.25
Recommended Stamper’s Toolkit ❤
Product List
$12.00

$7.00
$4.25

$5.75

$5.50

$11.00

$26.00

$7.00

$6.50

$11.00

$20.00

$11.00

$80.75

$128.00

$16.00

$13.00


")

 Designer Series Paper")


 Iridescent Trim")


 Designer Series Paper")

 Open Weave Ribbon")


")


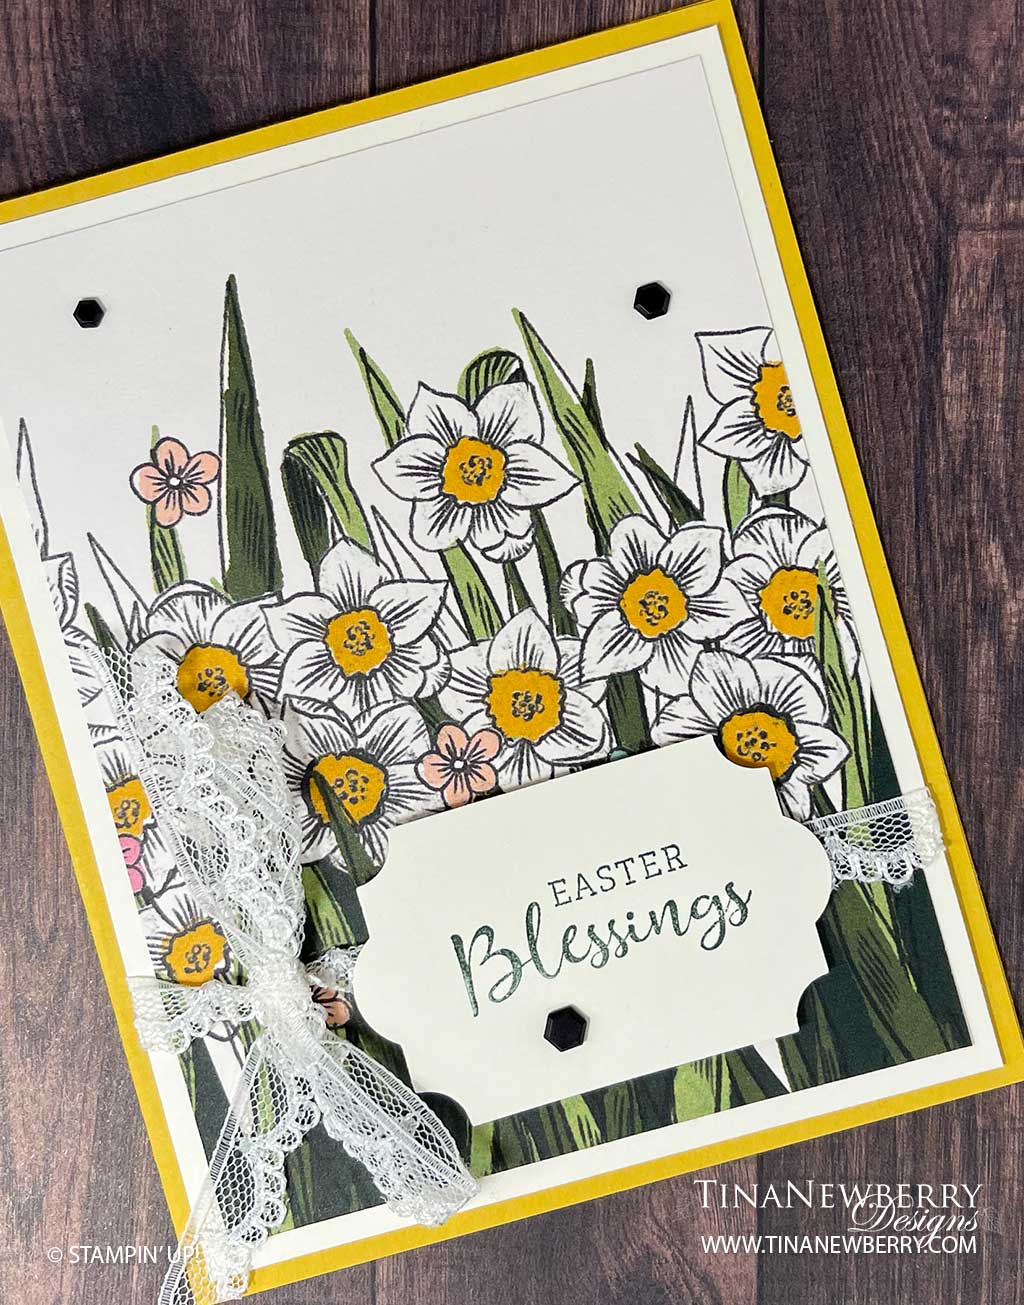

 Scalloped Lace Trim")