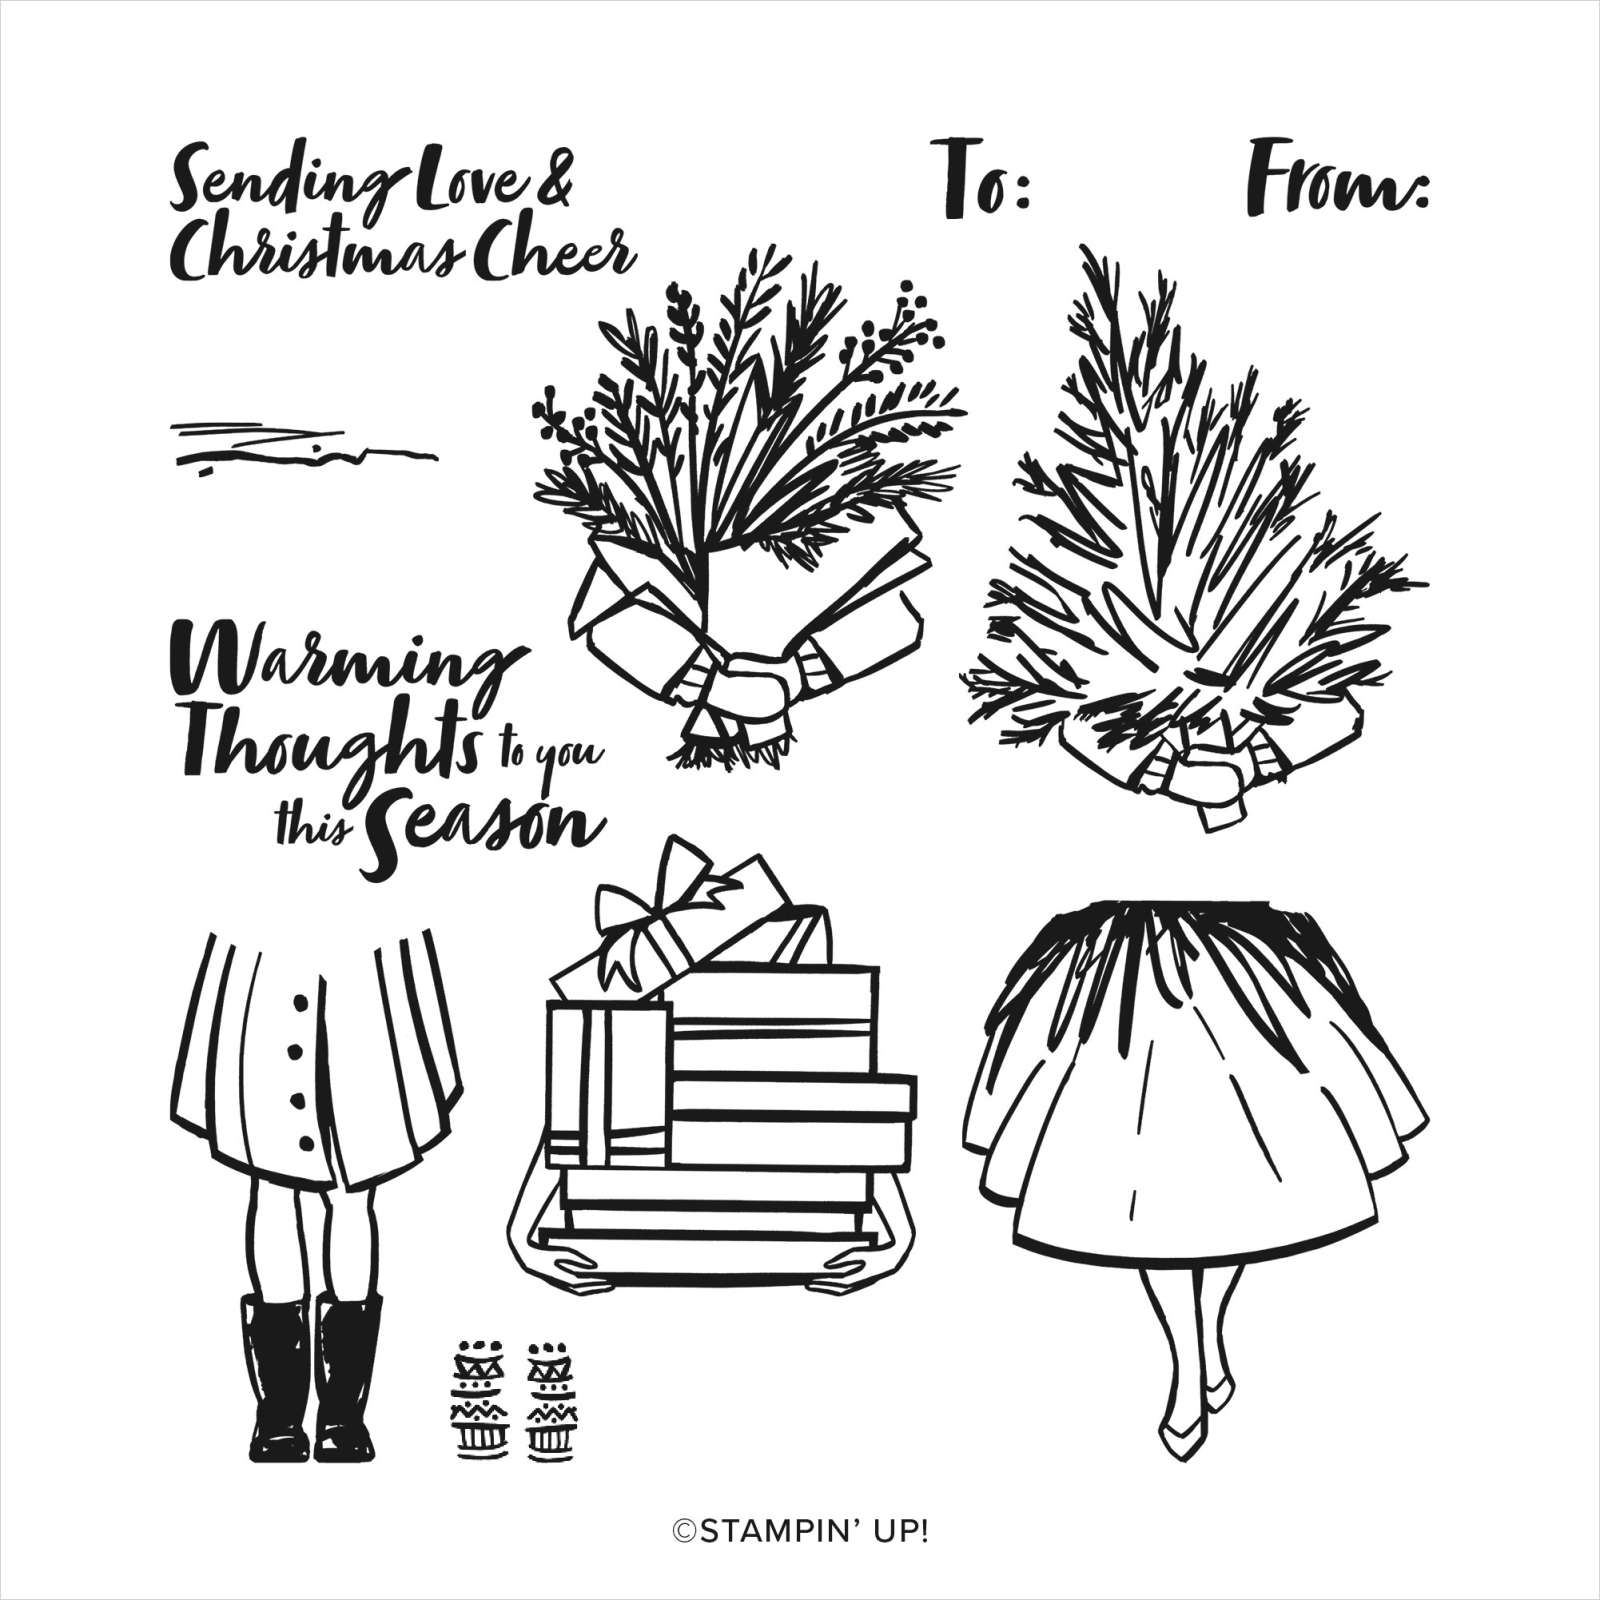
Bring your imagination to life, first when you select the package being delivered and again when you set to coloring the girl. Coloring is an increasingly popular activity known for being relaxing and this stamp set sets you up for a good coloring session in the middle of your papercrafty time. Enjoy!
Measurements
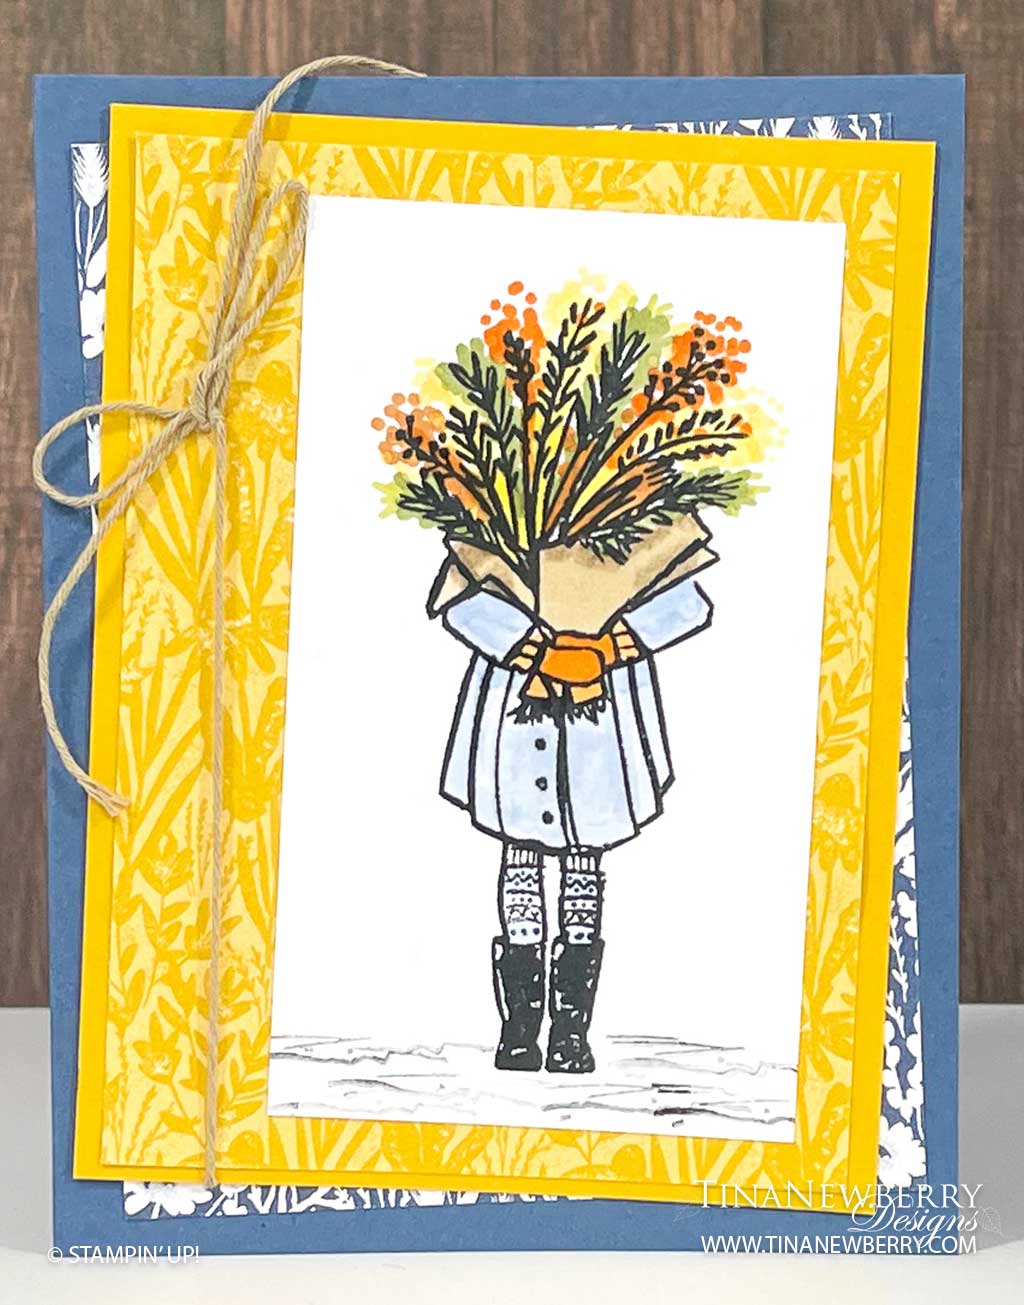
Misty Moonlight Card Base 8 ½” x 5 ½”, scored at 4 ¼”
Basic White
Inside Layer: 5 1/4″ h x 4″ w
Panel Basic White 2 ½” x 4 ¼”
Harvest Meadow Designer Series Paper
Misty Moonlight layer 3 ¾” x 5”
Bumblebee layer 3 ½” x 4 ¾”
Coordinating Scrap 3” x 6 (for envelope)
Cardstock Layer Bumblebee 3 ¾” x 5”
Let’s Create
- Adhere all stamps to acrylic blocks.
- Stamp top half of girl in Memento Black on Basic White panel
- Align and stamp bottom half of girl in Memento Black
- Stamp off once, and stamp the ground lightly underneath the girls boots in Memento Black
- Use Blends and Color Lifter to color the image:
- Boots are done in Basic Black light
- Leggings are done in Balmy Blue light on every other stripe
- Coat is done in Balmy Blue light, and lightened with the Color Lifter
- Gloves are done in Pumpkin Pie dark
- Cuffs and scarf are done in Pumpkin Pie light
- Flower wrapping is done in Crumb Cake light (using dark for just the shadows)
- Bouquet is done in Pumpkin Pie, Bumblebee, Daffodil Delight, Old Olive, CInnamon Cider and Crumb Cake. CREATIVE TIP: Use short pen strokes to achieve a look of long needles. Use a dot motion to achieve a “spray” look
- Stamp bottom right corner of inside layer and color.
- Adhere the Misty Moonlight DSP on an angle tilted to the left.
- Adhere Bumblebee DSP to Bumblebee Cardstock.
- Wrap Crumb Cake twine around this layer and tie in a bow.
- Then adhere this panel to the card front on an angle tilted to the right.
- Adhere colored image to card front with liquid glue.
- Adhere decorated inside layer.
- Cut a piece of scrap Designer Series Paper to 3” x 6”. Adhere to back flap of envelope and follow around the edge of the envelope with snips to trim the paper into shape.
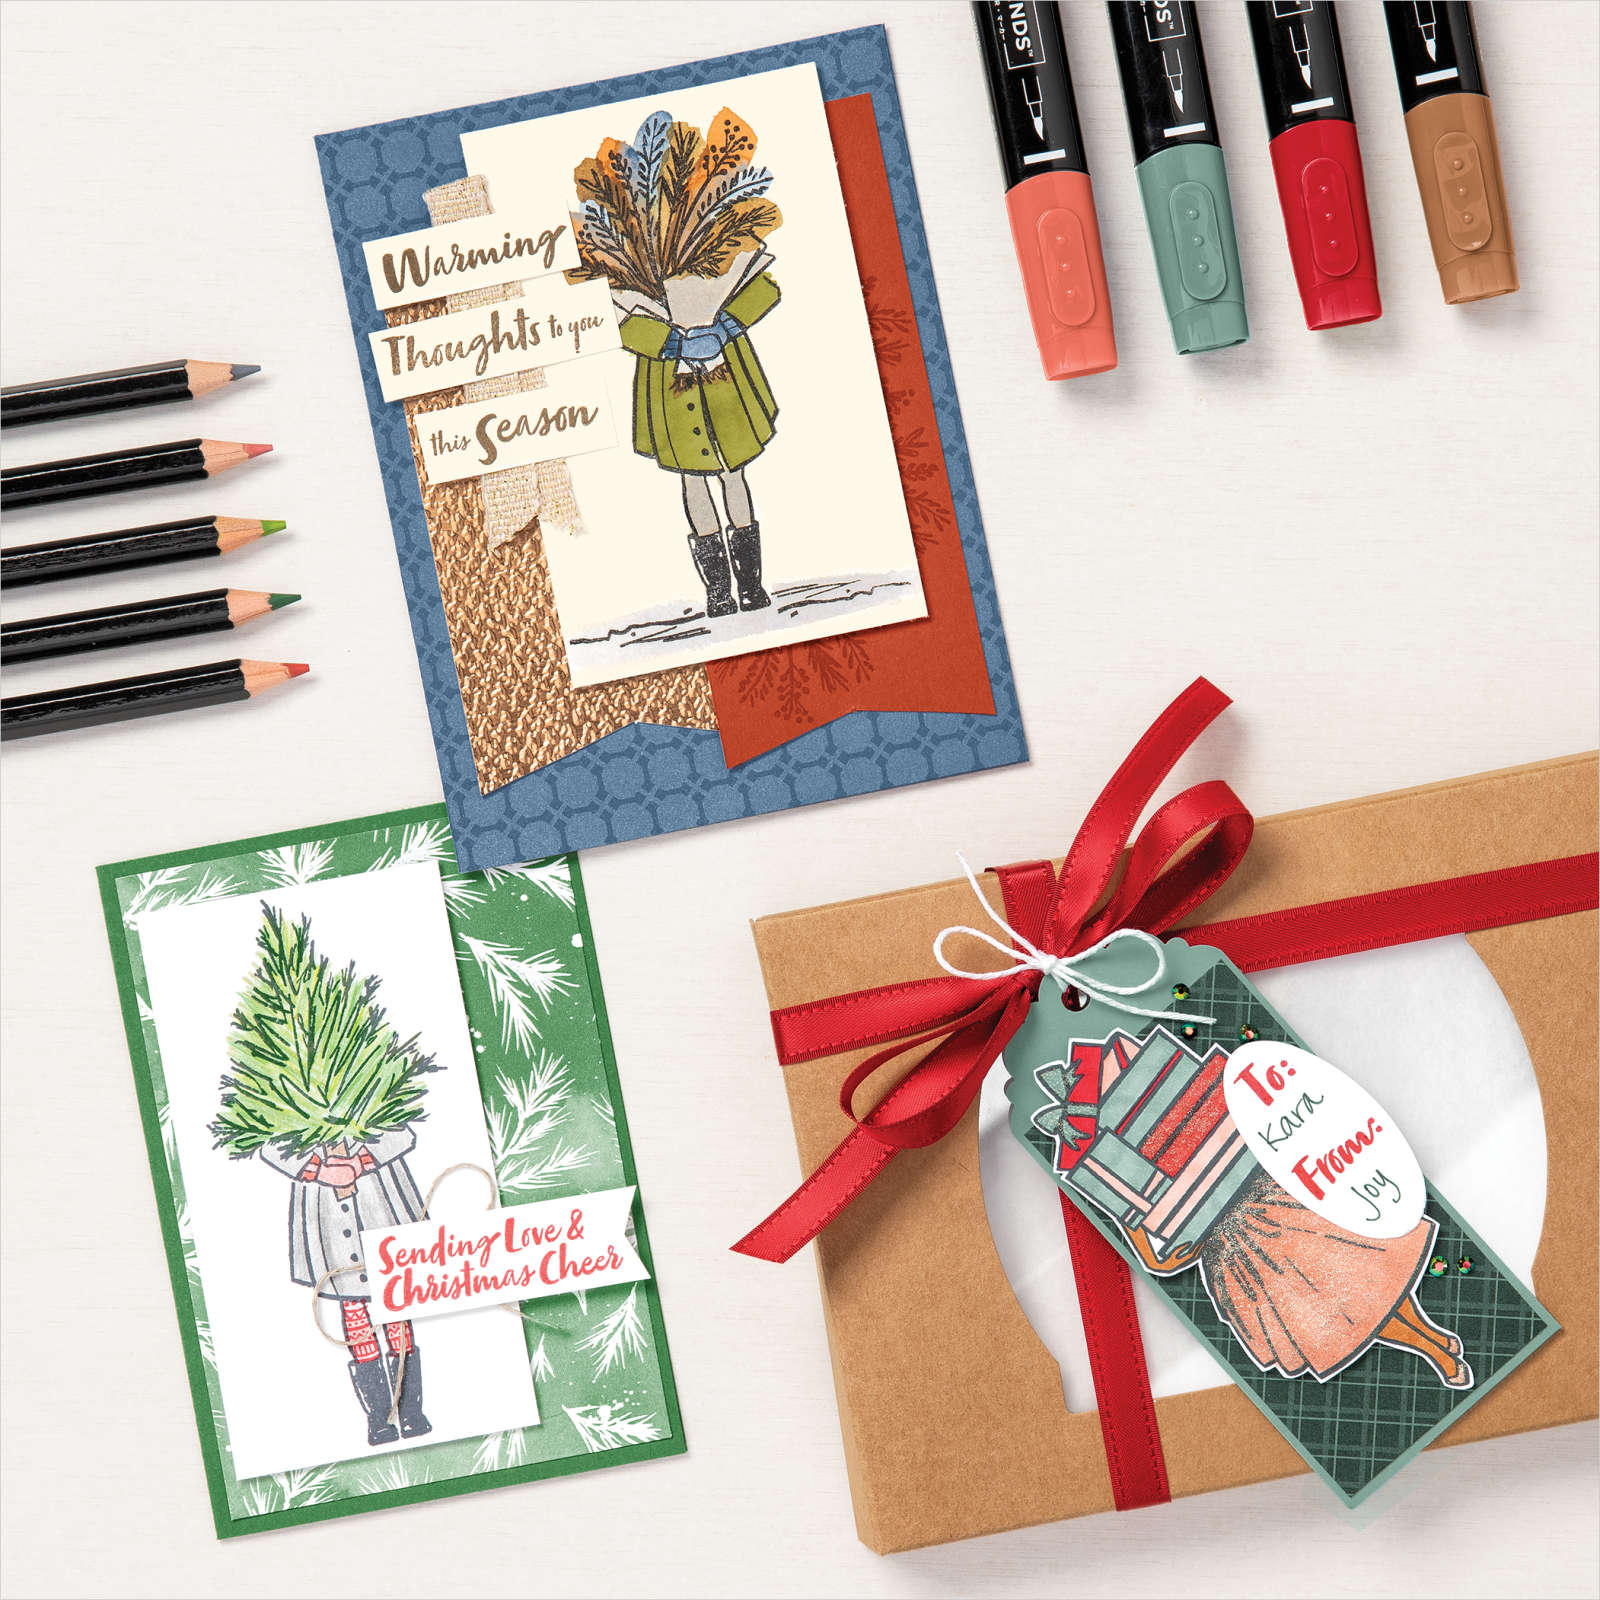
- So cute! Who will you send it to?
Shopping List

 Designer Series Paper")


Stamper’s Toolkit
You will also need adhesive, acrylic blocks, scissors and other basic PaperCrafting items from the Stamper’s Toolkit

$8.00

$12.00

$4.00


$5.25

$7.00

$4.00

$7.00

$10.00

$8.00

$8.00
$10.00
$25.00
$7.00

$6.00

$10.00

$8.00

$5.00

$5.00

$6.00

$71.50

$8.00

$11.75
")
$30.00

$9.50


$120.00