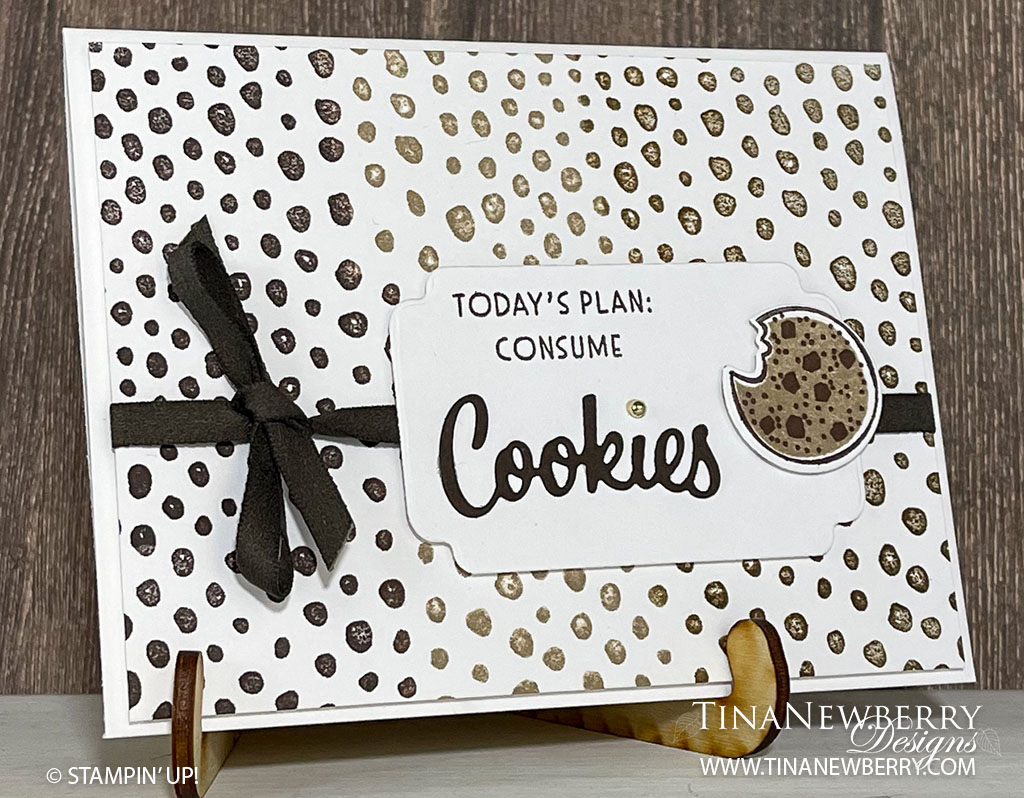
Cookie! Cookie! Cookie! Check out this cute chocolate chip card with a goal I can totally get behind. LOL.


Measurements
Full list of supplies needed, listed below. A die cutting machine is needed for this card.
Basic White Thick Cardstock: 5 1/2″ h x 8 1/2″ w folded to 5 1/2″ h x 4 1/4″ w
Basic White Cardstock:
- 5 1/4″ h x 4″ w
- scrap for sentiment tag
- scrap for cookie
Early Espresso Cardstock: scrap for Cookies die cut
Let’s Create
- Affix all stamps to Acrylic Blocks.
- Fold the Card Base in half using a Bone Folder to sharpen the crease.
- Create the Background Layer
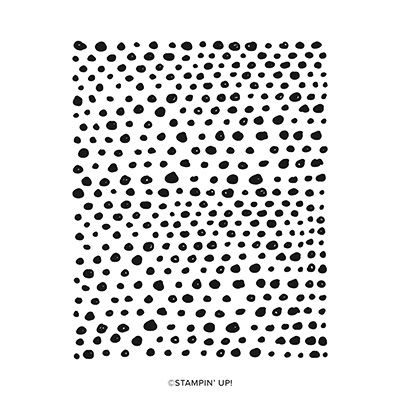
- Lay Hand-Drawn Dots background stamp on the table- stamp-side up.
- Use lightest ink pad (Crumb Cake) to ink up center of stamp.
- Use Early Espresso to ink up left side of stamp.
- Use Soft Suede to ink up right side of stamp.
- Press 5 1/4″ h x 4″ w Basic White layer on top of stamp and burnish well.
- Attach an adhesive sheet to the back of the Early Espresso Cardstock and die-cut “Cookies”
- Die-Cut Tag from Basic White.
- Stamp sentiment on tag in Early Espresso.
- Remove backing from adhere “Cookies” sentiment and attach to sentiment label.
- Cut 24” Early Espresso Ribbon. Wrap it around 5 1/4″ h x 4″ w Basic White layer and tie a bow on the left.
- Adhere 5 1/4″ h x 4″ w Basic White layer to the card front with Stampin’ Dimensionals.
- Adhere sentiment label with Stampin’ Dimensionals.
- Stamp cookie in Crumb Cake on scrap basic White, and stamp chips in Early Espresso. Die-Cut cookie, and adhere to label with Stampin’ Dimensionals.
- Add a little gold gem to do the “i” in the die cut Cookie.
- Stamp and decorate the inside.
- Decorate your envelope.
- Yummy!!!! Who will love this card? Send it today.
Shopping List
This project also uses the Hand-Drawn Dots Background Stamp (#160508) available Jan. 5, 2023 in the January to April Mini Catalog
")


 Faux Suede Trim")

$7.00

$11.00

$30.00
Recommended Stamper’s Toolkit ❤
Product List
$12.00

$7.00

$4.25

$5.75

$5.50

$11.00

$26.00

$7.00

$6.50

$11.00

$20.00

$11.00

$80.75

$128.00


$16.00

$13.00


