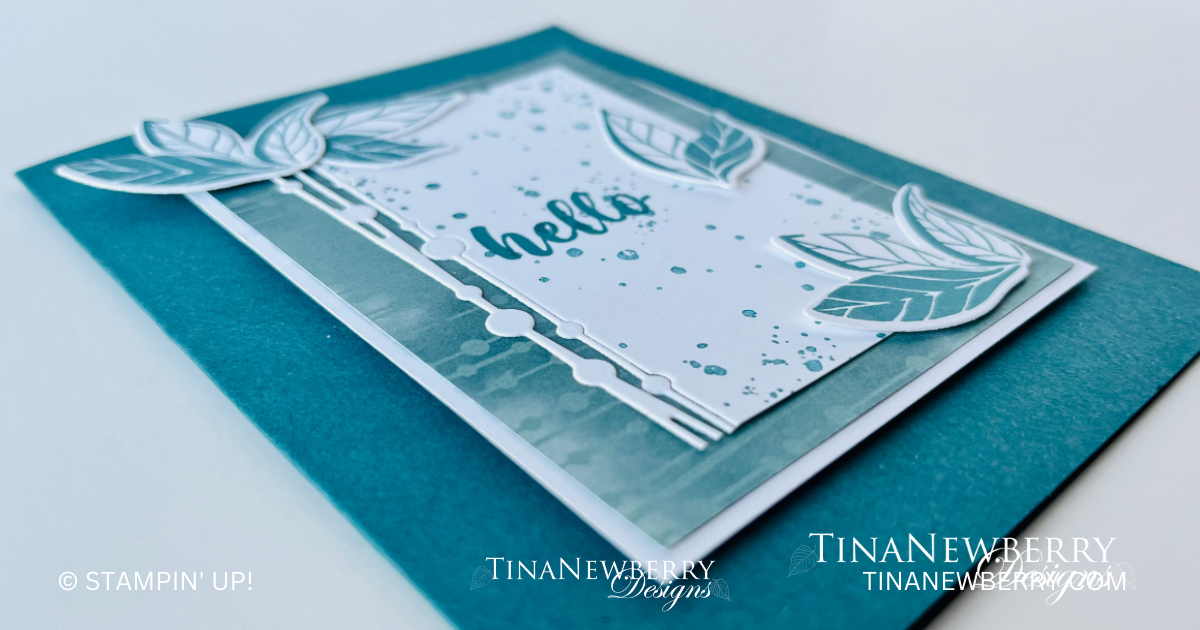
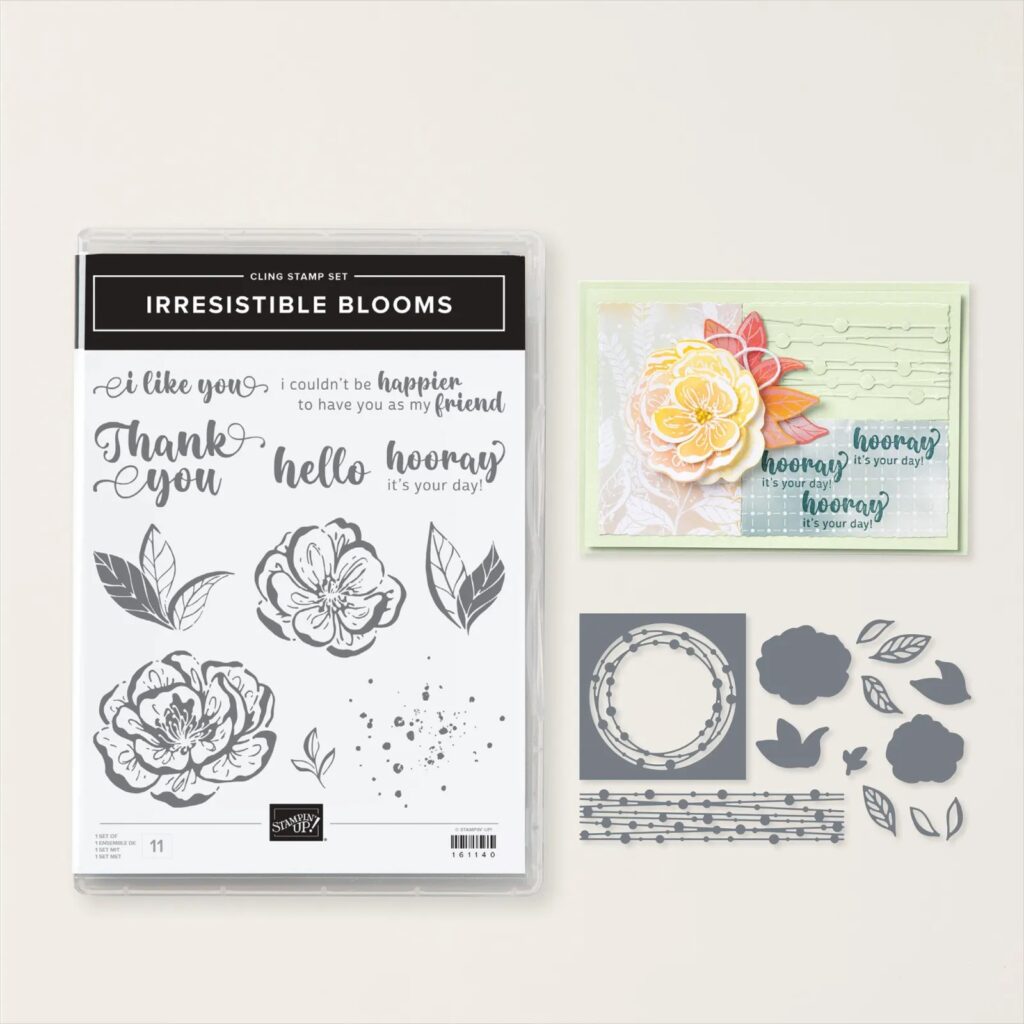
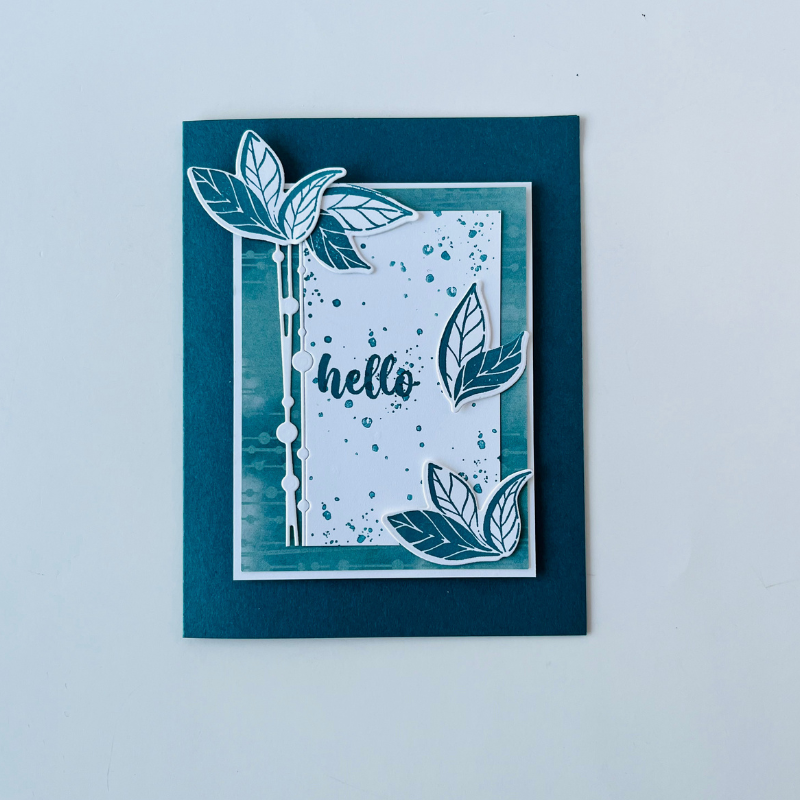
Use the coordinating dies to create a focal image of dotted strands and leaves stamped in a matching color for this simple stamping quick & easy card.
Measurements
Full list of supplies needed, listed below. A die cutting machine is needed for this card.
Card base – Pretty Peacock:
- 5 ½” x 8 ½” scored at 4 ¼”
- Scraps for stamping and die cutting
Basic White Cardstock
- 3 ¼” x 4 ¼”
- 3 ½” x 3 ½”
- 5 1/4″ h x 4″ w (for inside)
- Scraps for stamping and die cutting
Hello Irresistible Designer Series Paper- Lost Lagoon with dot lines: 3” x 4”
Let’s Create
- Affix all stamps to acrylic blocks.
- Fold and burnish card base at the score line using Bone Folder.
- Attach the Designer Series Paper (DSP) to the 3 ¼” x 4 ¼” Basic White cardstock with Stampin’ Seal.
- Use the dot strip die to die cut the side of the 3 ½” x 3 ½” piece of Basic White cardstock. Save both pieces.
- Take the dot strip and cut it so there are 3 strips that match the piece of White you cut it from. See photo above.
- Using the other piece of White that is solid, cut off the right side to the panel measures 2 1/8”.
- With Pretty Peacock ink, use a the Stamp Off technique to add dots all over the panel. See photo above.
- Stamp the sentiment in the center of the left side of the panel from Step 7. See photo above.
- Use Stampin Seal to attach the panel from Step 8 to the DSP panel from Step 3 so it is about ¼” from the right side and centered top and bottom.
- Add the dot strips from Step 5 using Mutlipurpose Glue so the dots fit into the spaces for the dots. See photo above.
- Add the panel from Step 10 to the card front using Stampin’ Dimensionals centering it on all sides.
- Use the 2 leaf stamps and Pretty Peacock ink to stamp 2 of each leaf on Basic White scrap. Use the coordinating die to cut them out.
- Add 1 of the double leaf images at the top left corner so the leaves point to the right, using Multipurpose Glue. Use a Min Glue Dot to add 1 on the triple leaf images so it overlaps the double leaf and the leaves are pointing up. See photo above.
- With a Mini Glue Dot add the other triple leaf images in the lower right hand corner for the White panel. See photo above.
- Add the last double leaf image to the center of the right hand side of the White panel with a Mini Glue Dot. See photo above.
- Use the dot stamp and triple leaf to stamp and decorate the 5 1/4″ h x 4″ w for the inside of the card and envelope.
Shopping List
")


 Designer Series Paper")
Recommended Stamper’s Toolkit ❤
Product List
$12.00

$7.00

$4.25

$5.75

$5.50

$11.00

$26.00

$7.00

$6.50

$11.00

$20.00

$11.00

$80.75

$128.00


$16.00

$13.00


