Joy! Shouldn’t we all be striving for joy? Joy for ourselves. Joy for others. This simple, stunning card made me think of Joy in the Morning, a beautiful worship song by Tauren Wells. Here’s the first verse:
Everything happens for a reason, but you don’t know what you don’t know
And you’ll never have peace if you don’t let go of tomorrow
‘Cause it ain’t even faith till your plan falls apart but you still choose to follow, uh
If it doesn’t make sense right now, it will when it’s over
[Chorus]
There will be joy in the morning
There will be joy in the morning

Measurements
Full list of supplies needed, listed below. A die cutting machine is needed for this card.
Card Base – Lost Lagoon Cardstock: 5 ½” x 8 ½, scored at 4 ¼”
Basic White Cardstock:
- 4” x 5 ¼”
- Scrap for stamping and die cutting
Snowflake Magic – White and silver Pattern and Blue foil snowflake pattern: Scrap for die cutting
Let’s Create
- Affix all stamps to acrylic blocks.
- Fold and burnish card base using bone folder. Stamp snowflake from Season of Chic randomly on the card front using Lost Lagoon ink
- Take the largest hexagon shape from the Nested Essentials dies and cut out from the White and silver dsp.
- Take the second smallest hexagon shape from the Nested Essentials dies and cut out from the blue foil dsp.
- Layer the 2 shapes from Step 3 and 4 using glue.
- Attach the shape from Step 5 to the card front using glue making sure to center it on all sides.
- Die cut the large snowflake from the dies with White.
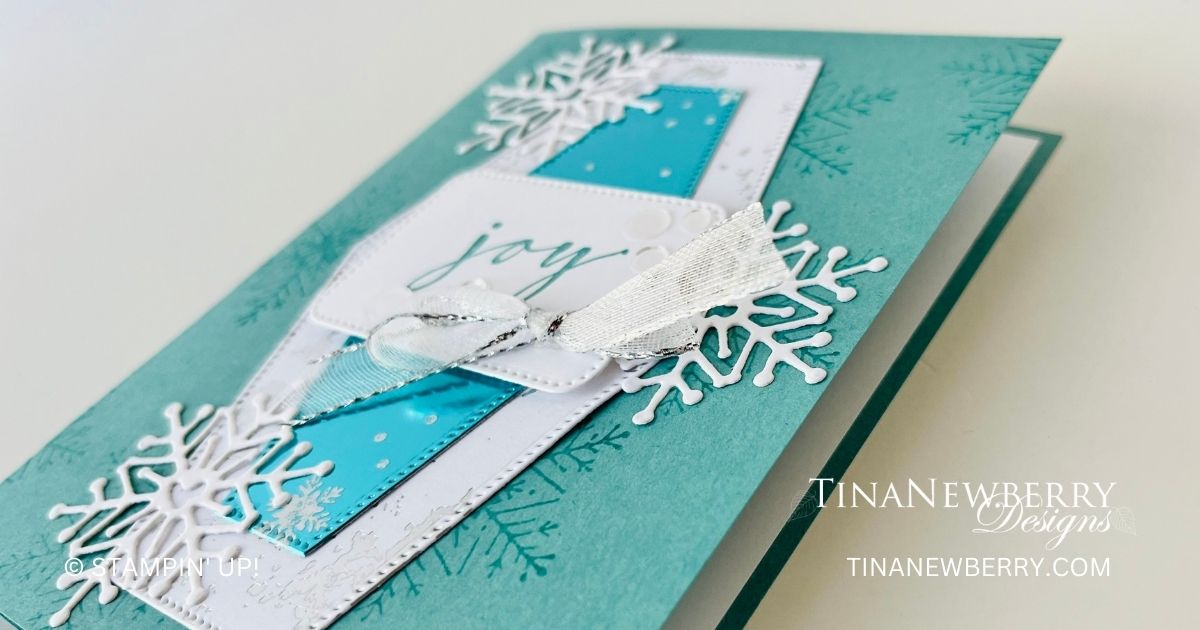
- Glue the snowflakes to the card front randomly. See photo above for placement.
- Stamp the sentiment from Brightest Glow stamp set using Lost Lagoon ink on a scrap of White. Die cut using the smallest rectangle from Nested Essentials dies.
- Add the sentiment layer to the middle of the card front centering it on all sides using dimensionals.
- Tie a bow using the White and Silver ribbon and add to the lower right hand corner of the sentiment.
- Add the sentiment to the card front using dimensionals making sure to center on the hexagon shape.
- Use glue to sprinkle some Loose Silver sequins on the sentiment panel.
- Stamp the large snowflake from the Season of Chic stamp set randomly on the 4” x 5 ¼” white panel using Lost Lagoon ink. Glue to the inside of card.
- Randomly stamp the snowflake on the left side of the envelope using Lost Lagoon ink.
- So joyful! Now send it to someone special.
Shopping List
Recommended Stamper’s Toolkit ❤
Product List


