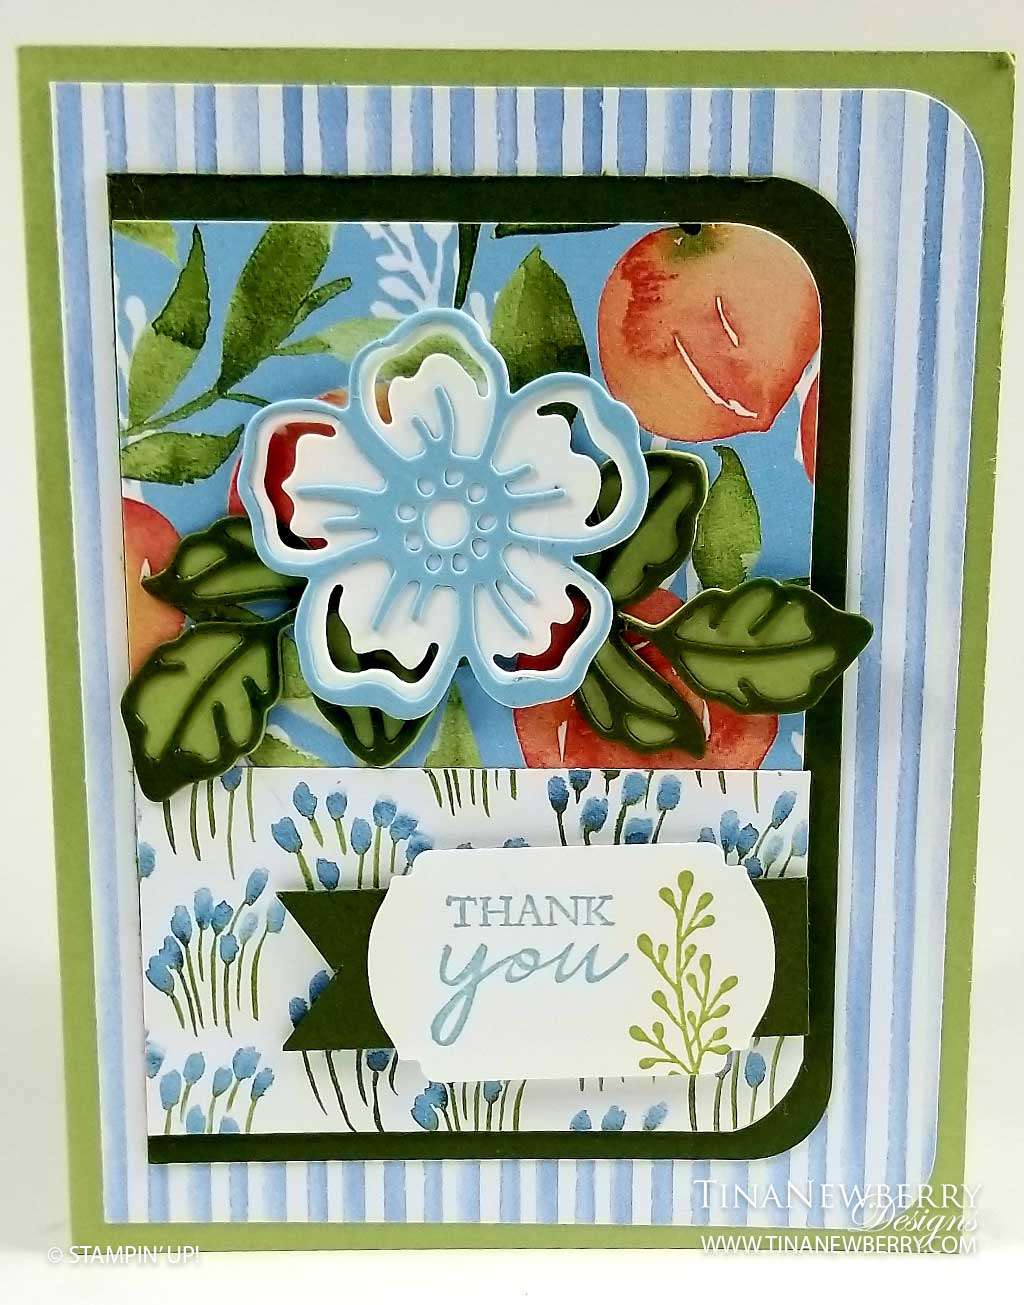
I have been seeing these layered die cut flowers for quite some time now in different sets and have been inspired by all the combinations. This is my first time working with them and I sure did have some fun! The You’re a Peach Designer Series Paper and Summer Shadows die cut flower do all the work on this pretty thank you card!

Measurements
Full list of supplies needed, listed below. A die cutting machine is needed for this card.
Card Base: Pear Pizzaz Cardstock 5 1/2″ h x 8 1/2″ w scored and folded to 5 1/2″ h x 4 1/4″ w
Striped Background: You’re a Peach Designer Series Paper 5 1/4″ h x 4″ w
Focal Matte: Old Olive Cardstock 4 1/2″ h x 3 1/4″ w
Focal Top Pattern: You’re a Peach Designer Series Paper 2 1/2″ h x 3″ w
Focal Bottom Pattern: You’re a Peach Designer Series Paper 1 1/2″ h x 3″ w
Banner: Old Olive Cardstock 3/4″ h x 2 1/2″ w
Sentiment Layer: Basic White Cardstock scrap punched with Label Me Fancy Punch
Die Cut Flower & Leaves: Basic White, Balmy Blue, Old Olive, Pear Pizzazz Cardstock scraps
Inside (optional): 5 1/4″ h x 4″ w Basic White Cardstock
Let’s Create
- Affix all stamps to Acrylic Blocks.
- Fold the Card Base in half using a Bone Folder to sharpen the crease.
- Use the Detailed Trio Punch to round the right-side corners of the Striped Background, Focal Matte, Focal Top Pattern, and Focal Bottom Pattern layers, then use Stampin’ Seal to attach each of these layers as shown.
- Stamp the Sentiment in Balmy Blue and the Branch in Pear Pizzazz ink in on Basic White Cardstock scrap and punch with the Label Me Fancy Punch.
- Use Stampin’ Seal to attach the Sentiment to the Old Olive Banner.
- Attach the Banner and Sentiment to the card, using Stampin’ Dimensionals.
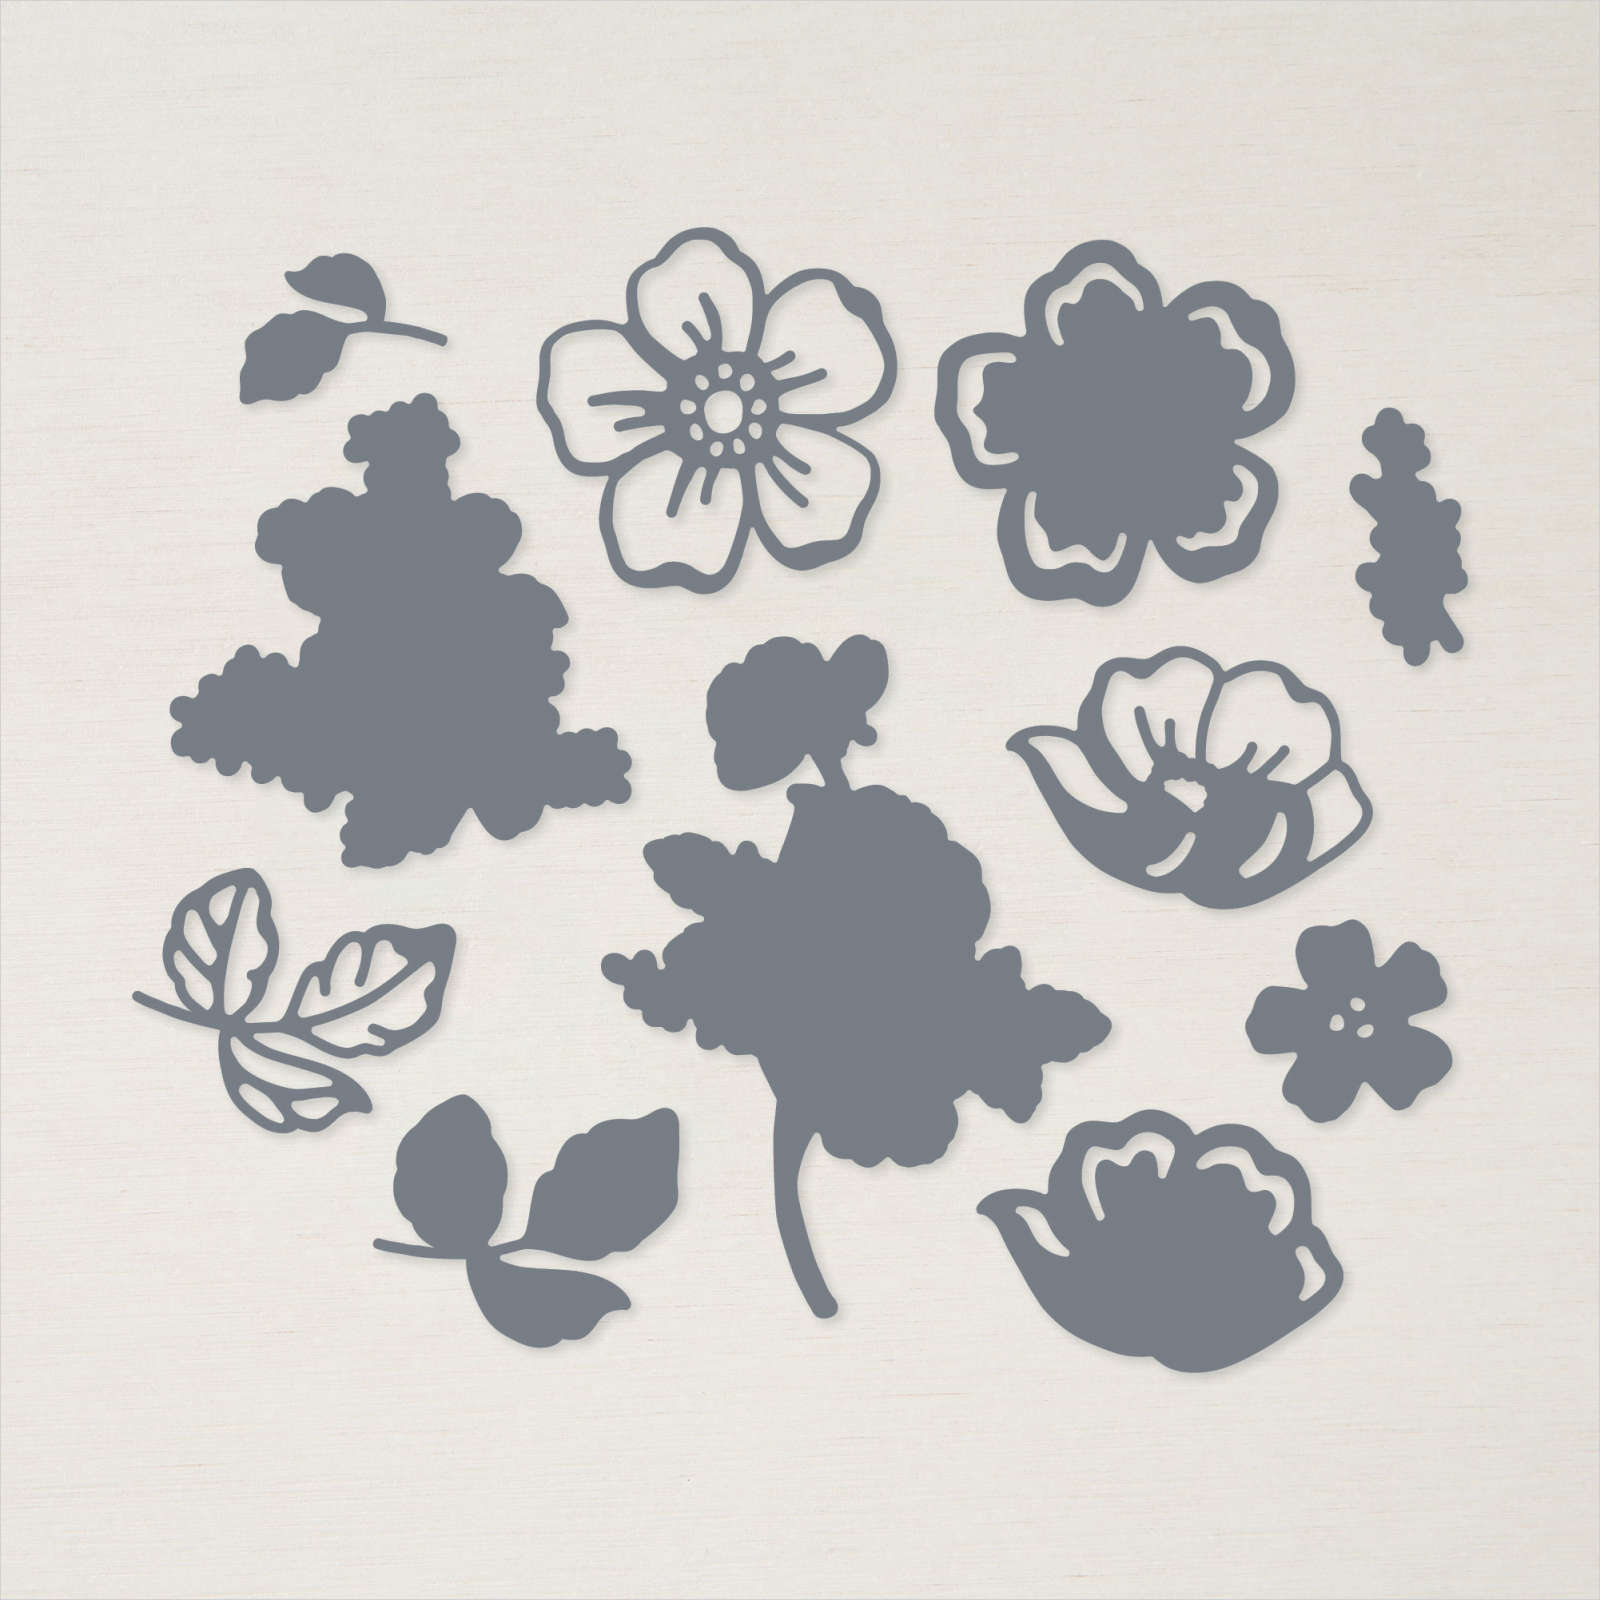
- Die cut the Flower and Leaves fill and outlines – it’s recommended to use Adhesive Sheets on the outlines for easier assembly- and then assemble the pieces.
- Attach with Flower and Leaves to the card with Stampin’ Dimensionals and Mini Glue Dots.
- Stamp the Inside Layer to your liking and attach with adhesive of your choice.
- Decorate your envelope.
- Beautiful!!!! Who will you send it to?


 Designer Series Paper")


Stamper’s Toolkit
You will also need adhesive, acrylic blocks, scissors and other basic PaperCrafting items from the Stamper’s Toolkit


")


