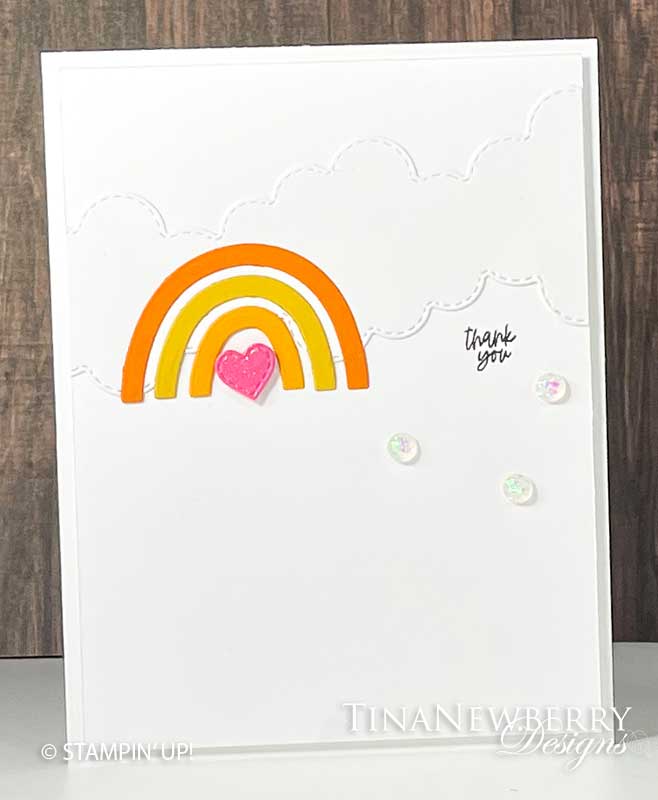
My favorite white-on-white card with a pop of color. Super cute and super easy to make.
Measurements
Full list of supplies needed, listed below. A die cutting machine is needed for this card.
Card Base: Basic White Thick Cardstock 5 1/2″ h x 8 1/2″ w folded to 5 1/2″ h x 4 1/4″ w
Basic White Thick Cardstock 8 ½” x 5 ½”, scored on the long side at 4 ¼” for Card Base
Basic White Cardstock
- 4” x 5 ¼” (2)
- scrap 4″ w x ~2 1/2″ h
Pumpkin Pie, Mango Melody and Bumble Bee Cardstock: Scraps for Rainbow
Polished Pink Cardstock scrap
Let’s Create
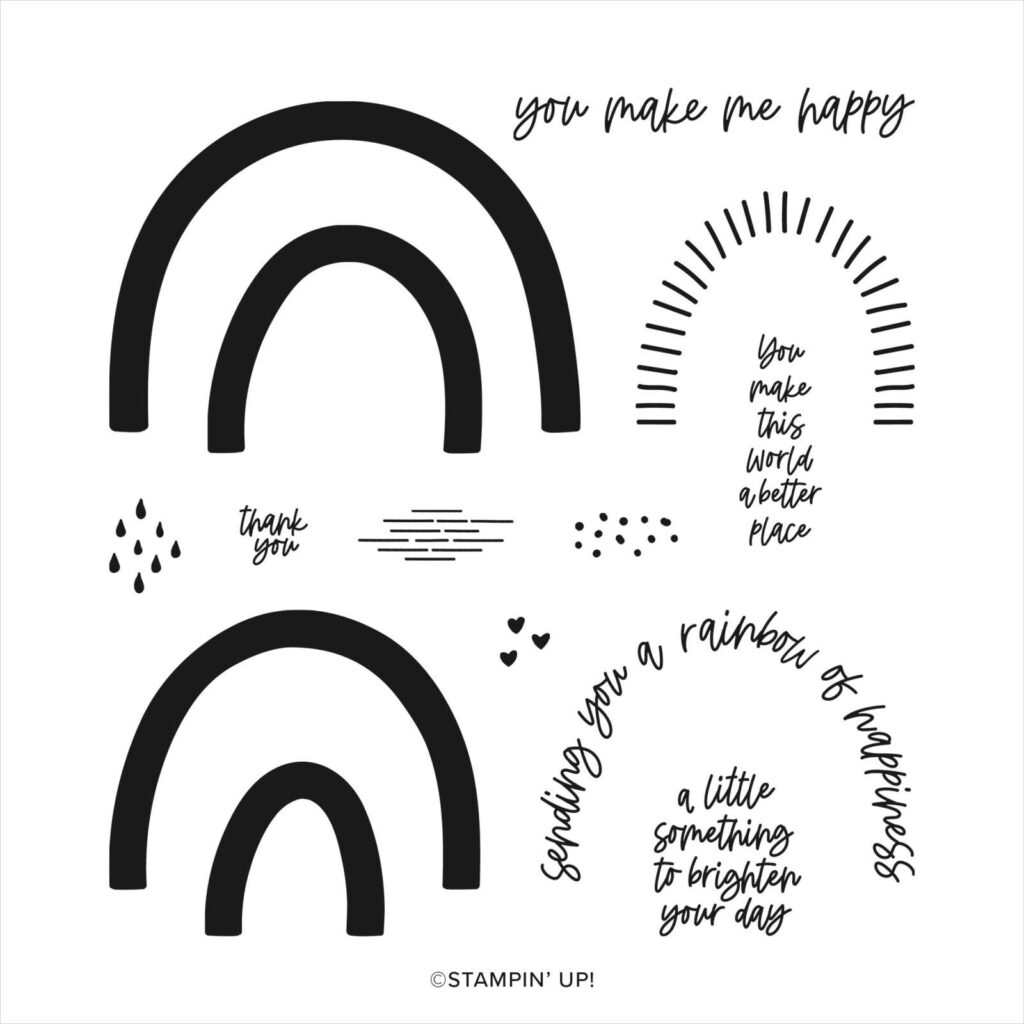
- Affix all stamps to Acrylic Blocks.
- Fold the Basic White Thick Card Base in half using a Bone Folder to sharpen the crease.
- Adhere 4” x 5 ¼” Basic White layer to card front with liquid glue.
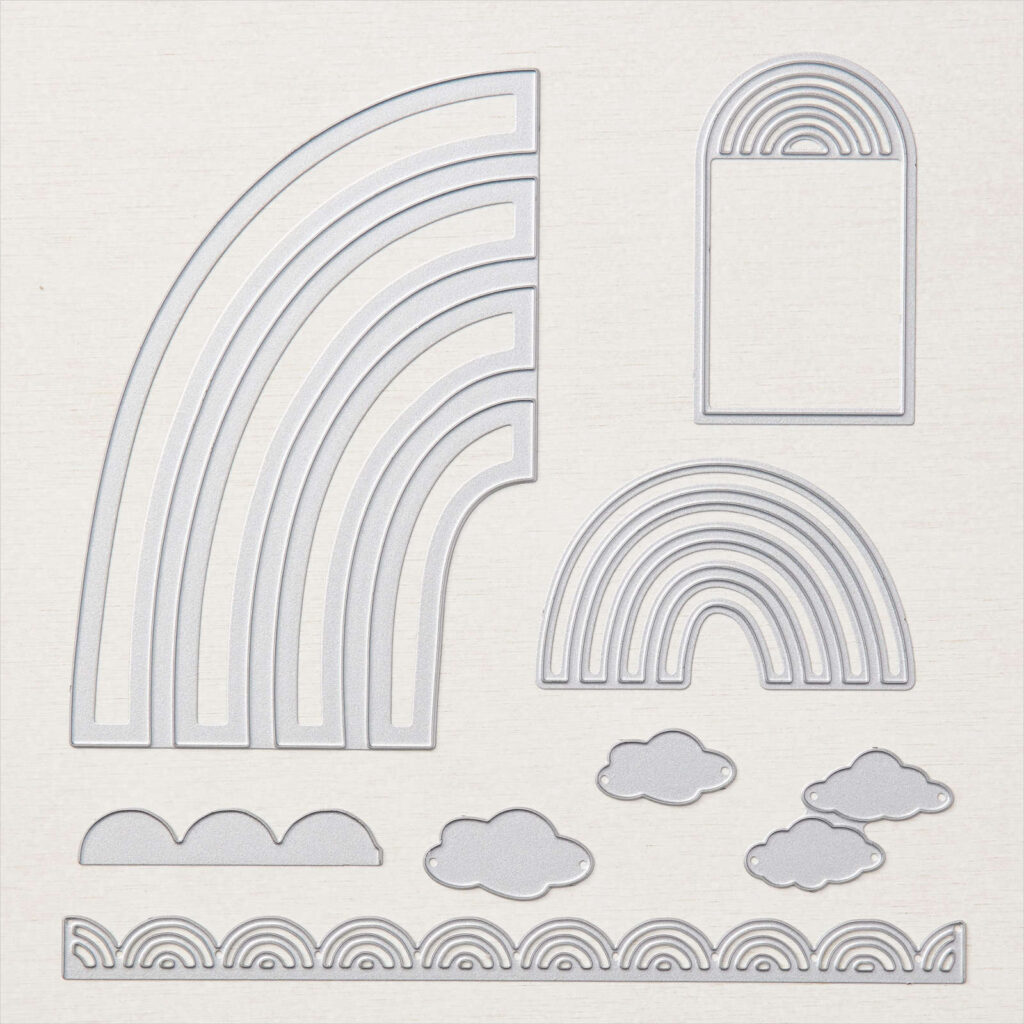
- Die cut Cloud layer from Basic Borders Dies and adhere to the Basic White Layer with liquid glue.
- Die cut the small Rainbow from Pumpkin Pie, Mango Melody and Bumble Bee Cardstock.
- Use Rainbow die as a guide to place your Pumpkin Pie, Mango Melody and Bumble Bee Cardstock rainbow arcs to achieve balanced placement. Adhere rainbow arcs with very thin traces of liquid glue.
- Die cut Heart from Give it a Whirl dies with Polished Pink Cardstock.
- Place a mini-Stampin’ Dimensional on the back of the heart, and position the heart in the center of the rainbow
- Stamp cute teeny-tiny thank you sentiment in Memento Black in a little cloud pocket.
- Sprinkle on the Opals.
- Stamp and decorate 4” x 5 ¼” Basic White layer for the inside and attach with Stampin’ Seal.
- Decorate your envelope.
- So cute! Now send it to someone special.
Shopping List
")


$7.50


$29.00

$39.00
Stamper’s Toolkit
You will also need adhesive, acrylic blocks, scissors and other basic PaperCrafting items from the Stamper’s Toolkit

$8.00

$12.00

$4.00


$5.25

$7.00

$4.00

$7.00

$10.00

$8.00

$8.00

$10.00

$25.00

$7.00

$6.00

$10.00

$8.00

$5.00

$5.00

$6.00

$71.50

$8.00

$11.75
")
$30.00

$9.50


$120.00