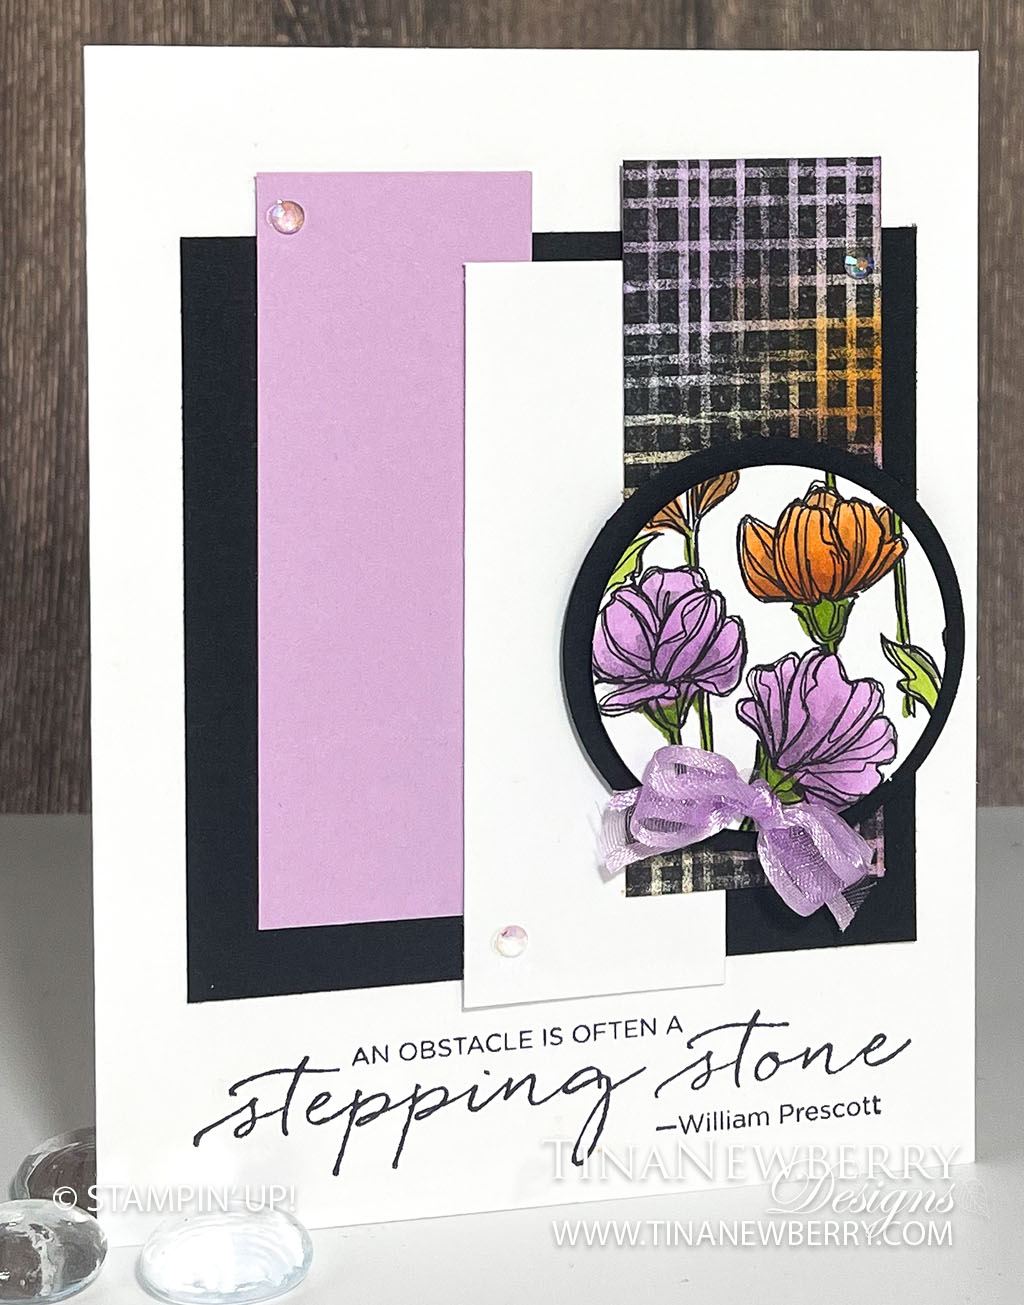
Use alcohol markers to color a pretty focal image and then set it apart with a few pieces of cardstock and patterned paper to make a quick and easy encouragement card for your loved one.

Measurements
Full list of supplies needed, listed below. A die cutting machine is needed for this card.
Basic White Thick Cardstock: 5-½” x 8-½”, score at 4 ¼” for Card Base
Basic Black Cardstock:
- 3 ½” x 3 ½” square
- 2” circle
Basic White Cardsdtock: 1 ¼” x 3 ½”
Fresh Freesia Cardstock: 1 ¼” x 3 ½”
Perfectly Penciled 12″ X 12″ Designer Series Paper (DSP):
- 1 ¼” x 3 ½”
- 1 ¾” circle
Let’s Create
- Affix all stamps to Acrylic Blocks.
- Fold the Card Base in half using a Bone Folder to sharpen the crease.
- Stamp sentiment along the bottom of the card front in Tuxedo Black ink.
- Assemble card by adhering the square to the card front, and then adding the Freesia and White strips.
- Use your Blending Brushes to apply color to the DSP in Pumpkin Pie and Fresh Freesia. Adhere remaining strip to card front in a pleasing manner.
- Use Layering Circles Dies to die cut the Basic Black and DSP Circles.
- Use your Stampin’ Blends to color the flowers on the DSP. Follow along with the shading in the DSP. Colors: Fresh Freesia, Pumpkin Pie, Granny Apple Green
- Use Stampin’ Seal to adhere DSP to Basic Black Circle.
- Adhere circle layer to card front with Stampin’ Dimensionals.
- Add glitz to the flower with WInk-of-Stella
- Cut 6″ of Fresh Freesia ribbon and add a sweet tiny bow. Attach with a Mini Glue Dot.
- Sprinkle on 3 Iridescent Rhinestones
- Stamp and decorate the inside.
- Decorate your envelope.
- So cute! Now send it to someone special.
Shopping List
Recommended Stamper’s Toolkit ❤
Product List


