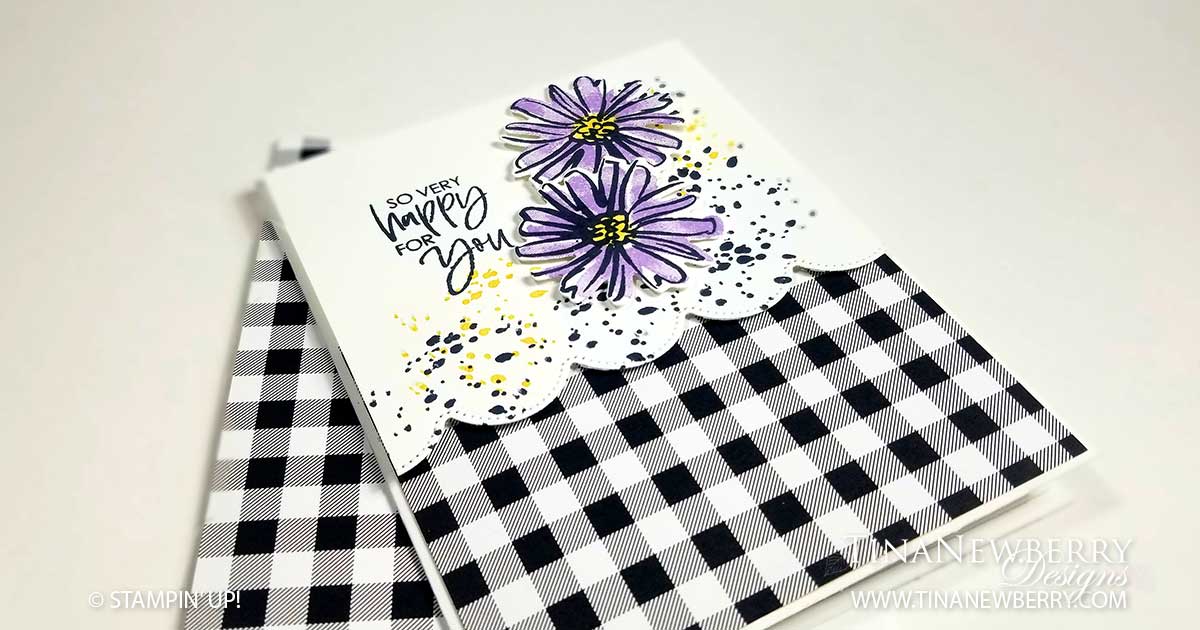
I see more of this card in my future. Super simple, but so so fun and easy! Such a cute #simplestamping card! This one takes a SIP and uses just Stamps, Ink and Paper, but it’s not lacking in character. The pretty font, Buffalo check paper, scalloped edge, pop of color with the flowers and then the brilliant dotted stamp to add some interest to the background. This card came together in just minutes using the Color & Contour Bundle.
Color & Contour Bundle – Save 10$ when you buy the bundle
Measurements
Full list of supplies needed, listed below. A die cutting machine is needed for this card.
Card Base: Basic White Thick Cardstock 5 1/2″ h x 8 1/2″ w folded to 5 1/2″ h x 4 1/4″ w
Background: Pattern Party Hostess Designer Series Paper 3 1/4″ h x 4 1/8″ w
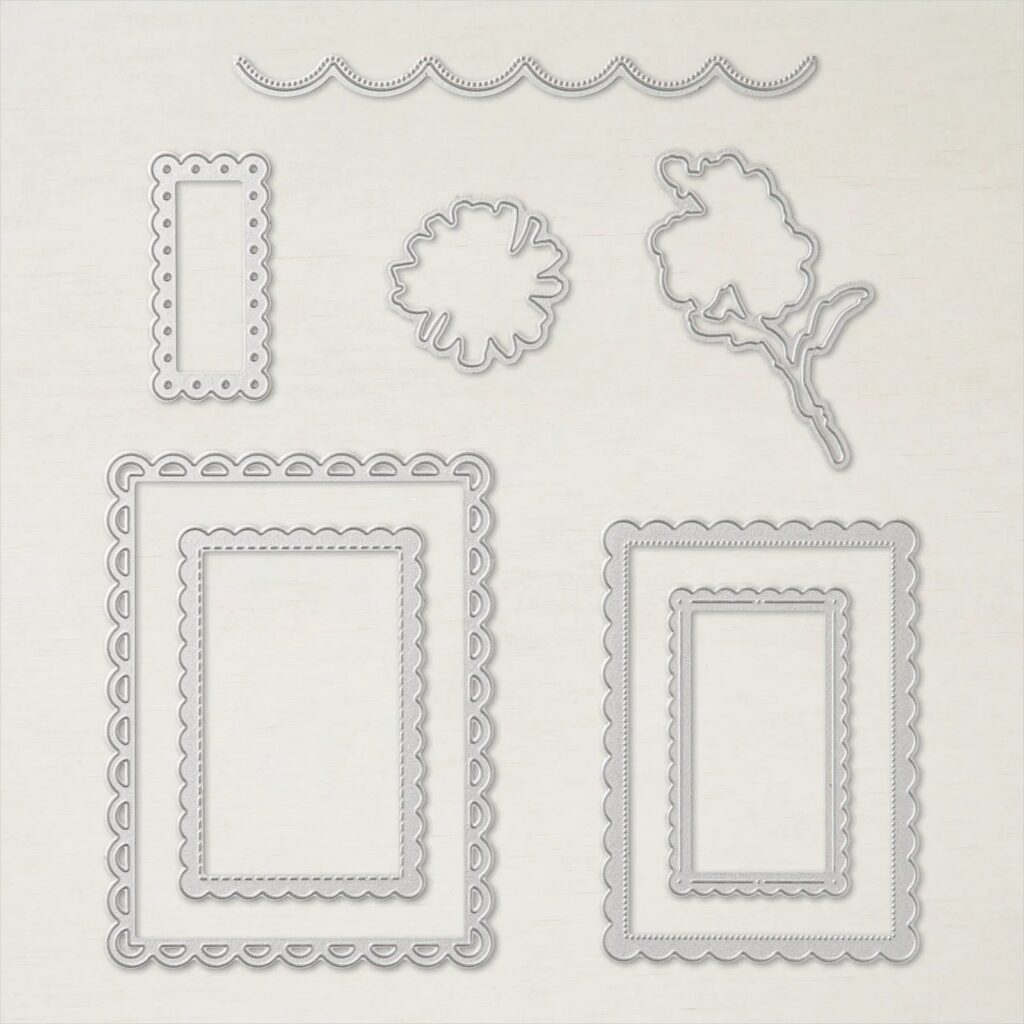
Stamped Scallop Layer: Basic White Cardstock 4″ h x 4 1/8″ w trimmed with the Scalloped Edge Die.
Inside Layer: Basic White Cardstock 5 3/8″ h x 4 1/8″ w
Let’s Create
- Affix all stamps to Acrylic Blocks.
- Fold the Card Base in half using a Bone Folder to sharpen the crease.
- Attach the Background Layer to the bottom front of the Card Base.
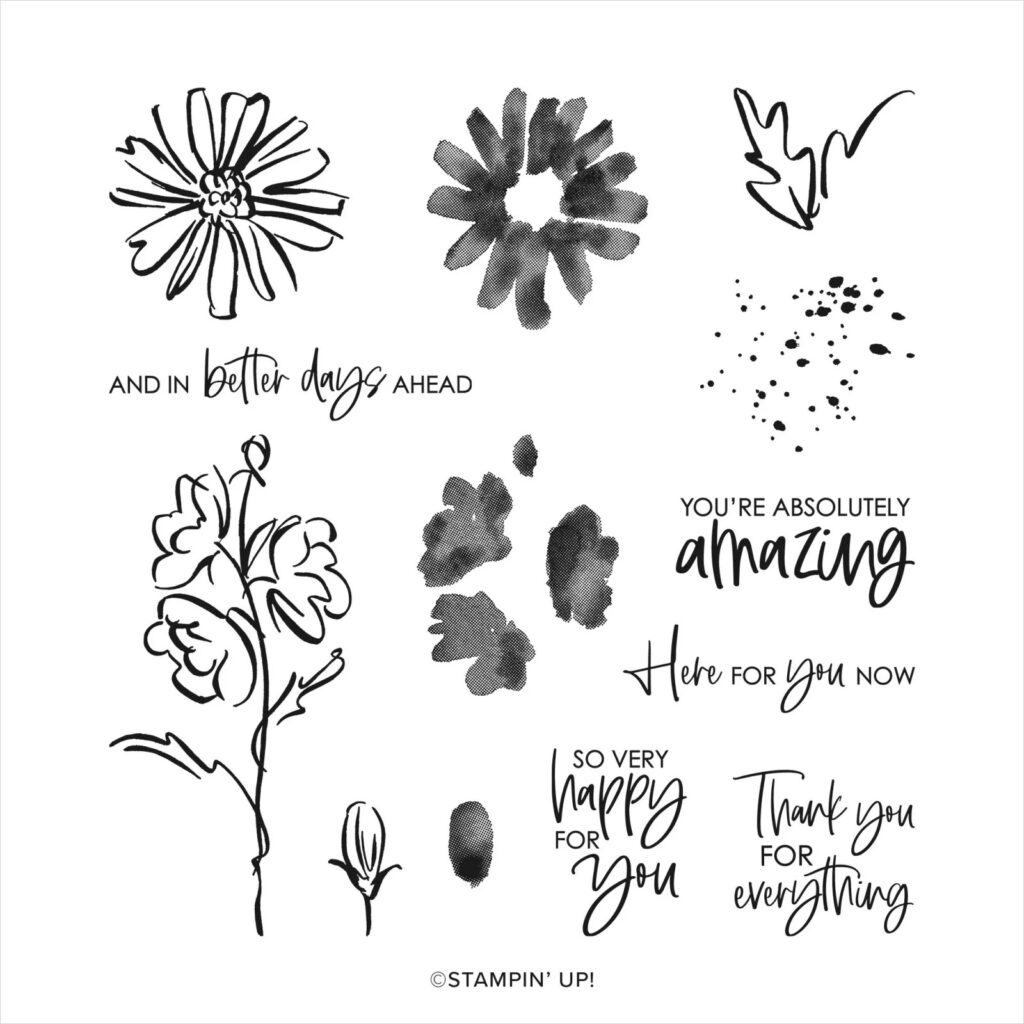
- Run the Stamped Scallop Layer through the Stampin’ Cut & Emboss machine with the Scalloped Edge Die. Next stamp the Sentiment and some Dots in Basic Black Ink. And some more Dots in Mango Melody Ink.
- On Basic White scrap Cardstock, stamp two Flower Outlines in Basic Black and then stamp the Fill in Highland Heather. Use a light Mango Melody Stampin’ Blend Alcohol Marker to color the center of the Flower.
- Attach the two Flowers to the Stamped Scalloped Layer with Stampin’ Dimensionals.
- Attach the Stamped Stamped Scallop Layer to the Card Front with Stampin’ Dimensionals.
- Decorate the Inside.
- Decorate your envelope
- So cute! Who will you send it to?!
Shopping List
")


 Host Designer Series Paper")
Stamper’s Toolkit
You will also need adhesive, acrylic blocks, scissors and other basic PaperCrafting items from the Stamper’s Toolkit


")


