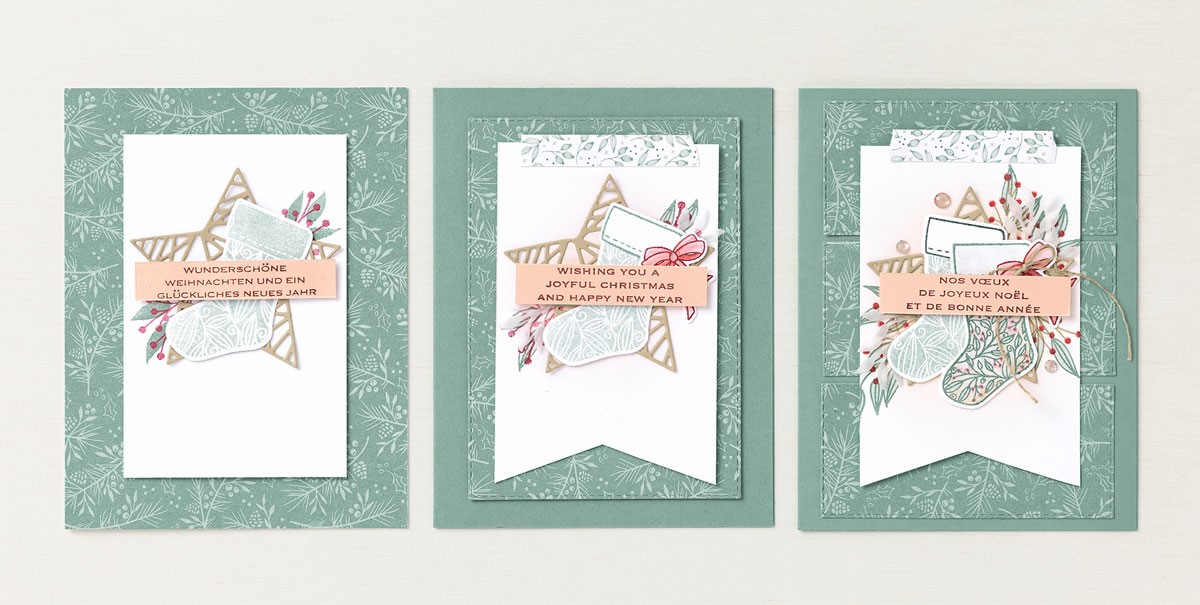
‘Tis the season to start thinking about creating festive, handcrafted cards for Christmas! So if you’d like to start “wrapping up” your plans for a Yule-themed class or event, we’ve got you covered with a series of step-ups using the new Tidings & Trimmings Bundle.
CASUAL
To make the “Wunderschöne Weihnachten” card, stamp the berries in Cherry Cobbler Ink and the leaves in Soft Succulent Ink. Die cut the star and adhere it using Mini Glue Dots, placing the berries and the leaves on top. Layer with the stocking, stamped in Soft Succulent Ink on Basic White Cardstock (stamp off once!), and use Stampin’ Dimensionals to place the Cherry Cobbler sentiment with Petal Pink Cardstock on the top. This will create the gorgeous, layered look in an easy way!
AVID
We stepped up our “Wishing You a Joyful Christmas” card by using Blending Brushes and a little ink to create a soft, glowing background of the die-cut star. We also added banner tips to the Basic White Cardstock piece, amplifying the sophistication. And don’t you love the faux washi tape? Simply cut a strip of Designer Series Paper and rip the ends to get the look. Finally, add subtle color to the bow using Blender Pens.
ARTFULLY AVID
Our “Nos vœux de joyeux Noël” is filled with lavish detail, including a die-cut Vellum Cardstock embellishment, a Linen Thread bow, an extra stocking colored with Blender Pens, and a smattering of Elegant Faceted Gems. So pretty!

