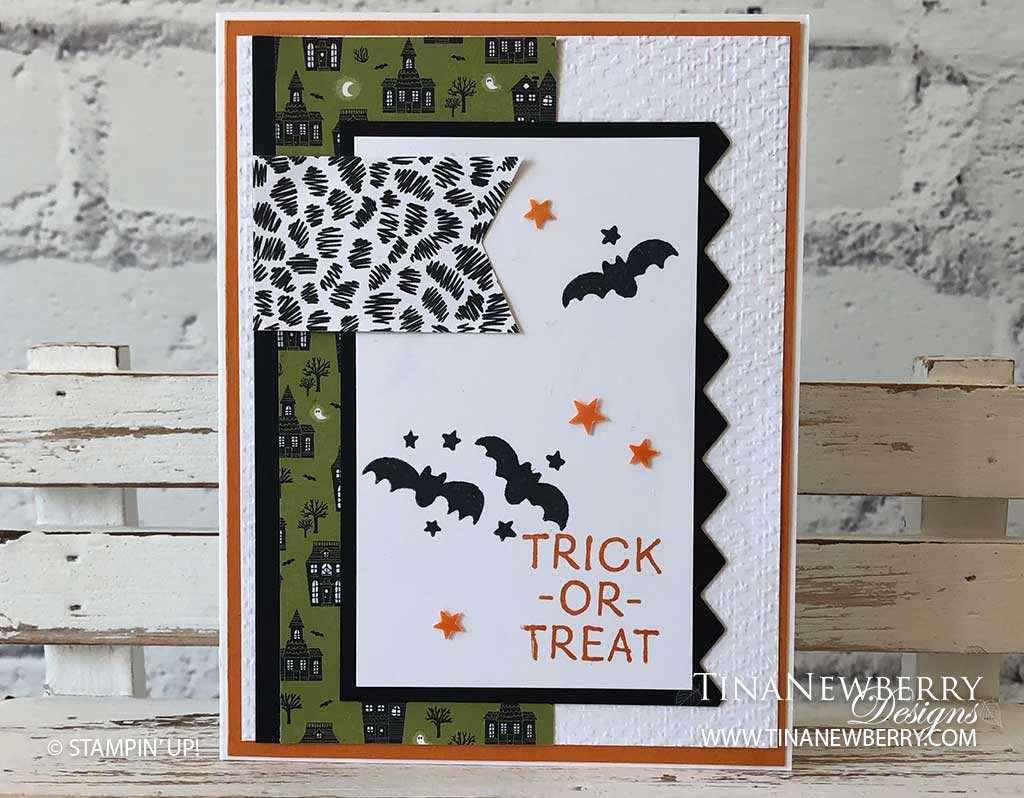
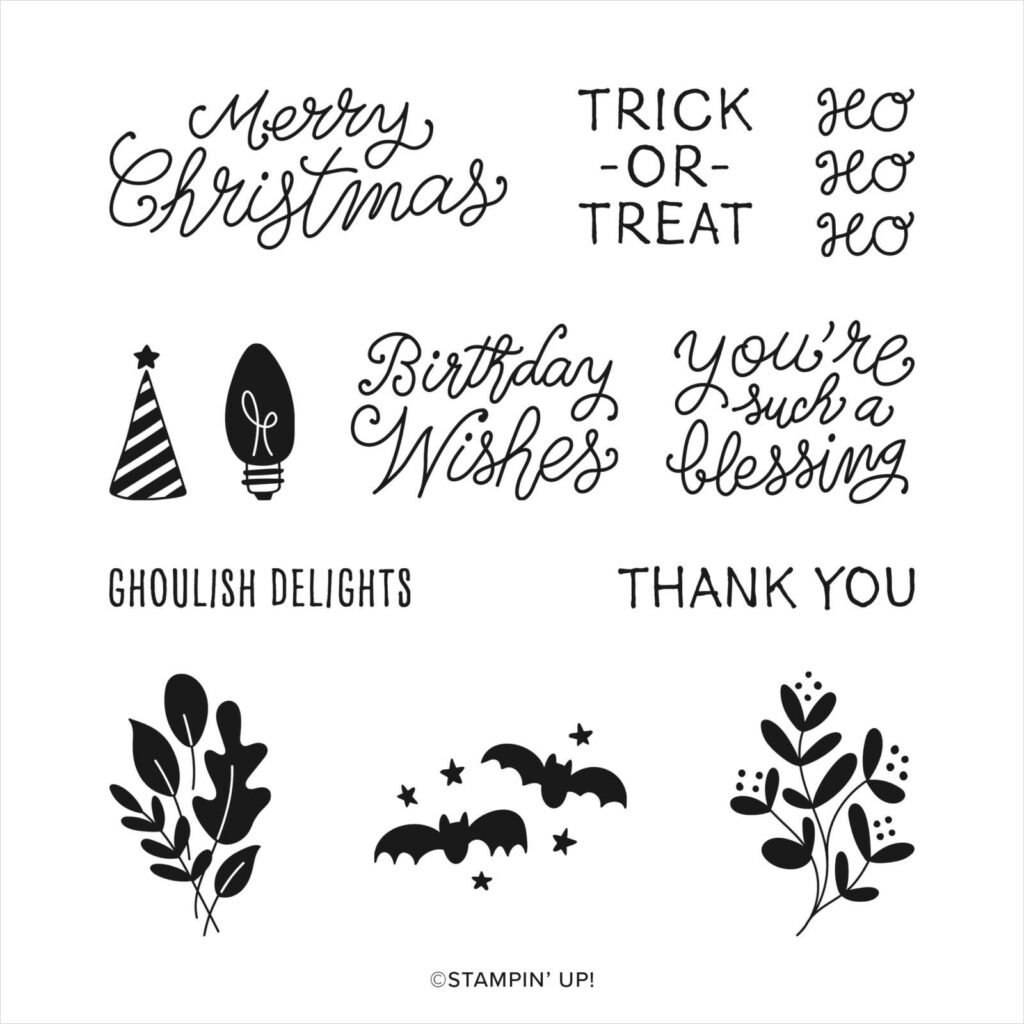
Another cute Halloween card featuring the Cute Halloween Designer Series Paper and The Little Delights Stamp Set. This is a great stamp set for the holiday season, covering all the holidays.
Measurements
Full list of supplies needed, listed below. A die cutting machine is needed for this card.
Card Base: Basic White Thick Cardstock 5 1/2″ h x 8 1/2″ w scored at 4 1/4″ w and folded to 5 1/2″ h x 4 1/4″ w
Background Matte: Pumpkin Pie Cardstock 5 3/8″ h x 4 1/8″ w
Background: Basic White Cardstock 5 1/8″ h x 3 7/8″ w
Decorative Rectangle: Cute Halloween Designer Series Paper 5 1/8″h x 3 1/4″ w
Decorative Rectangle Strip: Basic Black Cardstock 5 1/8″h x 1/4″ w
Sentiment Matte: Basic Black Cardstock 4 1/4” h x 3” w
Sentiment Layer: Basic White Cardstock 4” h x 2 1/2” w
Decorative Banner: Cute Halloween Designer Series Paper 1 1/4″ h x 2″ w
Inside Layer: Basic White Cardstock 5 1/4″ h x 4″ w
Let’s Create
- Affix all stamps to Acrylic Blocks.
- Fold the Card Base in half using a Bone Folder to sharpen the crease.
- Using the Tasteful Textile 3D Embossing Folder, emboss the Basic White Background Layer.
- Attach the Background Matte, Background Layer, Decorative Rectangle Strip and Decorative Rectangle using Stampin’ Seal.
- Die Cut the long edge of the 4 1/4” h x 3” w Basic Black using the Basic Borders dies (zig zag die)
- Stamp the sentiment on the 4” x 2 ½” Basic White in Pumpkin Pie Ink. Then stamp a set of the bats with Tuxedo Black Memento. I cleaned the stamp real well and then just inked one bat on the stamp (easily done with photopolymer stamps) and stamped it towards the upper right corner.
- Attach the Sentiment to the Sentiment Matte using Stampin’ Seal.
- Attach Sentiment to the Card using Stampin’ Dimensionals.
- Use your Paper Snips or the Banner Pick a Punch to create a banner tip at the end of the 1 ¼” x 2” Decorative Banner Designer Series Paper.
- Attach the Decorative Banner to the Sentiment using Stampin’ Dimensionals.
- Sprinkle a few Cute Stars Adhesive Backed Sequins.
- Decorate the Inside Layer and attach.
- Decorate your envelope.
- So cute! Who will you send it to?
Shopping List


 Designer Series Paper")


Stamper’s Toolkit
You will also need adhesive, acrylic blocks, scissors and other basic PaperCrafting items from the Stamper’s Toolkit


")


