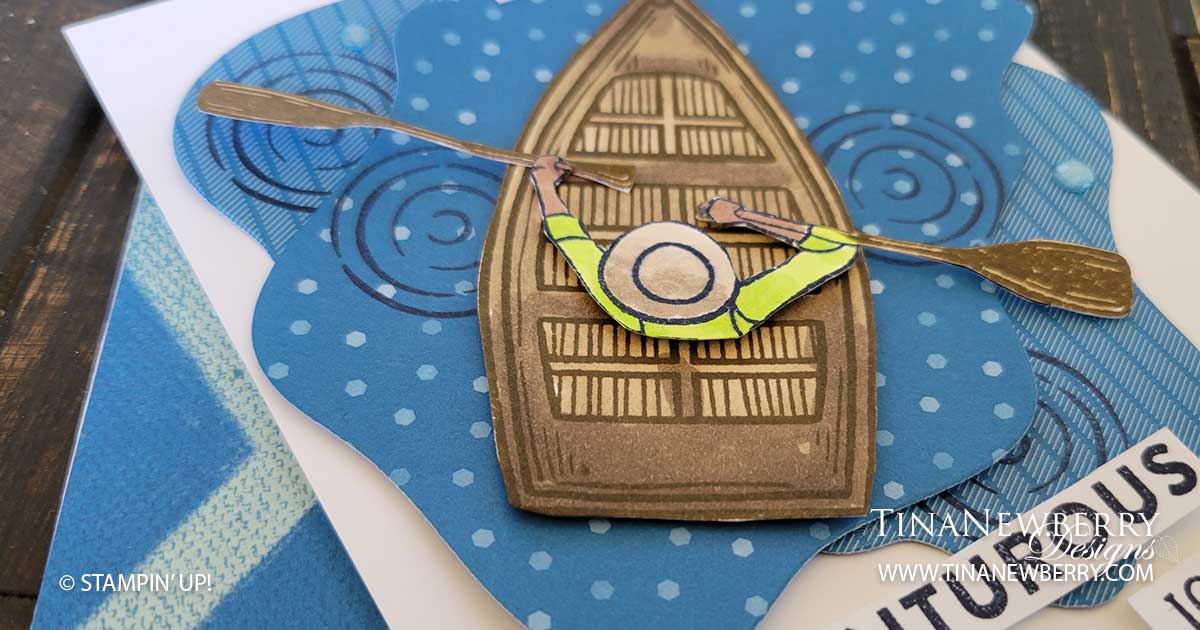
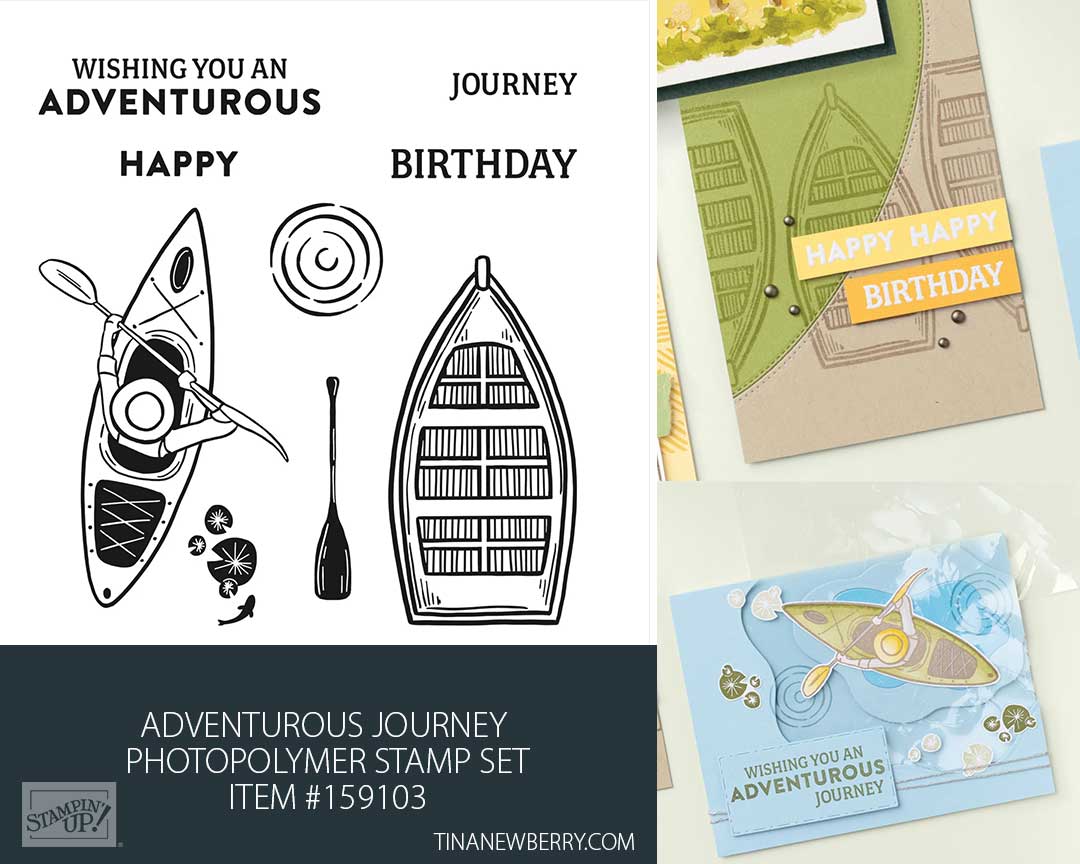
Stampin’ Up! Artisan Design Team member, Yvonne Spikman, was so clever to use the boater from the kayak stamp with the rowboat from the Adventurous Journey stamp set and diorama die cuts for the water! I used her general design with a bit of creative liberty to make this card design my own. Sometimes the most relaxing card making comes from re-creating something beautiful someone else made. CASE=Copy and Share Everything.
Measurements
Full list of supplies needed, listed below. A die cutting machine is needed for this card.
Basic White Thick Cardstock:
- 11″ h x 4 1/4″ w folded to 5 1/2″ h x 4 1/4″ w
- scrap for boat, boater w/ oars
Basic White Cardstock: scrap for sentiment tags
2022-2023 Brights Designer Series Paper (DSP): scrap for diorama die cuts
Let’s Create
- Affix all stamps to Acrylic Blocks.
- Fold the Card Base in half using a Bone Folder to sharpen the crease.
- Die cut two pieces of Pacific Point DSP with large Diorama Dies.
- Stamp the boat and kayak on Basic White Scrap in Soft Suede ink. Color the row boat with Light and Dark Soft Suede. Color the boater and oars from the kayak image with Light and Dark each of Soft Suede, Crumb Cake and Parakeet Party.
- Use Paper Snips to carefully cut out the boater and the row boat.
- Use a Stampin’ Dimensional to attach the boater to the row boat.
- Arrange the Pacific Point die cuts on the front of the card base. Use a pencil to lightly mark where two spots on the Card Base where you have room to add ripples.
- Remove the die cuts and stamp ripples in Night of Navy ink on the card base and a few on the die cuts.
- Attach Pacific Point die cuts with Stampin’ Dimensionals.
- Attach the row boat with Stampin’ Dimensionals
- On Basic White scrap, stamp the sentiment in Night of Navy Ink. Then carefully cut out into strips and attach with Stampin’ Dimensionals.
- Sprinkle on the Fine Sparkle Adhesive Backed Gems.
- Stamp and decorate the inside.
- Decorate your envelope.
- Awesome! Now send it to someone special.
Shopping List
")


 Designer Series Paper")


$29.00
Recommended Stamper’s Toolkit ❤
Product List
$12.00

$7.00

$4.25

$5.75

$5.50

$11.00

$26.00

$7.00

$6.50

$11.00

$20.00

$11.00

$80.75

$128.00


$16.00

$13.00


