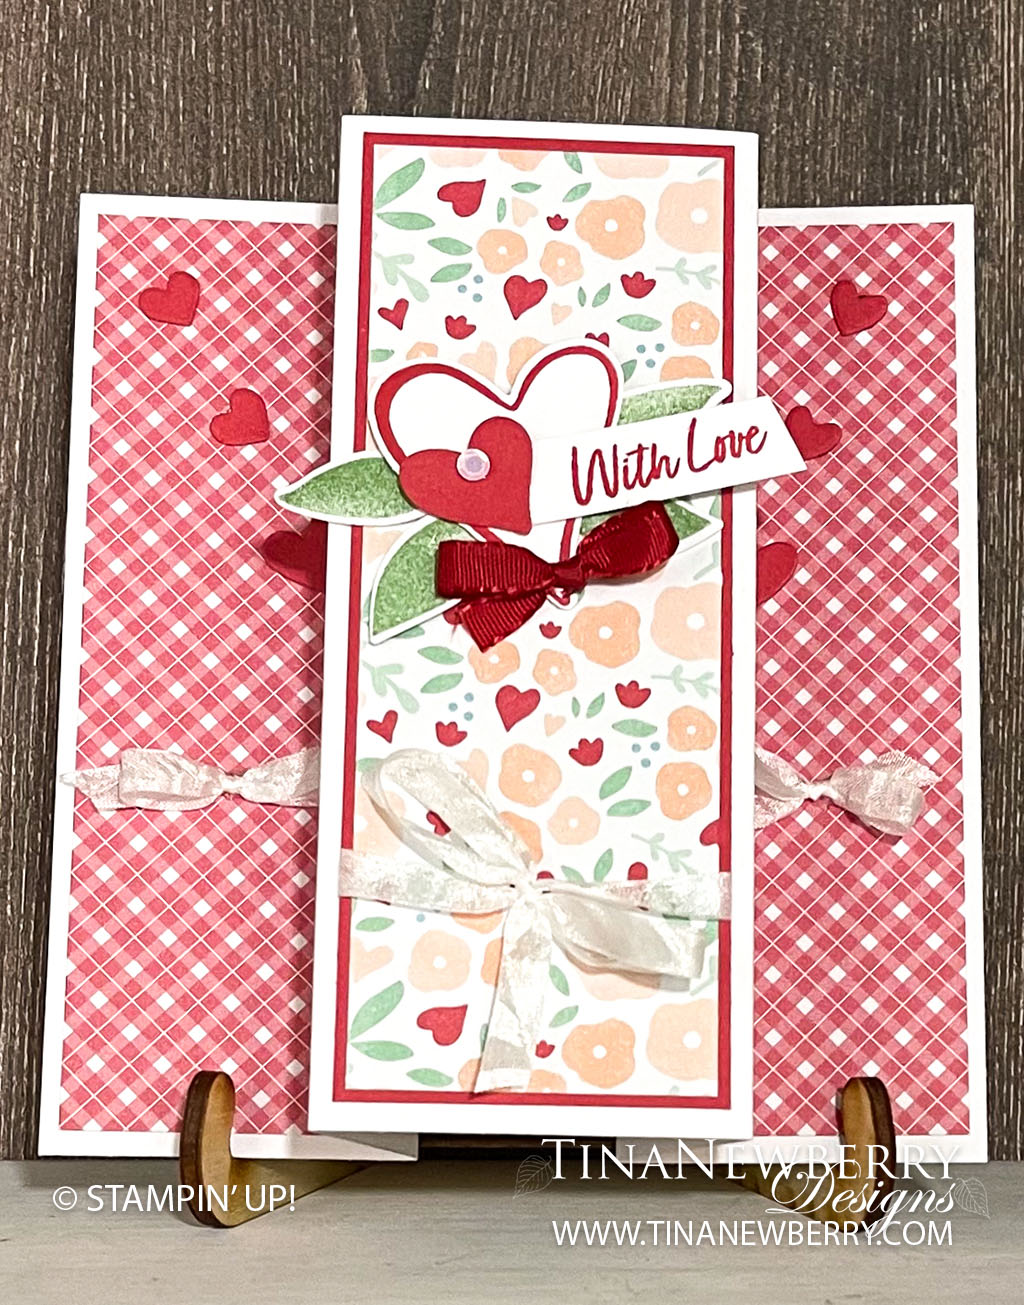
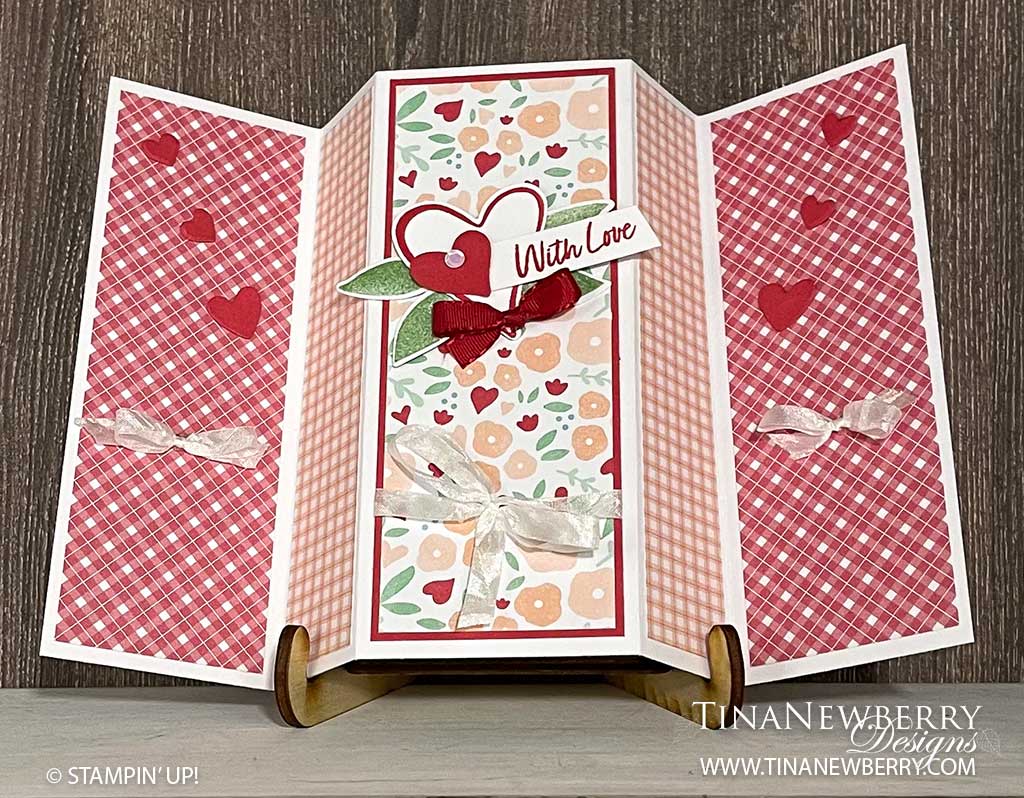
We made this card for Mystery Stamping at one point and it was a big hit because not only is it a quick and easy fun fold, but it also shows off your beautiful designer series (printed) paper. One other fun note about this card – it’s a S.I.P. – just stamps, ink and paper.
Measurements
Full list of supplies needed, listed below. A die cutting machine is needed for this card.
Basic White Thick Cardstock: 8 ½” x 5 ½”, and score at 2”, 3 1/8”, 5 3/8”, and 6 ½”. Fold the card along the score lines, using bone folder to burnish.
Basic White Cardstock:
- 1 ⅞” x 5 ⅛” (for inside behind panel)
- scrap for heart and sentiment.
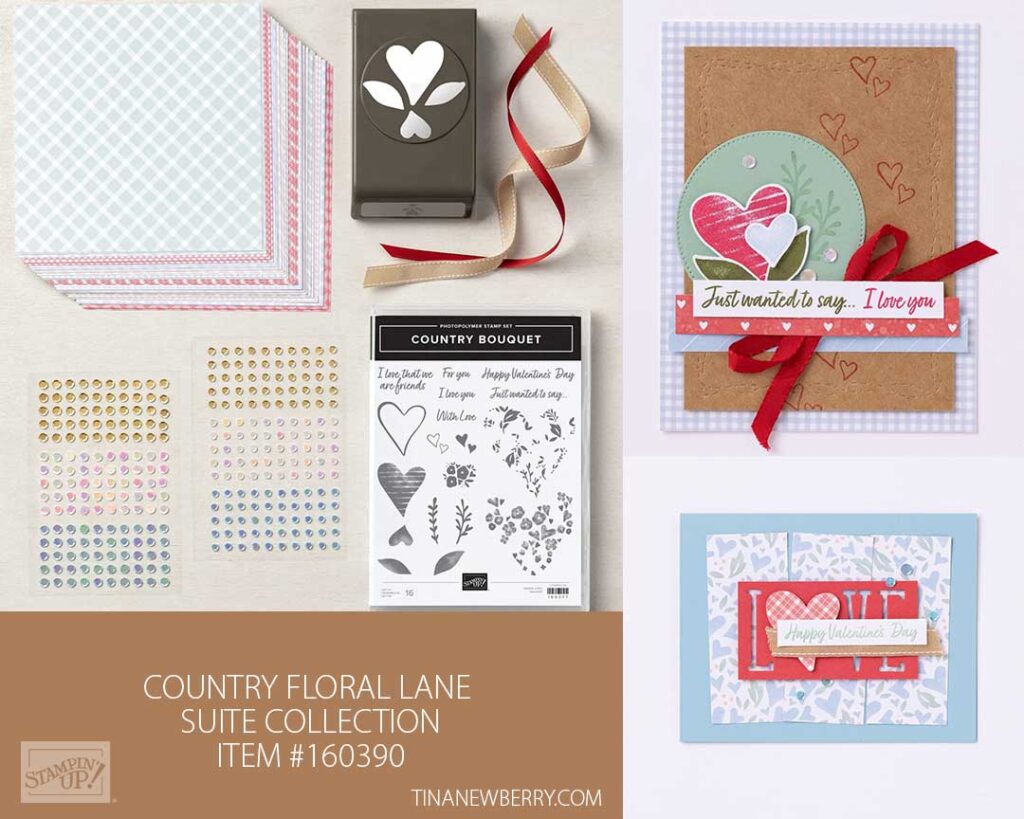
Designer Series Paper (DSP):
- 1 ¾” x 5 ¼” (cut 2 for the two outsides)
- 1” x 5 ¼” ( cut 2 for inside the folds)
- 1 ⅞” x 5 ⅛” (for front panel)
Sweet Sorbet Cardstock:
- 2” x 5 ¼” (for front panel)
- Scrap for die-cut hearts
Let’s Create
- Affix all stamps to Acrylic Blocks.
- Fold the Card Base at the score lines 2”, 3 1/8”, 5 3/8”, and 6 ½”using Bone Folder to sharpen the creases.
- Use Real Red ink to stamp the outline heart and sentiment on scrap Basic White.
- Use Mint Macaron ink to stamp the leaves on scrap Basic White.
- Punch the heart outline and leaves and trim the sentiment.
- Punch a small heart from Sweet Sorbet Cardstock.
- Use Paper Snips to fussy cut six small hearts for outside panels.
- Use Stampin’ Seal to adhere
- 1 ¾” x 5 ¼” DSP (2) on outside panels.
- 1” x 5 ¼” DSP (2) on inside panels.
- 1 ⅞” x 5 ⅛” DSP to 2” x 5 ¼” Sweet Sorbet Card Stock for the front panel.
- Wrap Crinkled White Seam Binding around 2” x 5 ¼” panel and tie a bow. Use Dimensionals to adhere this panel to the card front.
- Arrange and adhere hearts on the side panels with Mini Glue Dots.
- Arrange and adhere hearts, leaves, and sentiment on card front with Mini Glue Dots, Dimensionals and/or Stampin’ Seal.
- Tie two more little bows with Crinkle Seam Binding and one in Real Red. Place them about the card with Mini-Glue Dots.
- Add a Pastel Adhesive Backed Sequin on the small Sweet Sorbet heart.
- Stamp and decorate the remaining 1 ⅞” x 5 ⅛” Basic White and attach to the inside panel.
- Decorate your envelope.
- So cheery! Put it in the mail and make someone’s day!
Shopping List
")


 Designer Series Paper")
 Designer Series Paper")


 Crinkled Seam Binding Ribbon")
Recommended Stamper’s Toolkit ❤
Product List
$12.00

$7.00

$4.25

$5.75

$5.50

$11.00

$26.00

$7.00

$6.50

$11.00

$20.00

$11.00

$80.75

$128.00


$16.00

$13.00


