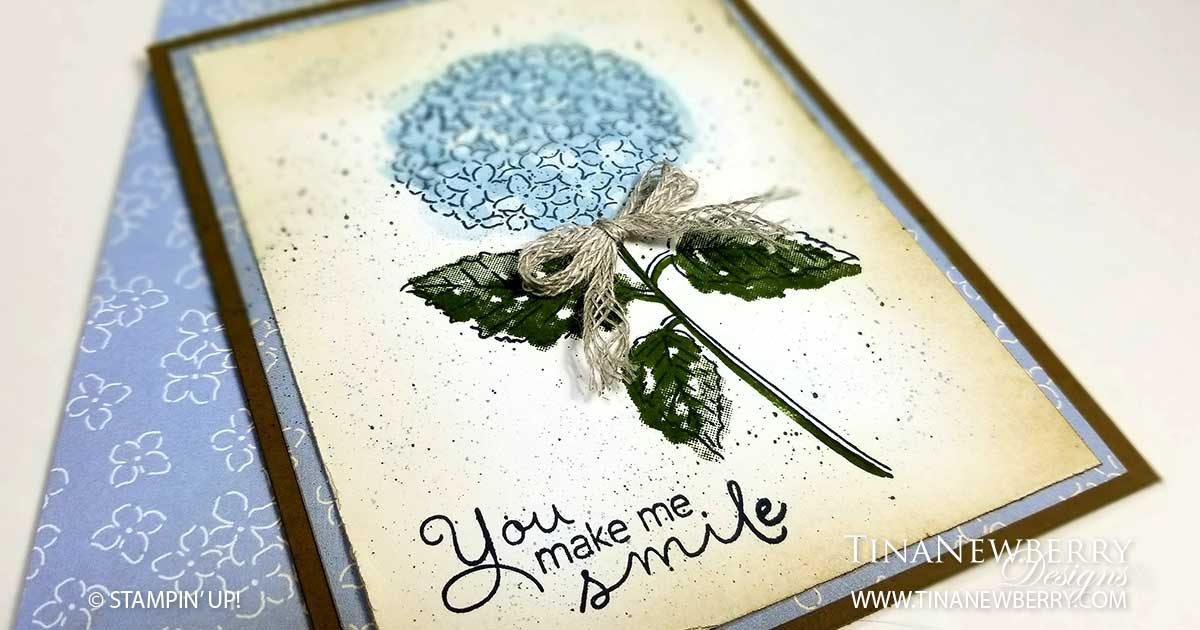
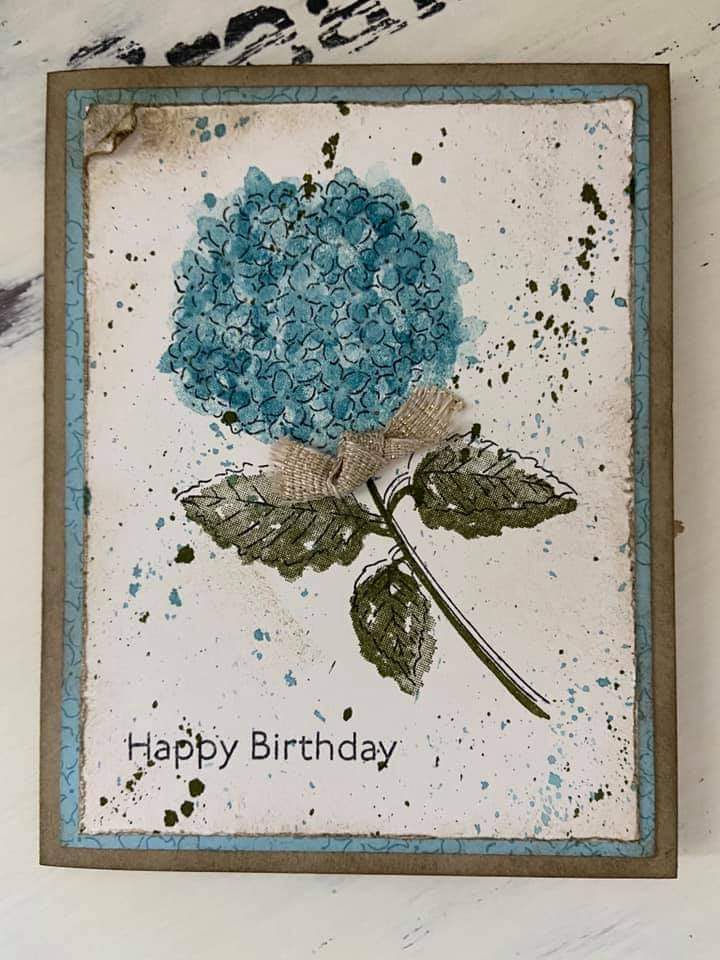
Paper, stamps, ink and one little braided linen bow are all you need to make this pretty nearly #simplestamping card. I saw this design somewhere and I can’t find out where. The photo had no name on it, so I’m not even sure who to give credit to, but I sure enjoyed re-creating it! There’s a little distressing, some two-step stamping, flicking, and a color wash I created using the new Blending Brushes. Read on for details to make it yourself.
Full list of supplies needed, listed below.
Card Base: Soft Suede Cardstock 5 1/2 h” x 8 1/2″ w folded to 5 1/2″ h x 4 1/4″ w.
Background Matte: Hydrangea Hill DSP 5 1/4″ h x 4″ w
Background: Basic White Cardstock 5″ h x 3 3/4″ w
Inside: Basic White Cardstock 5 1/4″ h x 4″ w
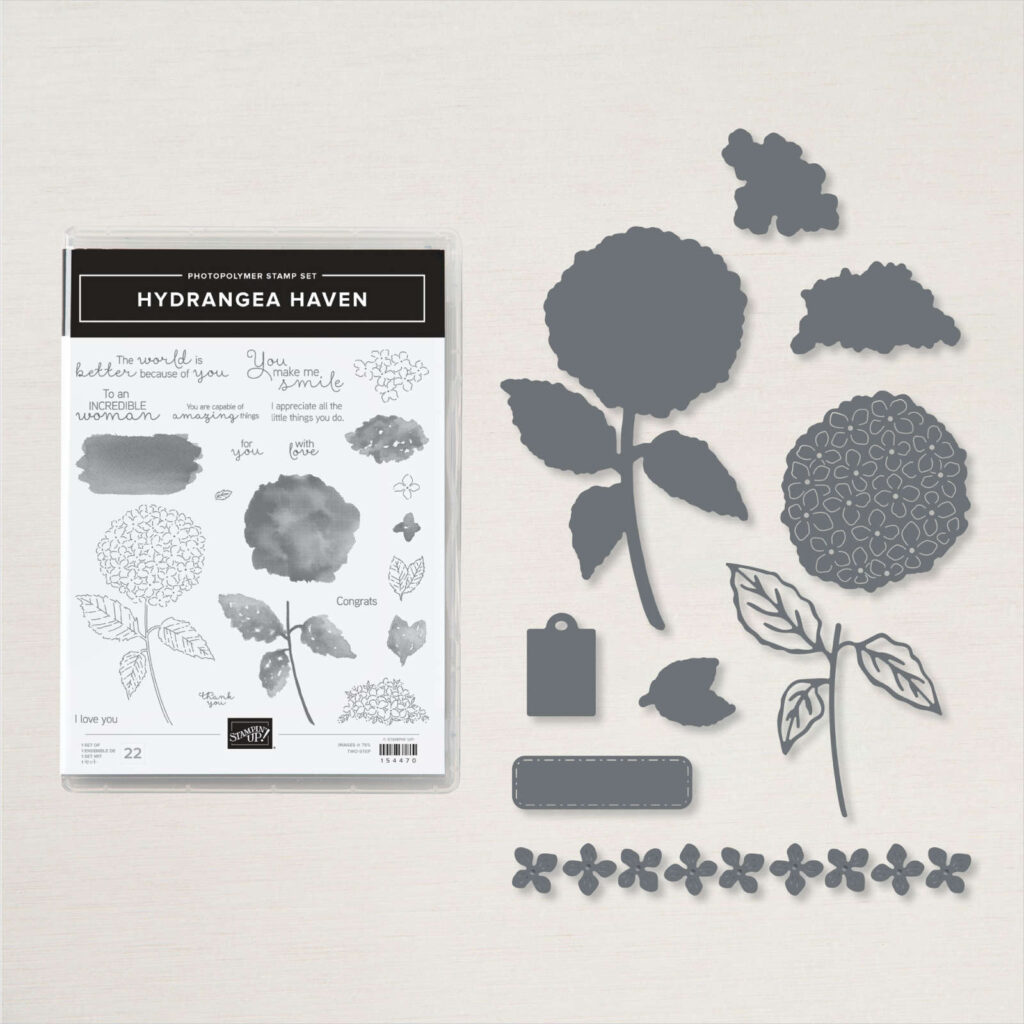
- Affix all stamps to Acrylic Blocks.
- Fold the Card Base in half using a Bone Folder to sharpen the crease.
- Use the Blending Brush blend some a light bit of Crumb Cake Ink onto the Background Matte and then attach to the Card Base.
- Use the Blending Brush blend some a light bit of Soft Suede Ink onto the Background.
- Stamp the large Hydrangea in Tuxedo Black Memento Ink. Then add the Stem and Leaves in Mossy Meadow Ink.
- For the Hydrangea, stamp off the Flower fill stamp with Seaside Spray and then use the Small Flower fill stamp to add Seaside Spray Flowers to create darker areas on the blossom.
- Stamp the Sentiment in Tuxedo Black Memento Ink
- Distress the edges with a Bone Folder before attaching the Background.
- Separate the Braided Linen Trim and tie into a bow. Separate some more and attach with a Mini Glue Dot.
- Decorate the Inside Layer and attach.
- Decorate the envelope.
- Lovely! Now send it to someone special.
Shopping List


 Braided Linen Trim")
Stamper’s Toolkit
You will also need adhesive, acrylic blocks, scissors and other basic PaperCrafting items from the Stamper’s Toolkit


")


