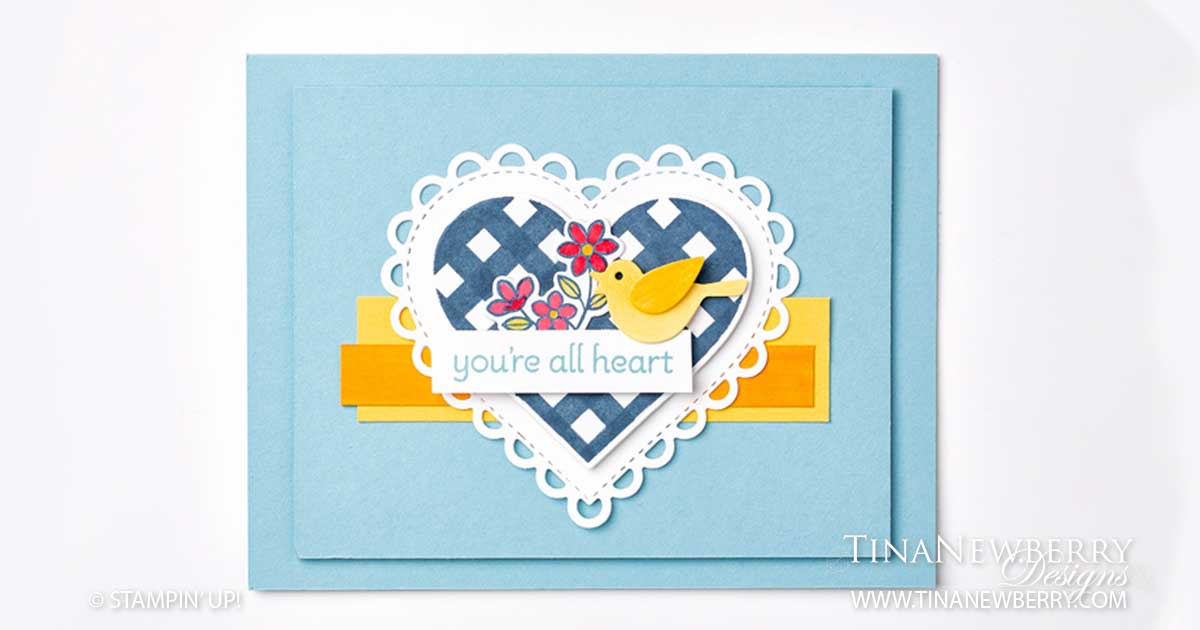
WOW! A few scalloped edges, hearts, gingham check and pops of color whallop all the WOW on this super cute and quick card that accomplishes #simplestamping using just Stamps, Ink and Paper.
Save 10% on the Lots of Heart Bundle
Measurements
Full list of supplies needed, listed below. A die cutting machine is needed for this card.
Card Base: Balmy Blue Cardstock 4 1/4″ h x 11″ w folded to 4 1/4″ h x 5 1/2″ w
Background: Balmy Blue Cardstock 3 3/4″ h x 4 3/4″ w
Decorative Strip Tall: Daffodil Delight Cardstock 1″ h x 3-1/4″ w
Decorative Strip Short: Daffodil Delight Cardstock 1/2″ h x 3-1/4″ w
Hearts: Basic White Cardstock scraps to fit dies.
Bird & Flowers: Basic White Thick Cardstock scraps to fit die. (Always use Thick Cardstock when using Stampin’ Blends)
Sentiment Layer: Basic White Cardstock 1/2″ h x 2″ w
Let’s Create
- Affix all stamps to Acrylic Blocks.
- Fold the Card Base in half using a Bone Folder to sharpen the crease.
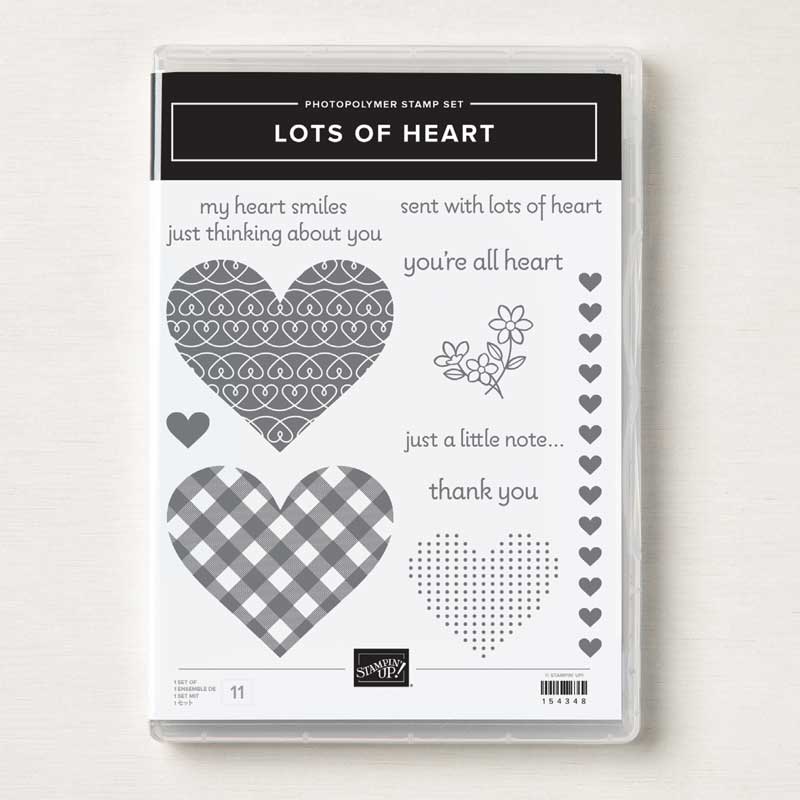
- Use the Misty Moonlight Classic Stampin’ Pad to stamp
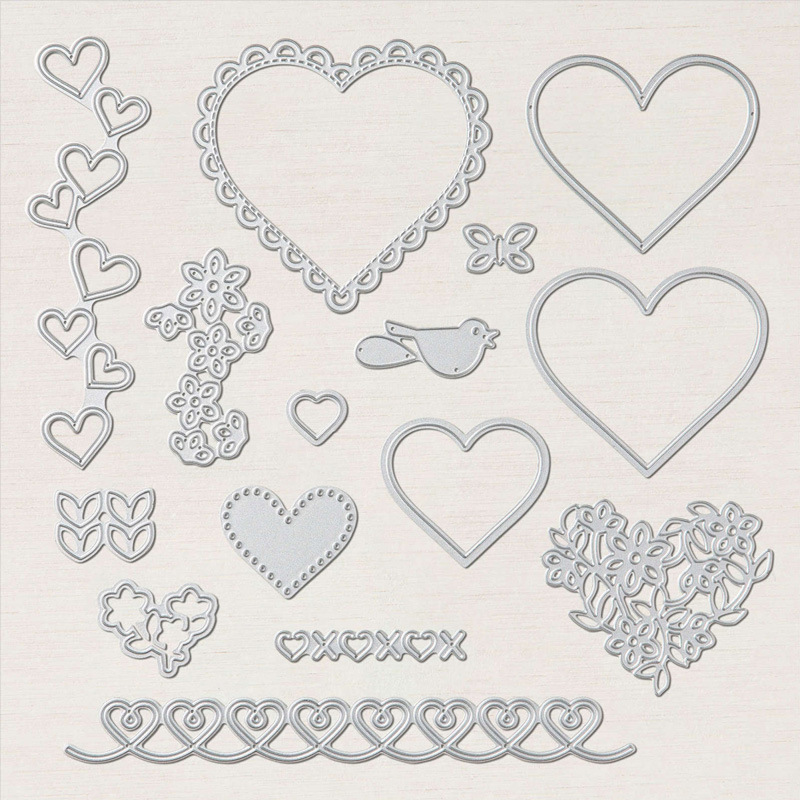
- The Gingham Heart on Basic White Cardstock scrap and die cut.
- The Flower Image on Basic White Thick Cardstock scrap. Color with Real Red and Daffodil Delight Stampin’ Blends, then die cut.
- Use the Daffodil Delight Stampin’ Blends to lay down a swatch of color on a piece of Basic White Thick Cardstock and then die cut the Bird from the swath. Use a Mini Glue dot to attach the wing.
- Use the dark Daffodil Delight Stampin’ Blend to color on the Daffodil Delight Cardstock to make some variation in the Decorative Strip Short layer.
- Die cut the Scalloped Stitched Heart from Basic White Cardstock.
- Use Balmy Blue Ink to stamp the Sentiment.
- Now Assemble it all:
- Use Stampin’ Dimensionals to attach the Balmy Blue Background.
- Use Stampin’ Seal to attach the two Daffodil Delight Decorative Strip Layers.
- Use Stampin’ Seal to assemble and attach the Scalloped Stitched Heart, Gingham Heart, and Flowers. Then attach all with Stampin’ Dimensionals.
- Use Stampin’ Dimensionals to attach your Sentiment and the Bird.
- Stamp an inside Sentiment and attach (optional)
- Decorate your envelope!
- OOH. So cute! Now send it to someone special.
Stamper’s Toolkit
")


You will also need adhesive, acrylic blocks, scissors and other basic PaperCrafting items from the Stamper’s Toolkit


")


