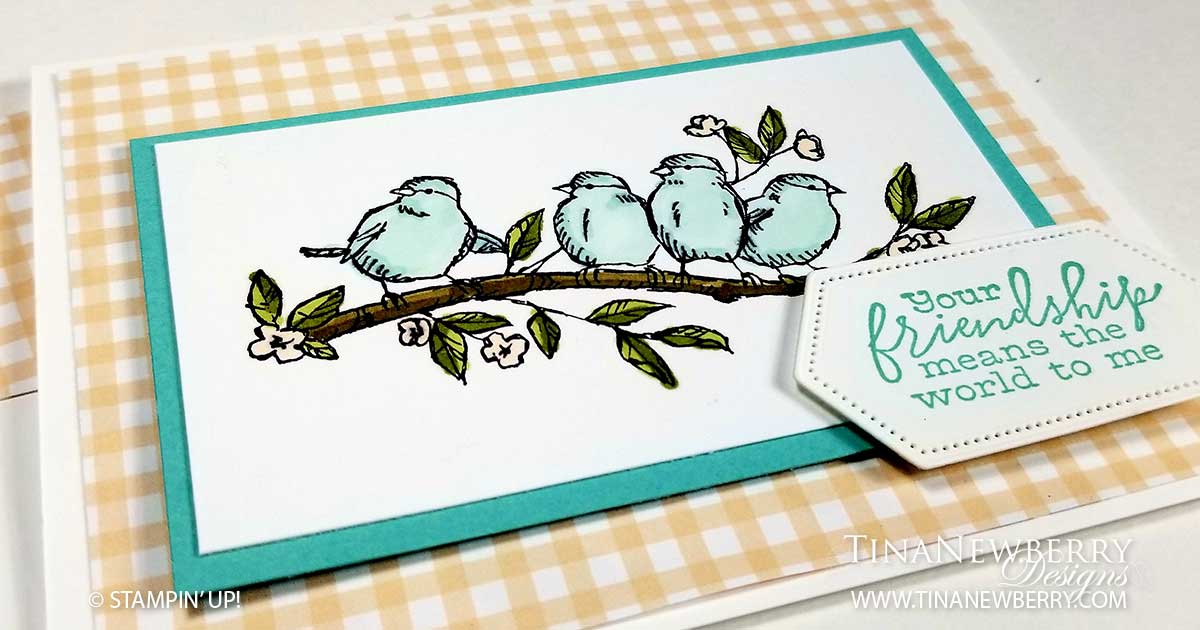
I’ve had my eye on this Free as a Bird Stamp Set for a few years and was SO GLAD when it carried over again into the new catalog. When we lived in NH my desk was in front of a window overlooking the front yard and a field beyond. The cats and I enjoyed watching the birds – even if for very different reasons. LOL. This pretty stamp set reminds me of brilliant sunrises and cute little birds viewed through that window. This one is just Stamps, Ink & Paper for #simplestamping


Full list of supplies needed, listed below. A die cutting machine is needed for this card.
Card Base: Basic White Thick Cardstock 5 1/2″ h x 8 1/2″ w folded to 5 1/2″ h x 4 1/4″ w
Background: Pansy Petals Designer Series Paper 5 1/4″ h x 4″ w
Birds Matte: Coastal Cabana Cardstock 3″ h x 4 1/2″ w
Birds Layer: Basic White Cardstock 2 1/2″ h x 4 1/4″ w
Sentiment: Basic White Cardstock Scrap
Inside Layer: Basic White Cardstock 5 1/4″ h x 4″ w
- Affix all stamps to Acrylic Blocks.
- Fold the Card Base in half using a Bone Folder to sharpen the crease.
- Stamp the Birds on a Branch image in Tuxedo Black Memento Ink and color in the birds with Blender Pens. I used:
- Birds: Pool Party Light and Dark
- Branch: Soft Suede Light and Dark
- Leaves: Old Olive Light and Dark
- Flowers: Pale Papaya Light and Dark
- Stamp your Sentiment on Basic White Scrap in Coastal Cabana Ink and run through the Stampin’ Cut & Emboss Machine with the Nested Labels Die.
- Now you’re ready to assemble.
- Attach the Background to the Card Base with adhesive.
- Attach the Birds to the Birds Matte and attach with Stampin’ Dimensionals.
- Attach your sentiment with Stampin Dimensionals.
- Decorate the inside layer and attach.
- Decorate the envelope.
- So cute! Now send it to someone special.
Shopping List
Product List


 Designer Series Paper")

Stamper’s Toolkit
You will also need adhesive, acrylic blocks, scissors and other basic PaperCrafting items from the Stamper’s Toolkit


")


 Designer Series Paper")


