Red & Gold

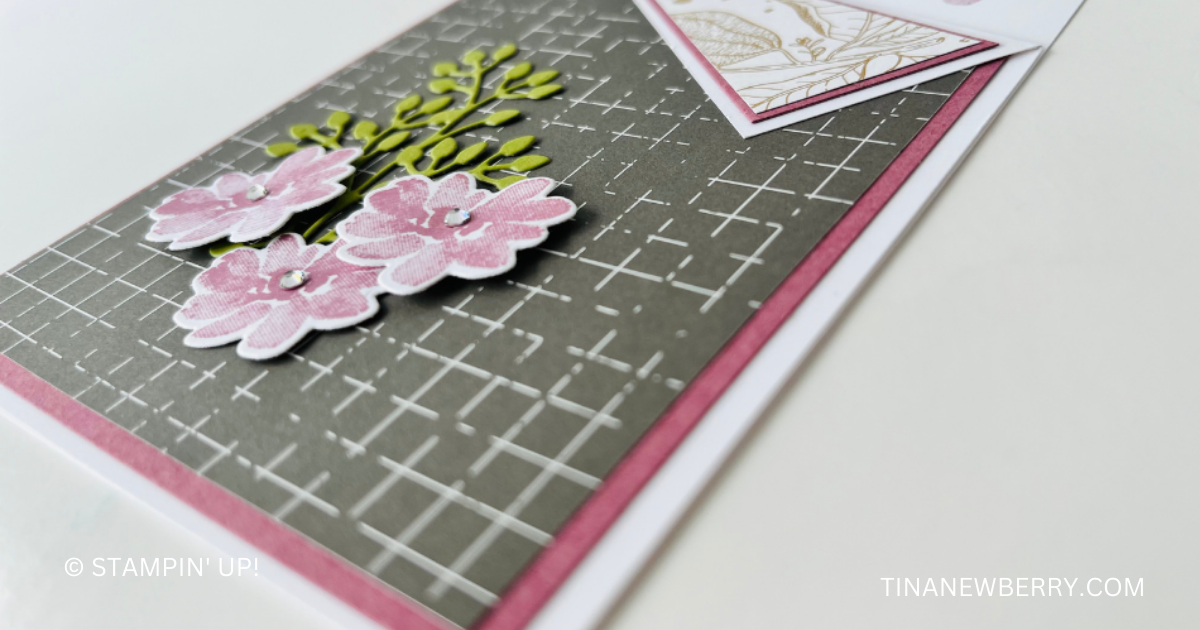
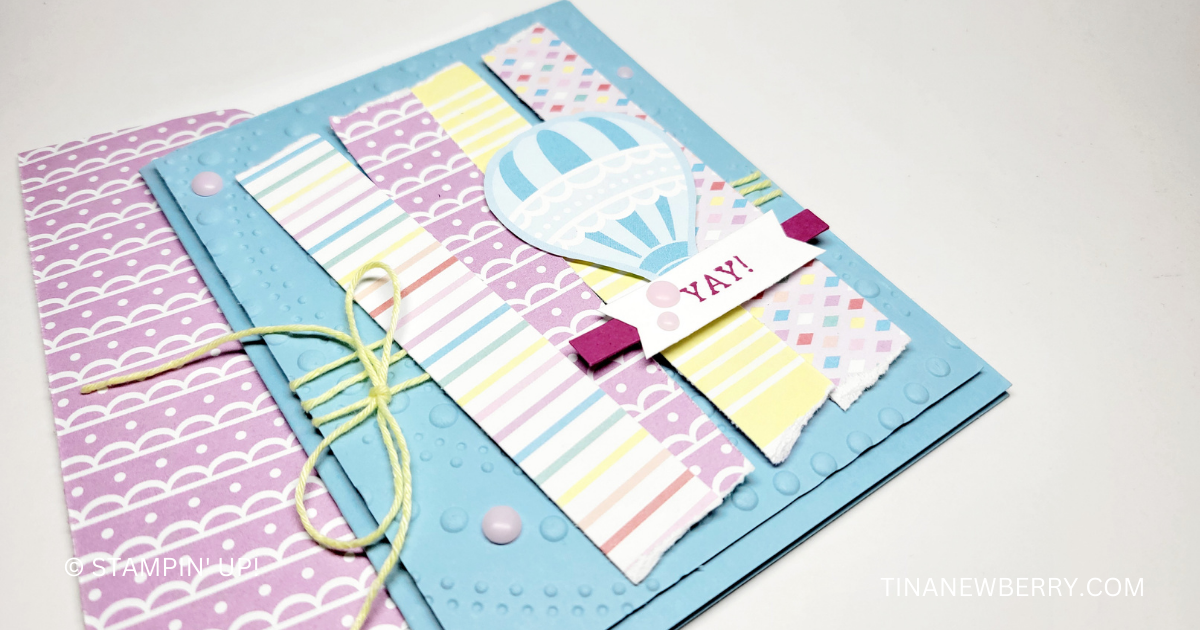
A quick & easy design to add pop with color and interest with subtle patterns.

Measurements

Full list of supplies needed, listed below. A die cutting machine is needed for this card.

Card base – White

                      5 ½” x 8 ½” scored at 4 ¼”

                      1 5/8” x 2 3/8” 

Poppy Parade – 4” x 5 ¼”

                          2 ¾” x 2 ½”

                          1 ¾” x 2 ½”

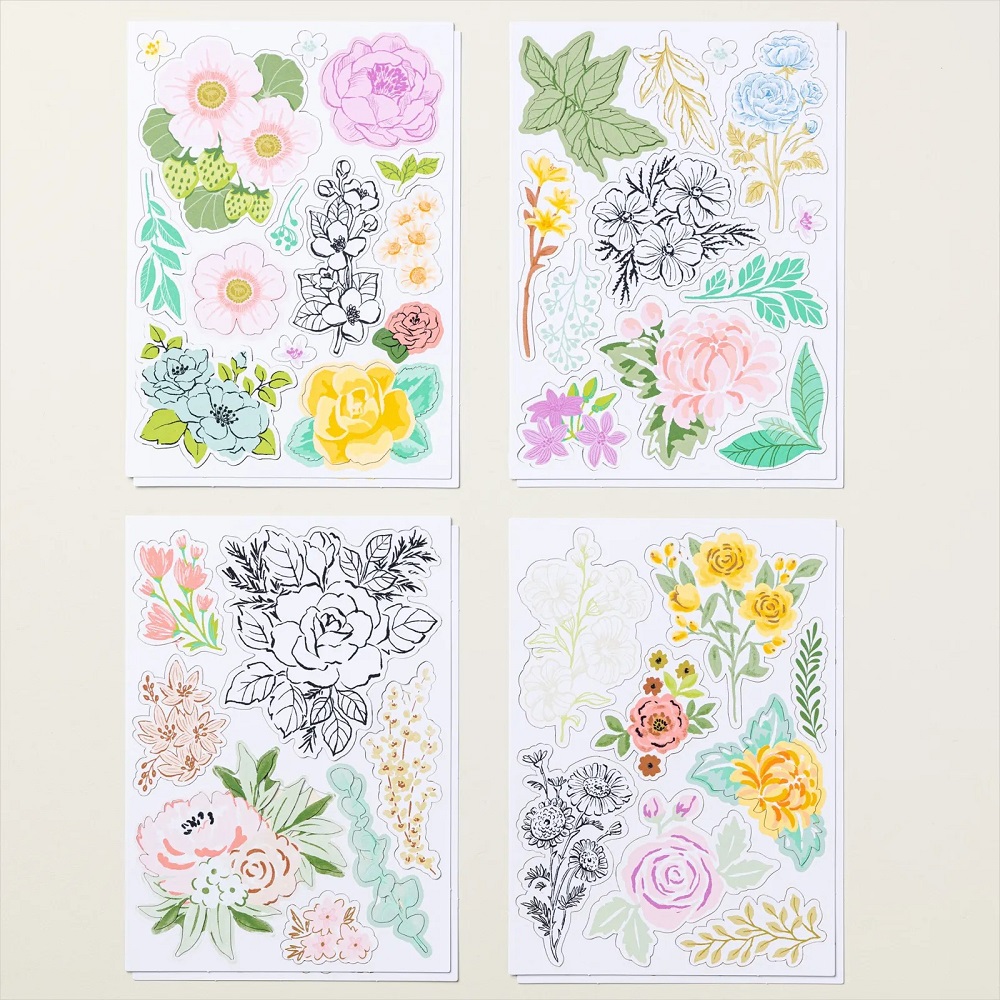
Nature’s Sweetness dsp – Gold leaf pattern 

                                               2 ½” x 4”

                                           Gold grid pattern


Let’s Create

  1. Affix all stamps to acrylic blocks.
  2. Fold and burnish card base at the score line using bone folder.
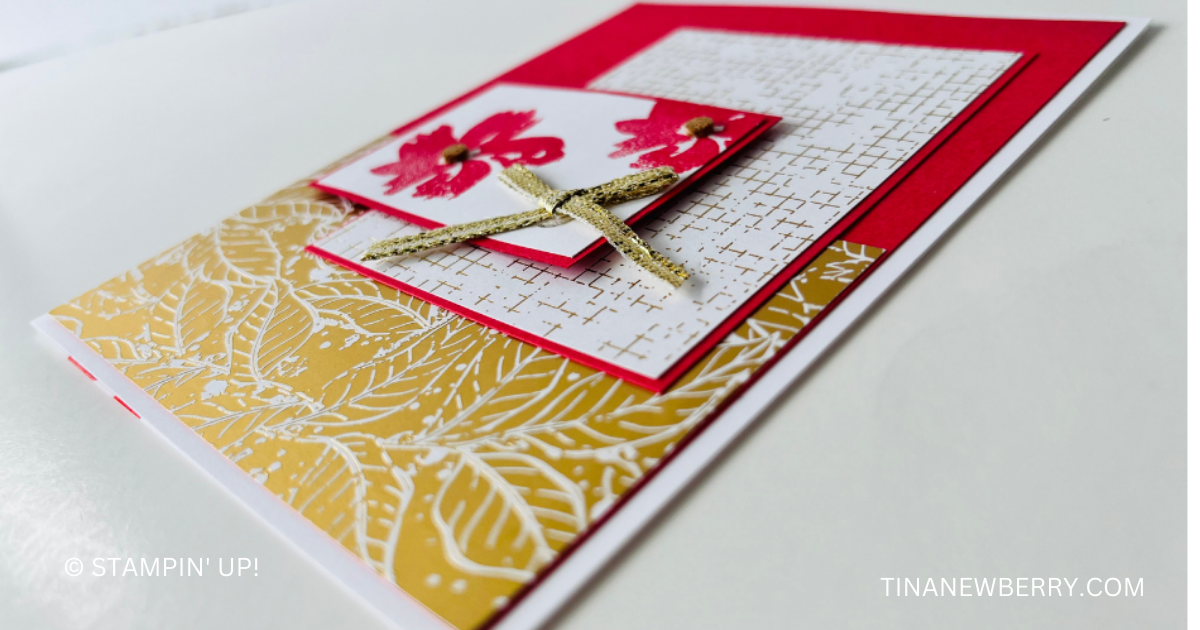
  3. Attach large Poppy Parade panel to the card front.
  4. Glue the gold leaf dsp to the bottom of the Poppy Parade panel.
  5. Add the gold grid panel to the Poppy Parade panel.  Glue it to the card front about 3/8” from the right hand side of the card and 3/4” from the top.
  6. Stamp the flower on the small panel of white using the Poppy Parade ink.  See photo above.
  7. Attach the image panel to the Poppy Parade small panel.
  8. Add the image panel to the card front about ½” from the left side and centered on the top line of the gold leaf panel.  See photo above.
  9. Use a glue dot to add a gold trim ribbon to the lower right hand corner of the image panel.
  10. Place a small gem or embellishment in the center of each flower on the image panel.

Shopping List

Recommended Stamper’s Toolkit

Product List
Order online from the convenience of your own home or send me your order and I’ll take care of you. ❤ Either way, please use the host code ANTD9UHS. Order online AND, if your order is $50 or more using host code ANTD9UHS between now and the end of the month you’ll receive a free pack of embellishment as a THANK YOU gift from me. ❤ If your order is over $150, skip the host code, earn Stampin’ Rewards for free stuff yourself and I’ll still send you a free pack of embellishment as a THANK YOU gift from me. ❤

Ephemera Focal Image

Card sketches inspire endless creativity. This project was inspired by the first sketch on page 22 of the new annual catalog. What will you make from that sketch?

Sketch 1 (’24 – ’25 Annual Catalog)
Fully Flowering Ephemera Pack
Let your creativity bloom with this Fully Flowering Ephemera Pack! These laser-cut floral elements give you the look of hand-colored, detailed, die-cut pieces in a jiff—just remove them from the sheet and adhere to a card base using your favorite adhesive. Pair them with our blank cards and envelopes to make quick and easy cards with a personal touch!

Measurements

Full list of supplies needed, listed below. A die cutting machine is needed for this card.

Basic White Thick Cardstock: 5 ½” h x 8 ½” w  scored and folded at 4 ¼” h

Vellum Cardstock: scrap for sprig die cuts

Basic White Cardstock: scrap for sprig die cuts

2024-2026 In Color Designer Series Paper: 4 ½” h x 3 ¼” w Summer Splash (2 patterns)

Fully Flowering Mix N Match Ephemera Pack

Saying Something Mix N Match Ephemera Pack

Let’s Create

  1. Use a Bone Folder to burnish the Basic White Thick Cardstock at the scoreline to create the card base.
  2. Attach two Designer Series Paper (DSP) panels using Stampin’ Seal. Off set from each other so both patterns are visible. 
  3. Die cut sprigs in Basic White Cardstock and Vellum Cardstock using the Textured Florals dies.
  4. Attach sprigs behind flower from the Fully Flowering Mix N Match Ephemera Pack using Mini Glue Dots.
  5. Attach flower with Stampin’ Dimensionals.
  6. Overlap the flower with the sentiment from the Saying Something Mix N Match Ephemera Pack. Use Stampin’ Seal to attach where the overlap and a Stampin’ Dimensional where they overhang. 
  7. Double up a piece of White Baker’s Twine and make a small bow. Attach with a Mini Glue Dot. 
  8. Sprinkle on some Brushed Butterflies.
  9. Decorate your envelope.
  10. So sweet! Who will you send it to?
Product List

Recommended Stamper’s Toolkit

Product List
Order online from the convenience of your own home or send me your order and I’ll take care of you. ❤ Either way, please use the host code ANTD9UHS. Order online AND, if your order is $50 or more using host code ANTD9UHS between now and the end of the month you’ll receive a free pack of embellishment as a THANK YOU gift from me. ❤ If your order is over $150, skip the host code, earn Stampin’ Rewards for free stuff yourself and I’ll still send you a free pack of embellishment as a THANK YOU gift from me. ❤

Cute Design Using Scraps

If you’re a paper hoarder like me, not only do you struggle to use your pretty patterned paper, but you also don’t want to waste any of it. With this quick & easy design you only have to part with a little of your stash, and you can use scraps.

Measurements

Full list of supplies needed, listed below. A die cutting machine is needed for this card.

Balmy Blue Cardstock 

  • 5 1/2″ h x 8 1/2” w scored at 4 1/4” 
  • 5 1/4″ h x 4″ w

Lighter Than Air Designer Series Paper (DSP):

  • Pattern #1: 3/4” w x 5 1/2” h
  • Pattern #2: 3/4” w x 5 1/2” h
  • Pattern #3: 3/4” w x 5 1/2” h
  • Pattern #4: 3/4” w x 5 1/2” h
  • Scrap for focal image

Berry Burst Cardstock: scrap for sentiment

Basic White Cardstock: 

  • scrap for sentiment
  • 5 ¼” h x 4” w


Let’s Create

  1. Affix all stamps to Acrylic Blocks.
  2. Use a Bone Folder to burnish the Balmy Blue at the scoreline to create the card base.
  3. Run the 5 1/4″ h x 4″ w Balmy Blue panel through the Stampin’ Cut & Emboss Machine with the Dotted Circles Embossing Folder.
  4. Wrap Baker’s Twine around panel several times and tie a bow off to the left side. Attach panel to Card Base with Stampin’ Dimensionals.
  5. Tear the ends of the DSP strips of varying sizes. Note: If you want the torn edge to be have a white edge, hold DSP strip with preferred pattern facing up and tear toward the preferred pattern.. If you want the torn edge to have DSP colored edge, tear away from the preferred pattern.
  6. Attach DSP strips using Stampin’ Dimensionals. 
  7. Die cut a Balloon from the Lighter Than Air DSP and attach with Stampin’ Dimensionals.
  8. Stamp Sentiment on scrap Basic White in Berry Burst ink and use Paper Snip Scissors to flag the ends.
  9. Attach tiny strip of Berry Burst cardstock behind the Sentiment with Multipurpose Glue. Attach sentiment to card with Stampin’ Dimensionals. 
  10. Sprinkle on some Rainbow Adhesive Backed Dots.
  11. Decorate 5 ¼” h x 4” w Basic White Cardstock and attach to inside with Stampin’ Seal.
  12. Decorate your envelope.
  13. Cute!  Put it in the mail today!
Product List

Recommended Stamper’s Toolkit

Product List
Order online from the convenience of your own home or send me your order and I’ll take care of you. ❤ Either way, please use the host code ANTD9UHS. Order online AND, if your order is $50 or more using host code ANTD9UHS between now and the end of the month you’ll receive a free pack of embellishment as a THANK YOU gift from me. ❤ If your order is over $150, skip the host code, earn Stampin’ Rewards for free stuff yourself and I’ll still send you a free pack of embellishment as a THANK YOU gift from me. ❤

Corner-Fold Design

Thank you for your interest in this project. Some projects are exclusive to subscribers who will receive passwords by email.

Are you a subscriber? Awesome! Check your email for the password and enter it here to view this project.

Not yet subscribed?  We’d love for you to join us.  Subscribe to my email list and receive news, information and inspiration by email.