Congratulations on Your Growing Family

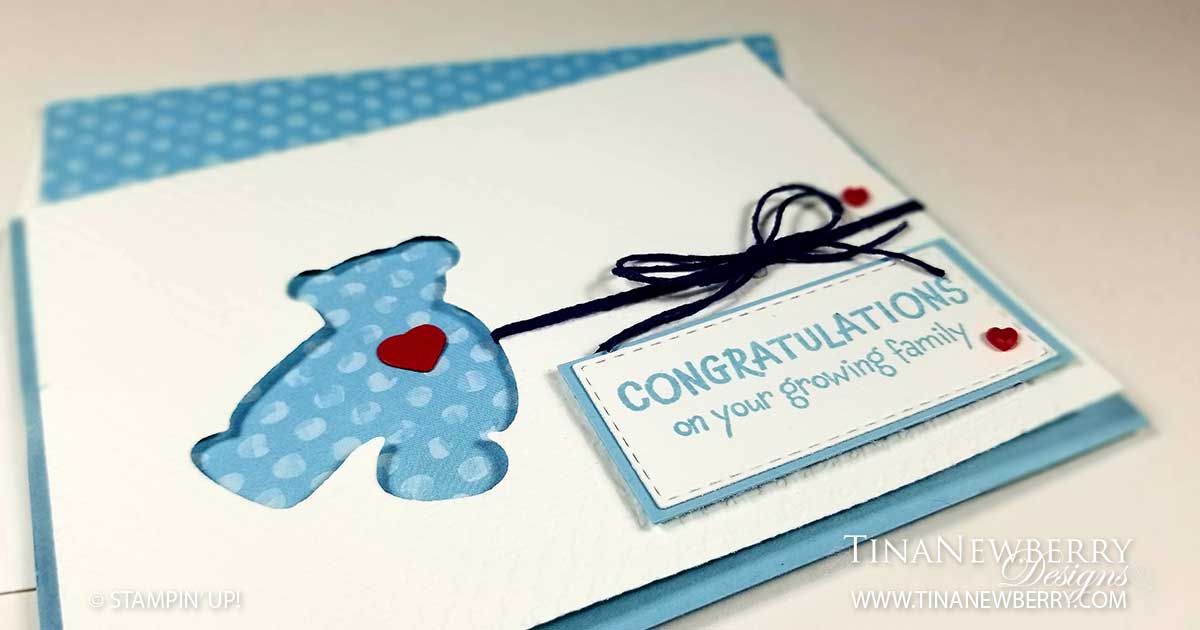
Look at this cute little bear! I’m loving the look of emphasizing the Bear with a popped up background and this blue polka dot paper from the You’re a Peach Designer Series Paper.

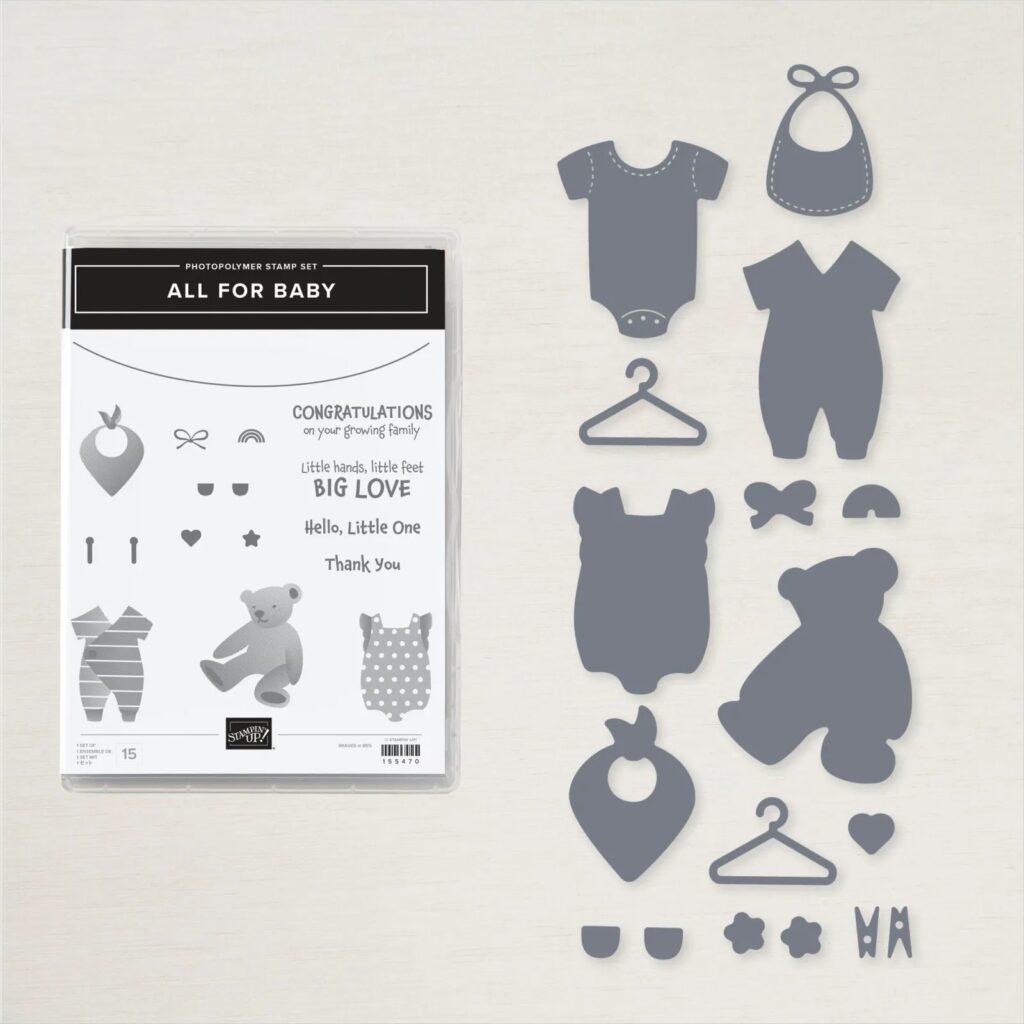
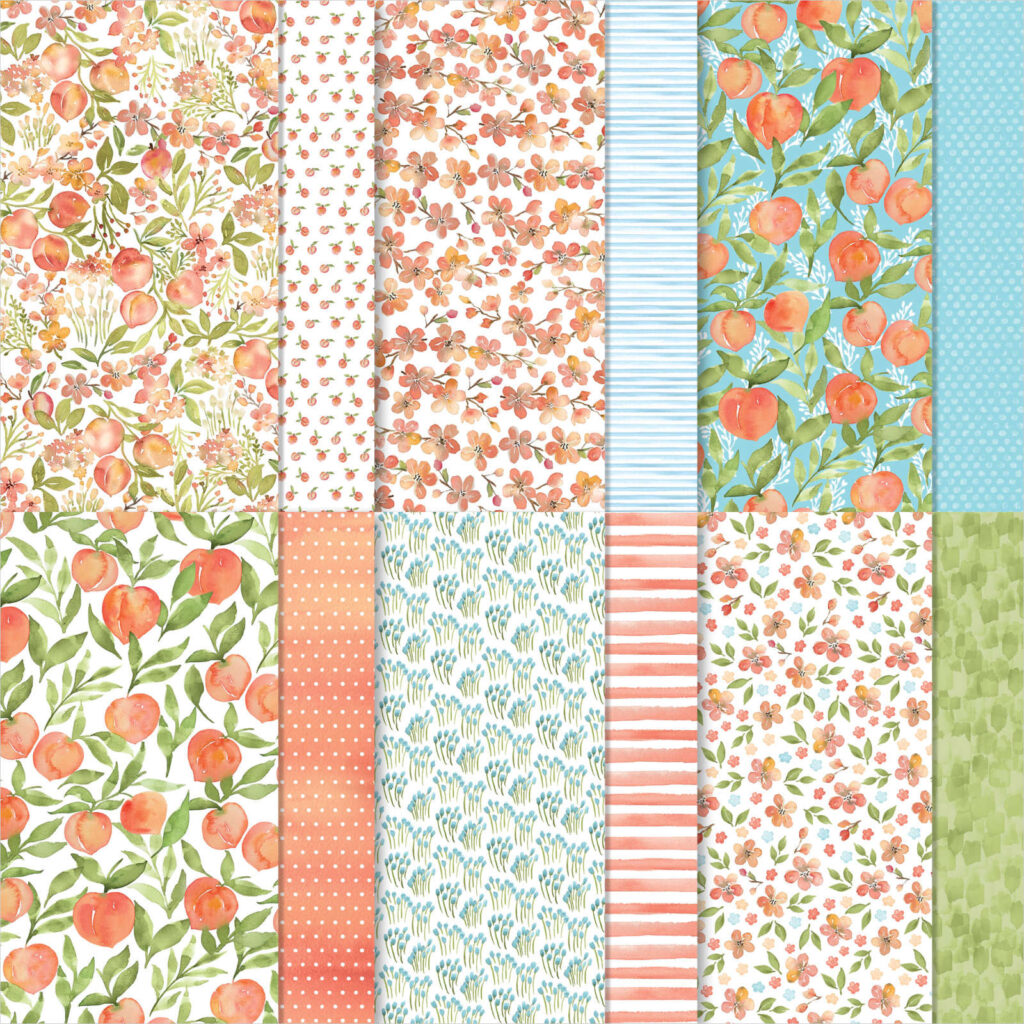
All For Baby Bundle – Save 10% when you buy the bundle – and You’re a Peach Designer Series Paper – 15% off thru 8/2/21.

Measurements

Full list of supplies needed, listed below. A die cutting machine is needed for this card.
Card Base: Balmy Blue Cardstock 4 1/4″ h x 11″ w folded to 4 1/4″ h x 5 1/2″ w
Patterned Background: You’re a Peach Designer Series Paper 3 3/4″ h x 5″ w.
Background: Basic White Cardstock 4″ h x 5 1/4″ w
Sentiment Matte: Balmy Blue Cardstock 1 1/8″ h x 2 1/2″ w
Sentiment Layer: Basic White Cardstock die cut with the Stitched Rectangles Die 1 3/8″ h x 2 1/2″ w

Let’s Create

  1. Affix all stamps to Acrylic Blocks.
  2. Fold the Card Base in half using a Bone Folder to sharpen the crease.
  3. Use the adhesive of your choice to attach the You’re a Peach Patterned Background to the Card Base.
  4. Run the Basic White Background through the Die Cutting & Embossing Machine with the Bear Die first and then run it through again with the In Good Tasteful Textiles Embossing Folder.
  5. Cut 24-30″ of Baker’s Twine, double it over and wrap it around the Basic White Background. Tie with a Bow. I used the retired Well Suited Night of Navy Baker’s Twine.
  6. Attach the Basic White Background with Stampin’ Dimensionals.
  7. Die cut a Real Red heart and attach with the adhesive of your choice.
  8. Die cut the Basic White Sentiment Layer from the Stitched Rectangles Die, if you haven’t already.
  9. Use Balmy Blue Ink to stamp the Sentiment on the Stitched Rectangle Die and attach to the Balmy Blue Sentiment Layer with the Adhesive of your choice, then attach to the card with Stampin’ Dimensionals.
  10. Add some embellishments – I added the recently retired Resin Hearts.
  11. So cute! Now send it to someone special.

Stamper’s Toolkit

You will also need adhesive, acrylic blocks, scissors and other basic PaperCrafting items from the Stamper’s Toolkit

Hey Friend

This card makes me SO HAPPY! The colors, the layout. So fun! I can’t wait to send this to a friend. My inspiration for this pretty card came from Mary Fish. She made the super cute card below with the Bloom By Bloom Bundle a few years ago and I couldn’t wait to recreate it.

In Symmetry Bundle – save 10% when you buy the bundle.

Measurements

Full list of supplies needed, listed below. A die cutting machine is needed for this card.
Card Base: Basic White Thick Cardstock 5 1/2″ h x 8 1/2″ w folded to 5 1/2″ h x 4 1/4″ w
Background: Flirty Flamingo Cardstock 5 1/4″ h x 4″ w
Decorative Banner: Sweet Symmetry Designer Series Paper 5″h x 2″ w
Decorative Rectangle: Sweet Symmetry Designer Series Paper 3 3/8″h x 1 1/2″ w
Flower Background: Basic White Cardstock 2 3/4″h x 2 3/4″ w
Flower, Stem and Leaves: Basic White Cardstock scrap
Sentiment Layer: Basic White Cardstock 3/4″h x 1 7/8″ w
Sentiment Matte: Flirty Flamingo Cardstock 7/8″h x 2 1/8″ w
Inside (optional): 5 1/4″ h x 4″ w

Let’s Create

  1. Affix all stamps to Acrylic Blocks.
  2. Fold the Card Base in half using a Bone Folder to sharpen the crease.
  3. Use adhesive of your choice to attach the Decorative Banner.
  4. Use Tear & Tape to attach a 4 1/2″ piece of Just Jade ribbon.
  5. Use Stampin’ Dimensionals to attach the Decorative Rectangle.
  6. On scrap Basic White Cardstock, stamp the flower inn Night of Navy ink and the Stem, the small flower in Flirty Flamingo ink and Leaves in Just Jade ink, then use your Paper Snips to cut the out. Assemble the large Flower, Stem and Leaves on the Flower Background Basic White Cardstock and then use Stampin’ Dimensionals to attach.
  7. Stamp the Sentiment in Night of Navy ink on the Basic White Sentiment Layer. Attach to the Flirty Flamingo Sentiment Matte with Stampin’ Dimensionals.
  8. Add the small Flower using a Dimensional. Add a Metallic Pearl to the center.
  9. Punch out two sprigs inn Just Jade Cardstock from the Symmetrical Stems Border Punch and attach with Mini Glue Dots.
  10. Sprinkle on a Metallic Pearl and some Playing with Patterns Resin Dots.
  11. You’re Done!! That’s GREAT! Who will you send it to?

Shopping List

Stamper’s Toolkit

You will also need adhesive, acrylic blocks, scissors and other basic PaperCrafting items from the Stamper’s Toolkit

Thanks So Much

Sometimes inspiration comes from not only other papercrafters, but other products. When I first saw the In Symmetry Stamp Set, I was reminded of the Bloom by Bloom stamp set we had a few years ago. There were several beautiful cards I had seen from the Bloom by Bloom set that I still wanted to make, like this one from Julie Davison! It’s super simple- only 3 layers- and I love it! I used the Sweet Symmetry Designer Series Paper, a little ink and some Just Jade ribbon and that’s it. So fun.

Measurements

Full list of supplies needed, listed below. A die cutting machine is needed for this card.
Card Base: Night of Navy Cardstock 5 1/2″ h x 8 1/2″ w folded to 5 1/2″ h x 4 1/4″ w
Background: In Symmetry Designer Series Paper 3″ h x 3 1/2″ w
Sentiment Layer: 4 1/4″h x 2 1/4″ w
Inside Layer (Optional): Basic White Cardstock 5 1/2″ h x 4 1/4″ w

Let’s Create

  1. Affix all stamps to Acrylic Blocks.
  2. Fold the Card Base in half using a Bone Folder to sharpen the crease.
  3. Stamp the Flower in Bumble Bee Ink, the Stem and Leaves in Just Jade and the Sentiment in Night of Navy, all on the Sentiment Layer.
  4. Attach the Background using the adhesive of your choice.
  5. Attach the Sentiment Layer with Stampin’ Dimensionals.
  6. Tie a Bow from the Just Jade & Gold 3/8″ (1 cm) Ribbon and use a Mini Glue Dot to attach to the Sentiment Layer.
  7. Punch a few sprigs from Just Jade Cardstock and sprinkle those around your card – attaching with Mini Glue Dots.
  8. How Pretty!! Who will you send it to?!

Shopping List

Stamper’s Toolkit

You will also need adhesive, acrylic blocks, scissors and other basic PaperCrafting items from the Stamper’s Toolkit