Hello

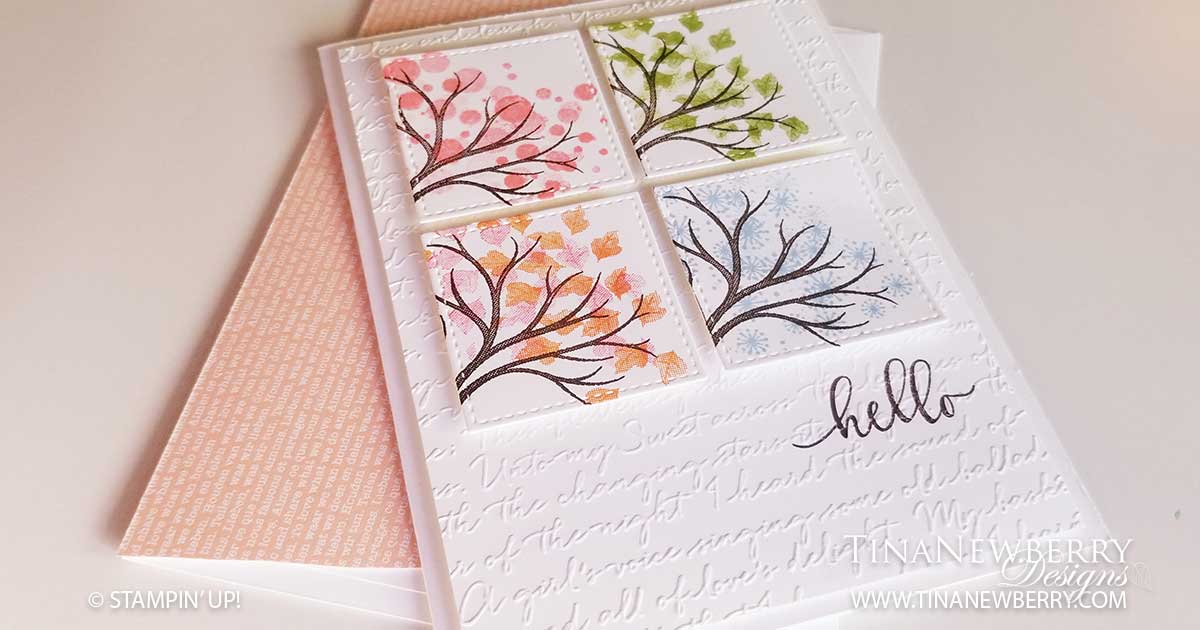
This card has been brewing in that creative space in my head ever since I first saw the Life is Beautiful Stamp Set. I knew I wanted to depict all four seasons and the stitched squares were the perfect mini canvases for each season. Another white on white #simplestamping card. Exactly what I had in mind.

Full list of supplies needed, listed below. A die cutting machine is needed for this card.
Card Base: Whisper White Thick 8 1/2 h” x 5 1/2″ w folded to 5 1/2″ h x 4 1/4″ w.
Background: Whisper White 5 1/4″ h x 4″ w
Squares: 
Whisper White Cardstock 1 5/8″ Stitched Shapes Dies

  1. Affix all stamps to Acrylic Blocks.
  2. Fold the Card Base in half using a Bone Folder to sharpen the crease.
  3. Stamp the Tree Trunk in Early Espresso ink. Use a Stamparatus or otherwise mark your settings to make duplicate tree images.
  4. Use the Bubbles Stamp with Flirty Flamingo ink for the Spring image.
  5. Use the Leaves Stamp with Pear Pizzaz ink for the Summer image.
  6. Use the Leaves Stamp with Pumpkin Pie and stamped off Cherry Cobbler ink for the Fall image.
  7. Use the Snowflake Stamp with Seaside Spray for the Winter Image.
  8. Roughly lay the Squares where you want them on the Background and use as a guide to stamp the Sentiment.
  9. Run the Background through the Scripty Embossing Folder.
  10. Attach all the Season Squares with Stampin’ Dimensionals.
  11. Attach the Background with Stampin’ Dimensionals.
  12. Decorate the Inside.
  13. Decorate the envelope.
  14. Lovely!! Now put it in the mail and make someone’s day.

Shopping List

Recommended Stamper’s Toolkit ❤


Life is Beautiful

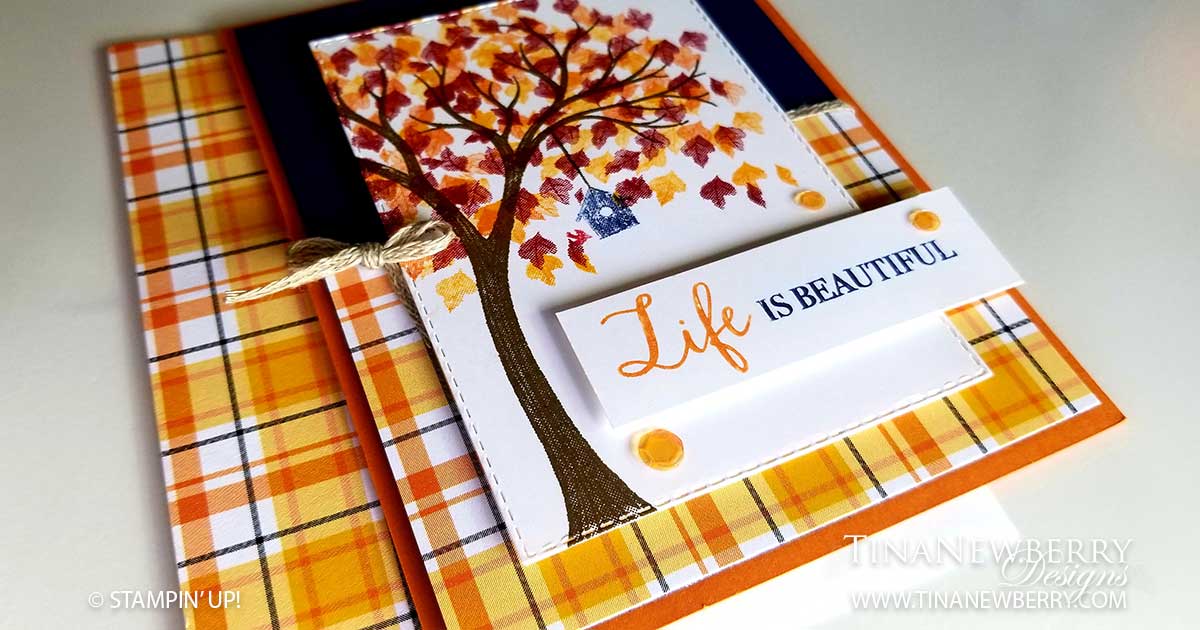
We’re still waiting for fall to arrive here in Florida, but that’s not going to stop me from stamping homemade fall cards! There are so many possibilities with the Life is Beautiful Photopolymer Stamp Set. No matter what you choose, your cards are sure to be beautiful.

Full list of supplies needed, listed below.
Card Base: Pumpkin Pie Cardstock 8 1/2 h” x 5 1/2″ w folded to 5 1/2″ h x 4 1/4″ w.
Background: Night of Navy Cardstock 5 1/4″ h x 4″ w
Background Pattern: Plaid Tidings DSP 2 3/4″ h x 4″ w
Tree Layer: Whisper White Cardstock 4 1/4″ h x 3″ w Stitched Rectangle
Sentiment Layer: Whisper White Cardstock 7/8″ h x 2 7/8″ w

  1. Affix all stamps to Acrylic Blocks.
  2. Fold the Card Base in half using a Bone Folder to sharpen the crease.
  3. Stamp the Tree in Early Espresso Ink.
  4. Stamp and Stamp off the Leaves in Pumpkin Pie and Cherry Cobbler Ink
  5. Use Stampin’ Write Markers to color the Bird House and stamp it on the Tree Layer.
  6. Use Stampin’ Write Markers to color the Sentiment Stamp and stamp it on the Sentiment Layer.
  7. Attach the Background Pattern to the Background Layer with Stampin’ Seal. Wrap the Braided Linen Trim along the seam and attach with Tear & Tape. Use a second piece of Braided Linen Trim to make a bow and attach with a Mini Glue Dot.
  8. Attach the Tree Layer and the Sentiment Layer with Stampin’ Dimensionals.
  9. Add some sequins.
  10. Attach the Background Layer with Stampin Dimensionals.
  11. Decorate the Inside Layer and attach.
  12. Decorate the envelope.
  13. Eek! Love it! Now send it to someone special.

Shopping List

Recommended Stamper’s Toolkit ❤


Design inspired by Kristi Gray.

Brushed Metallic Thank You

Thank you for your interest in this project. Some projects are exclusive to subscribers who will receive passwords by email.

Are you a subscriber? Awesome! Check your email for the password and enter it here to view this project.

Not yet subscribed?  We’d love for you to join us.  Subscribe to my email list and receive news, information and inspiration by email.