Step It Up: Blessings of Home

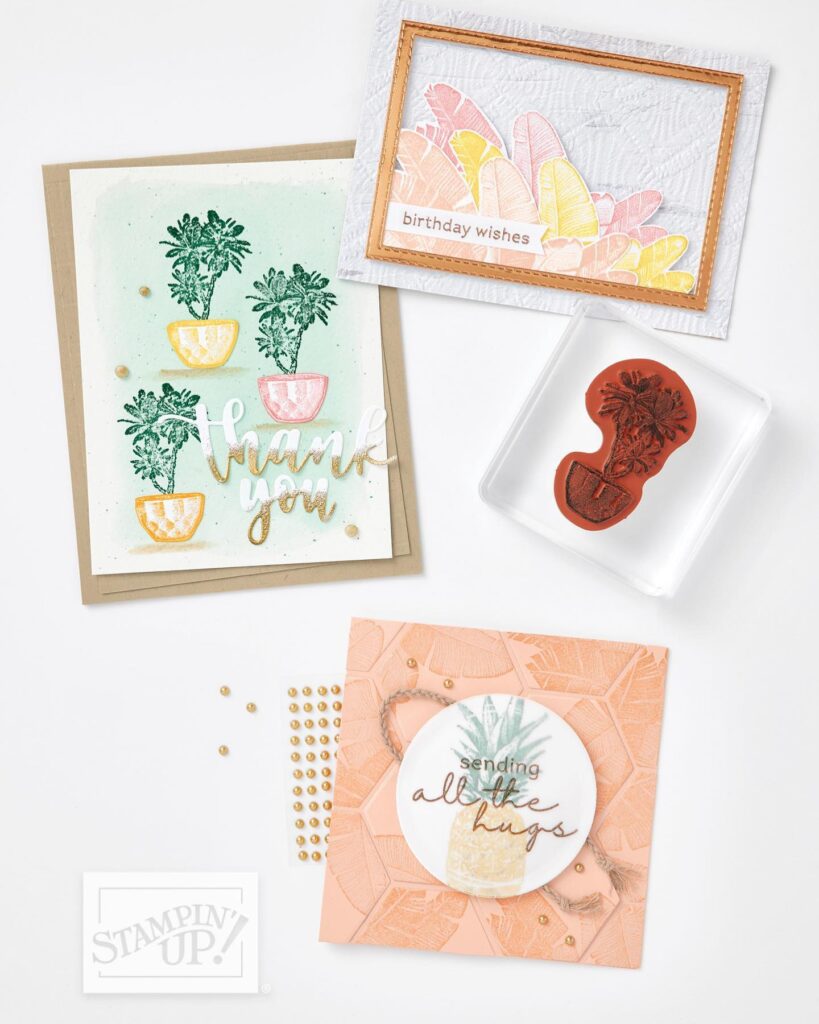
What’s better than making one card? Making three cards, of course! We had fun stepping up these three cards, and we hope you have fun too, whether you make one card or all three! (Products referenced are linked below)

CASUAL

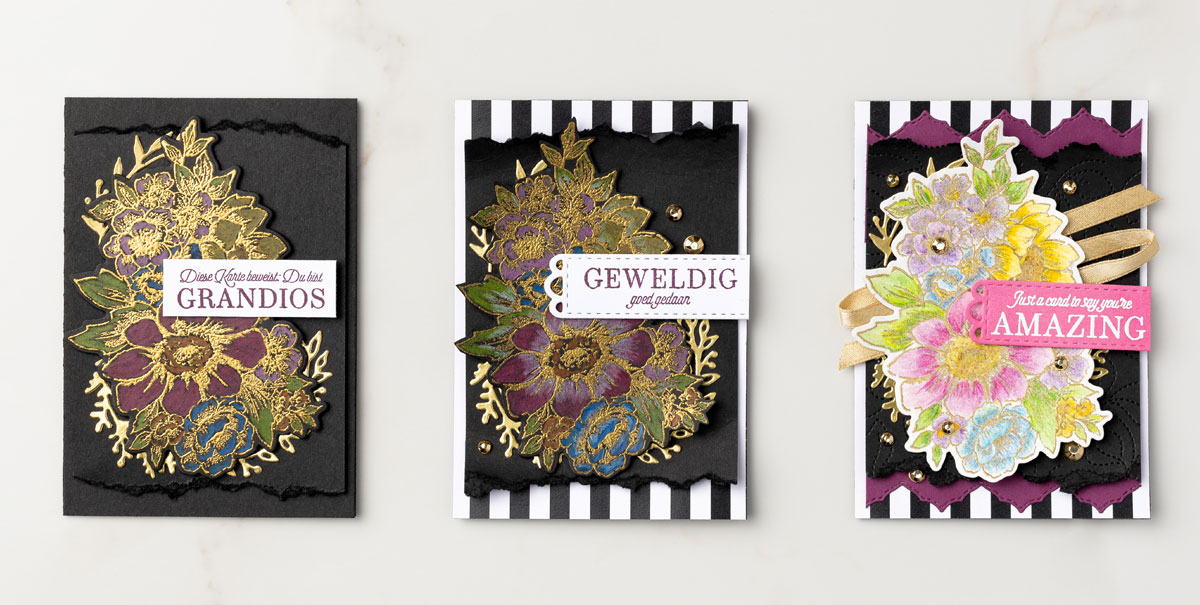
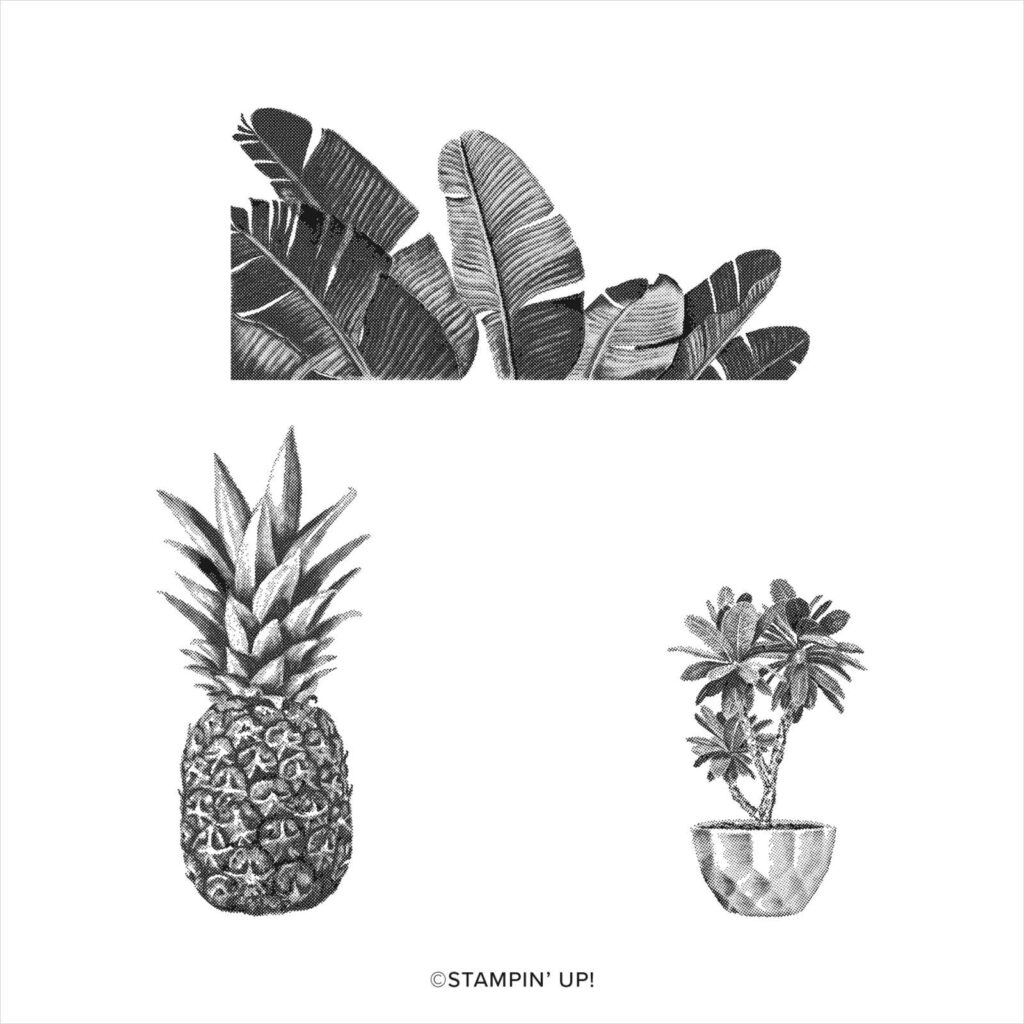
For our Diese Karte beweist: Du bist grandios card, we used both the stamps and the die cuts from the Blessings of Home bundle. We first stamped out a gorgeous floral arrangement in VersaMark ink, which we heat embossed with Gold Stampin’ Emboss Powder and colored with Watercolor Pencils. We then die cut some lovely leaf trim using gold foil and stamped out a sentiment in Rich Razzleberry ink using the Special Moments Stamp Set. Finally, we tore the top and bottom of the panel behind the floral arrangement for texture.

AVID

We added Pattern Party Designer Series Paper and Gilded Gems to our Geweldig goed gedaan card for a nice pop of color. We then used the White Watercolor Pencil to add shading and dimension to our beautiful flowers. Finally, we die cut a fun label for our sentiment using the Meadow Dies.

ARTFULLY AVID

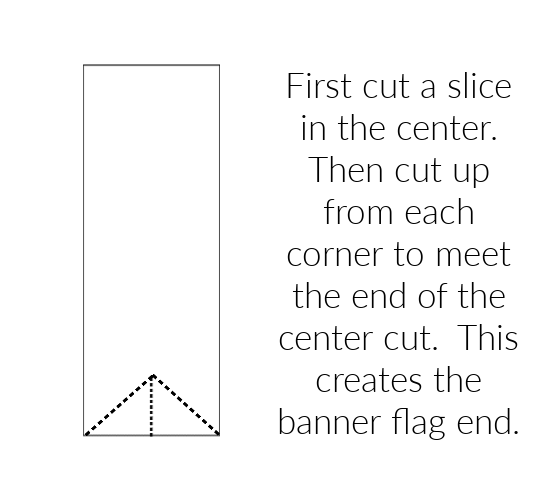
For our last project—Just a Card to Say You’re Amazing—we broke out the cardstock! We accented the top and bottom of the card with die cut Basic Borders in Rich Razzleberry; then we die cut the floral arrangement in white and the sentiment in Polished Pink. We finished off the card with some Gold 1/4″ (6.4 mm) Shimmer Ribbon. Isn’t it beautiful?

Show us how you step up your cards! Upload your projects to the Customer PaperCrafty Time Group.

Product List

Thinking of You

Thank you for your interest in this project. Some projects are exclusive to subscribers who will receive passwords by email.

Are you a subscriber? Awesome! Check your email for the password and enter it here to view this project.

Not yet subscribed?  We’d love for you to join us.  Subscribe to my email list and receive news, information and inspiration by email.

Hang In There

The color combinations for this design are endless! For this one, the Old Olive and Cinnamon Cider combination of this card combines with the Island Vibes stamps set are perfect to support the boys or girls in your life.

Measurements

Full list of supplies needed, listed below. A die cutting machine is needed for this card.

Card Base: Thick Basic White Cardstock 5 ½” h  x  8 ½” w folded to 5 ½” h x 4 ½” w

Background: Old Olive Cardstock  5 ¼” h x 4” w

Back Tag Layer: Cinnamon Cider Cardstock 4 ½”  h x 2” w

Front Tag Layer: Basic White Cardstock 4” h x 1 ½” w

Sentiment Layer: Basic White Cardstock scrap ¾” h x 3” w

Inside Layer: Basic Whie Cardstock 5 ¼” h x 4” w

Let’s Create

  1. Affix all stamps to Acrylic Blocks.
  2. Fold the Card Base in half using a Bone Folder to sharpen the crease.
  3. Stamp the palm fronds image with Old Olive Stampin’ Pad around the perimeter of the Old Olive Cardstock layer. 
  4. Adhere the stamped Old Olive Cardstock layer onto the front of the Thick Basic White card base.
  5. Punch the tops of the Cinnamon Cider Cardstock 4 ½”  h x 2” w and Basic White card stock 4” h x 1 ½” w with the Delightful Tag Topper.
  6. Place the pot side of the stamp image into the Cinnamon Cider Stampin’ Pad and the plant part of the image into the Old Olive Stampin’ Pad. Stamp onto the center of the Basic White Cardstock tag.
  7. Stamp the sentiment with Old Olive Stampin’ Pad onto the ¾” h x 3” w Basic White Cardstock scrap. Trim each end with a slant cut but leave space for placing embellishments at each end.
  8. Lightly tap the edges of the sentiment layer into the Cinnamon Cider Stampin’ Pad to lightly ink each side.
  9. Now cut a banner tag bottom onto the Cinnamon Cider tag and the Basic White tag, see the diagram image. 
  10. Cut a 15” length of the Linen Thread. Fold it in half and push the fold from the front to the back of the tags ribbon holes to connect the tags.
  11. Thread the ends up through the loop and pull it snug.  Tie the ends into a knot and trim the ends.
  12. Use Dimensionals to adhere the layered tags diagonally onto the card front. 
  13. Use Dimensionals to adhere the sentiment strip onto the card front.
  14. Embellish the sentiment and tag with the Brushed Metallic Adhesive Backed Dots.
  15. If you like, you can stamp the palm leaves onto the top left corner of the envelope.
  16. Stamp and decorate the inside and attach with Stampin’ Seal.
  17. So cute! Now send it to someone special.

Shopping List

Stamper’s Toolkit

You will also need adhesive, acrylic blocks, scissors and other basic PaperCrafting items from the Stamper’s Toolkit

Happy Dad Day

Father’s Day will be here before we know it. Get a jump on your cards with the Island Vibes Sale-a-bration Stamp Set. Free with your $50 product order now thru February 28th. Learn more about Sale-a-bration.

Measurements

Full list of supplies needed, listed below. A die cutting machine is needed for this card.

Card Base: Garden Green Cardstock 4 ¼” h  x  11” w folded to 4 1/4″ h x 5 1/2″ w

Background: Basic White card stock  4″ h x 5 1/4″ w

Front Layer: Cinnamon Cider print from the In Color 2020–2022 6″ X 6″ (15.2 X 15.2 CM) Designer Series Paper 1 ½” h x 4” w

Sentiment Layer: Basic White Cardstock scrap ½” h x 3” w

Inside Layer: Basic White Cardstock 4″ h x 5 1/4″ w

Let’s Create

  1. Affix all stamps to Acrylic Blocks.
  2. Fold the Card Base in half using a Bone Folder to sharpen the crease.
  3. Place the pot side of the stamp image into the Cinnamon Cider Stampin’ Pad and the plant part of the image into the Soft Succulent Stampin’ Pad. Stamp onto the center  lower edge of the Basic White card stock  4″ h x 5 1/4″ w. Repeat and stamp the image to the left and then right of the first image. 
  4. Use the dark Soft Succulent Stampin’ Blends marker to tap along the edge of a clear block to splatter ink onto this layer of Basic White 4″ h x 5 1/4″ w card stock. 
  5. Adhere this stamped Basic White layer onto the Soft Succulent card base. 
  6. Adhere the 1 ½” h x 4” w Cinnamon Cider print from the In Color 2020–2022 6″ X 6″ Designer Series Paper across the card front.
  7. Stamp the sentiment with Soft Succulent Stampin’ Pad onto the Basic White Cardstock scrap ½” h x 3” w.  Adhere this sentiment layer with Dimensionals onto the Cinnamon Cider DSP layer. 
  8. Color 2 pearls with the Soft Succulent Stampin’ Blends marker.  Allow to dry and then place them at either end of the sentiment label. 
  9. If you like, decorate the envelope with a layer of the Cinnamon Cider print from the In Color 2020–2022 6″ X 6″ Designer Series Paper.
  10. Stamp and decorate the inside and attach with Stampin’ Seal.
  11. Perfect! Now you are ready for Dad Day!

Shopping List

Stamper’s Toolkit

You will also need adhesive, acrylic blocks, scissors and other basic PaperCrafting items from the Stamper’s Toolkit