Just Copy and Share Everything

Did you know that famous artists CASEd the work of other artists? It’s true. For instance, Claude Monet worked as a caricaturist until he met Eugène-Louis Boudin—who taught him landscape and oil painting techniques on the beaches of France.

Boudin inspired Monet’s work, and Monet inspired countless other artists throughout time. So if you feel guilty about looking at other papercrafting artists’ projects for inspiration—don’t! We all look to one another for ideas, and we build on one another’s successes and strengths. It’s a good thing.

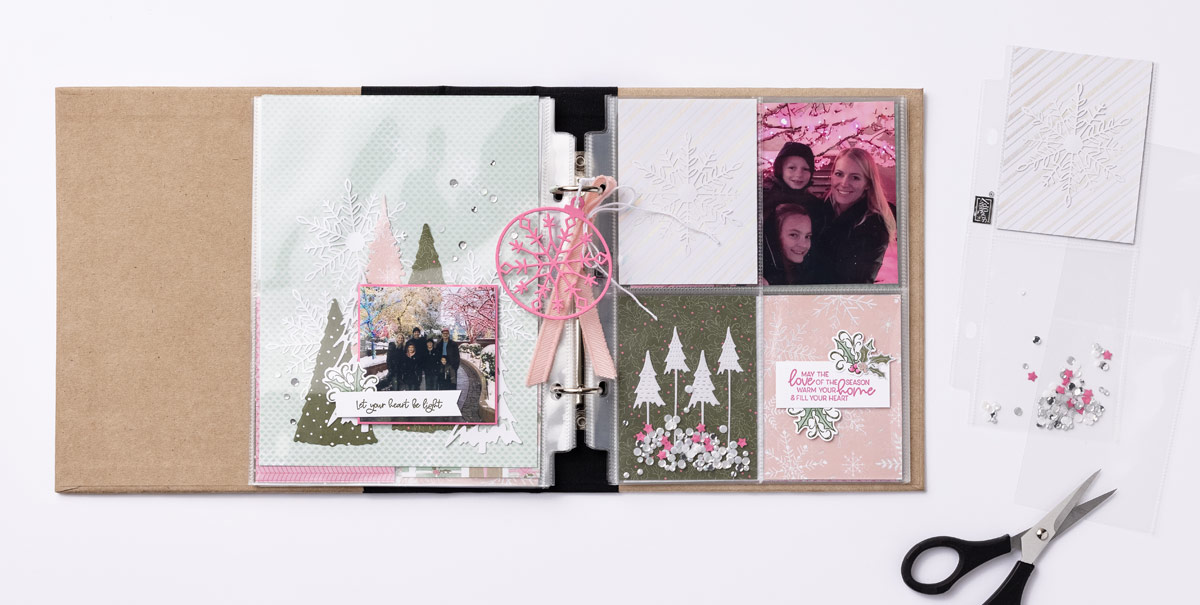
One of our concept artists has herself been busily CASEing to create today’s lovely samples. For example, the You Are Strong card features a color combo she saw in the annual catalog. She admired the Pale Papaya/Crushed Curry/Smoky Slate/Basic White vibe—and just switched up the emphasis for a unique look. (Do you love how the Square Vellum Doily peaks out from the Designer Series Paper layer?)

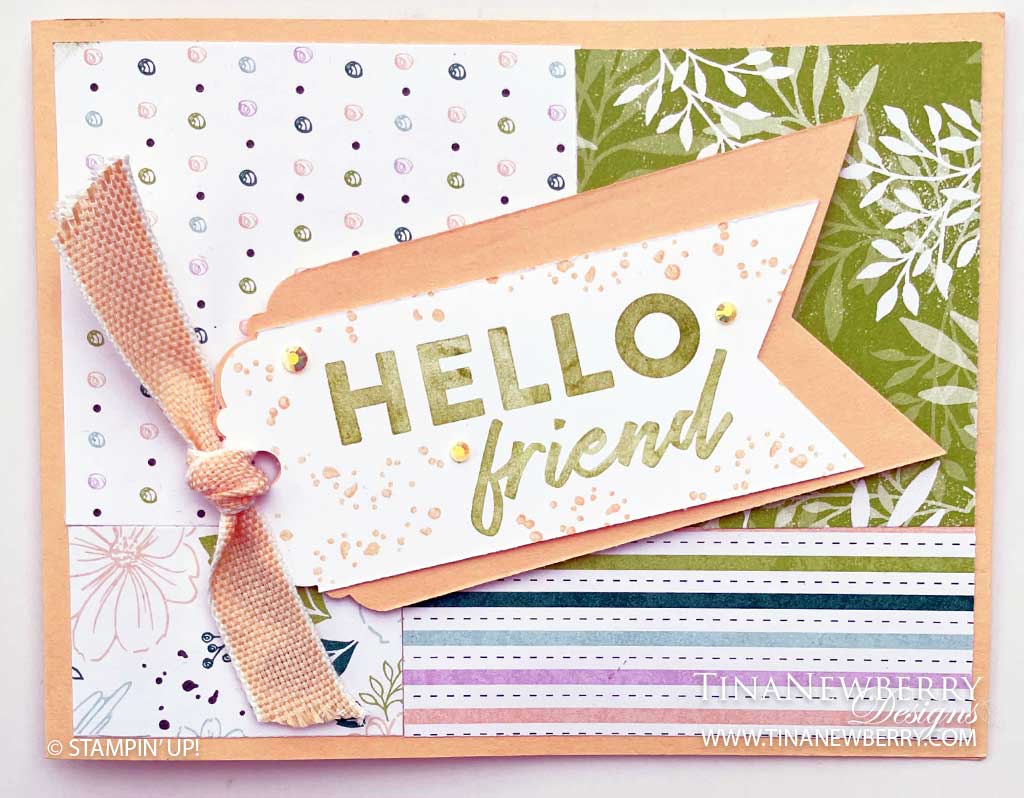
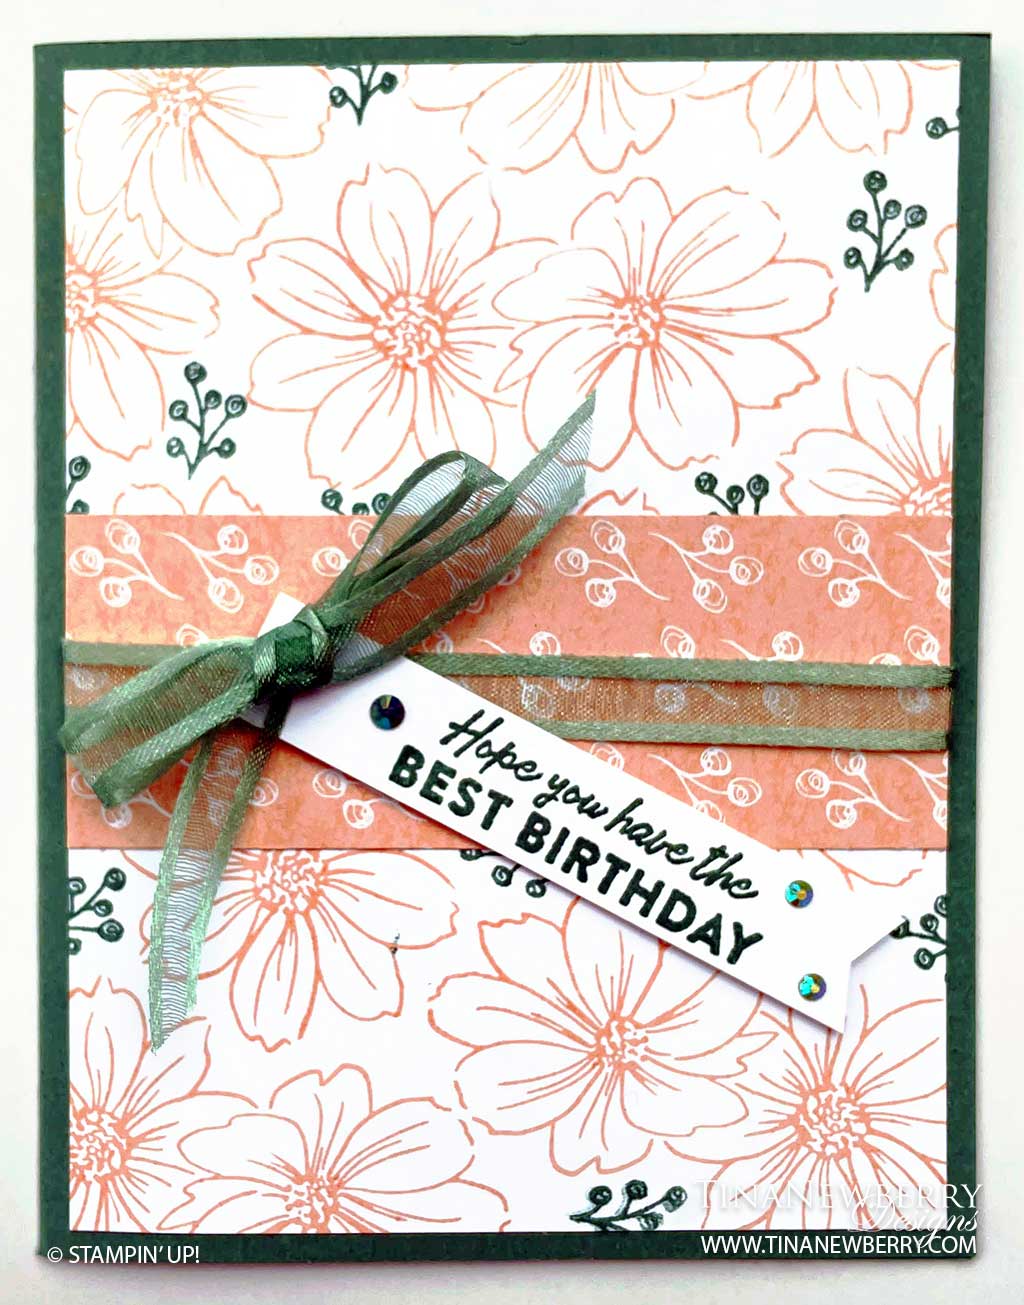
In other CASEing examples, our artist’s Happy Birthday card duplicated the use of paper strips to build depth and create an eye-catching background, while the You Make the Ordinary Extraordinary card was inspired by the embossed vellum technique.

Have fun looking for inspiration for your next project, and remember our very important, non-written rule of papercrafting: Sharing and CASEing makes the papercrafting world go around.

Hope You Have the Best Birthday

This paper is SO PRETTY! The paper along with the stamp set comprise the Friendly Hello Sale-a-bration Bundle – yours FREE with a $100 order January 4th, 2022 – February 28, 2022. Place your order in my online store.

Measurements

Full list of supplies needed, listed below.

Garden Green Cardstock

  • 5 ½” h  x  4 ¼” w folded to 5 ½”  h x 4 ¼” w for card base

Basic White card stock

  • 5 ¼” h x  4″ w for background
  • 5 ¼” h x  4″ w Basic White for inside layer
  • scrap ½” h x 4” w for sentiment

Friendly Hello DSP Front Layer:

  • 1 ½” h x 4” w for strip

Let’s Create

  1. Affix all stamps to Acrylic Blocks.
  2. Fold the Card Base in half using a Bone Folder to sharpen the crease.
  3. Stamp Petal Pink flowers all over the 5 ¼” h x  4″ w Basic White card stock background layer.
  4. Stamp Soft Succulent sprigs among the Petal Pink flowers.
  5. Adhere the 1 ½” x 4” DSP piece onto the stamped Basic White layer.
  6. Wrap the Soft Succulent ribbon around the layers and adhere to the backside.
  7. Adhere the layers onto the card base with Stampin’ Dimensionals.
  8. Stamp the sentiment with Soft Succulent Stampin’ Pad on the Basic White ½” x 4” scrap piece.
  9. Punch the end with the Pick a Banners punch.
  10. Adhere the sentiment with Dimensionals on angle on the card front.
  11. Tie a bow with the Soft Succulent ribbon and adhere to the top end of the sentiment banner with a Mini Glue Dot. 
  12. Embellish with In Color Gems on the sentiment banner.
  13. Stamp and decorate the 5 ¼” h x  4″ w Basic White inside layer and attach with Stampin’ Seal.
  14. Stamp your envelope with Petal Pink flowers.
  15. Pretty! Now send it to someone special.

Shopping List

This project also uses the Friendly Hello Sale-a-bration Bundle available FREE with a $100 order Jan 3, 2022 – Feb 28, 2022.

Stamper’s Toolkit

You will also need adhesive, acrylic blocks, scissors and other basic PaperCrafting items from the Stamper’s Toolkit

Love and Support

Show your love and support for a loved one with this pretty card featuring the Friendly Hello Designer Series Paper and Stamp Set Bundle, a Sale-a-bration Rewards product free with your $100 order January 4 – February 28, 2022. Contact me for your free Sale-a-bration and January – June Mini Catalogs.

Measurements

Fresh Freesia Cardstock: 4 ½” h  x  11” w scored on the long-side at 5 1/2″ and folded to 4 1/4″ h x 5 1/2″ w Card Base

Basic White Cardstock: 

  • 4″ h x 5 1/4″ w Background
  • 4″ h x 5 1/4″ w Inside
  • Scrap for Sentiment

Friendly Hello DSP: 2 ½” Circle and 2 ⅞” scallop circle

Granny Apple Green: Scallop Circle 1 ¾” die cut

Petal Pink: Circle 1 ⅞” die cut

Let’s Create

  1. Affix all stamps to Acrylic Blocks.
  2. Die cut the Friendly Hello DSP, Granny Apple Green and Petal Pink Circles.
  3. Stamp the splotches on the 4″ h x 5 1/4″ w Basic White layer with Petal Pink and Fresh Freesia.
  4. Use Stampin’ Seal to adhere this stamped Basic White layer onto the Fresh Freesia Card  Base
  5. Stamp the sentiment with Fresh Freesia on Basic White card stock and then die cut with a corresponding circle die. 
  6. Use Stampin’ Seal to adhere the Granny Apple Green scalloped circle behind the sentiment circle.
  7. Emboss the Petal Pink circle with the Dots embossing folder.
  8. Use Stampin’ Seal to adhere the scalloped DSP circle onto the card front.
  9. Use Stampin’ Seal to adhere the next DSP circle onto the card front to slightly overlap the scallop circle.
  10. Use Stampin’ Seal to adhere the Dots embossed Petal Pink circle as a slight overlap on the other 2 circles.
  11. Use Dimensionals to adhere the layered sentiment circle overlapping the other 3 circles.
  12. Stamp and/or decorate the inside layer and attach.
  13. Decorate your envelope.
  14. So cute! Who will you send it to?

Shopping List


This project also uses the 2022 Sale-a-bration Friendly Hello Bundle avail Jan 4, 2022

Memory Keeping: Whimsical Trees

Christmastime memory keeping is a great way to preserve family traditions and keep heartwarming moments with loved ones alive for years to come. That means it’s time to start gathering supplies to make your own pretty pages!

Variety Pack 6″ x 8″ (15.2 x 20.3 cm) Photo Pocket Pages can be your best friend as you start planning your yule-centric project. Pro tip: Not every pocket needs to hold a photo! In fact, you’ll probably want to dedicate a few pocket spaces for design elements alone, allowing you to create a pleasing mix of Christmas-themed photos and art.

Our concept artist also cut Designer Series Paper to fit the pockets, then embellished the paper with die-cuts from the Whimsical Tree Stamp Set. (Notice how one pocket features a tree cut in half, with pieces strategically placed on the top and bottom of the photo to make it appear taller!)

And do you love the bauble die-cut tied to the binder rings with a bit of Baker’s Twine? The loop of Blushing Bride 3/8″ (1 cm) Frayed Grosgrain Ribbon placed behind it adds an extra smidge of beauty.

Are you inspired to start your own Christmas pages? We are, too! Share your project on the Customer PaperCrafty Time Group—we’d love to see your work!