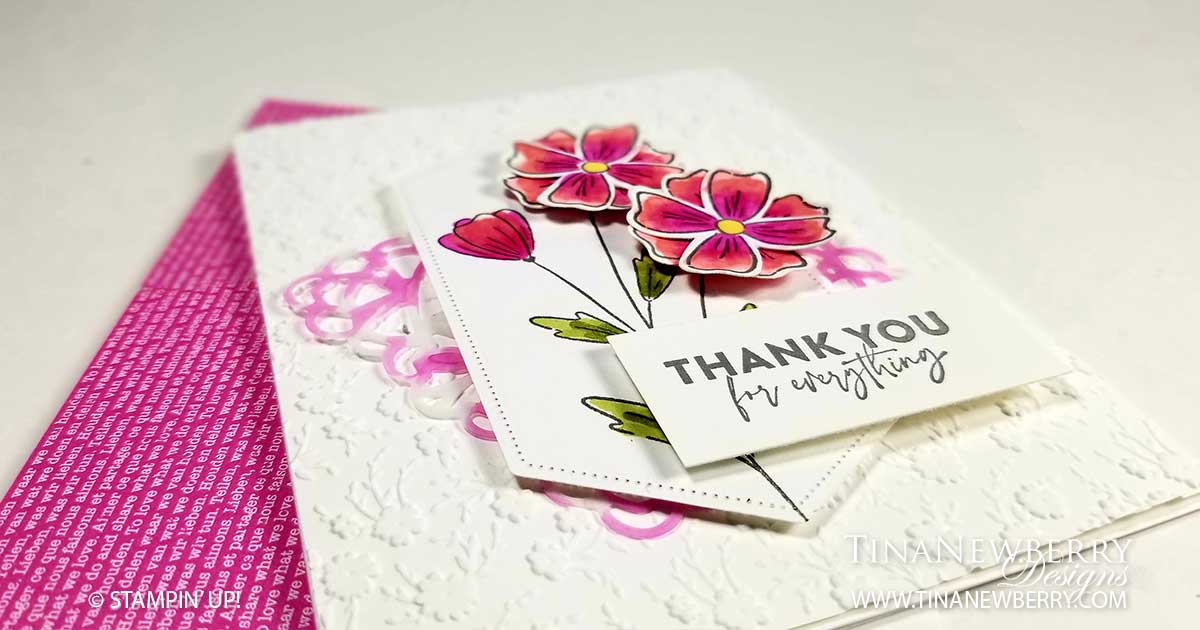
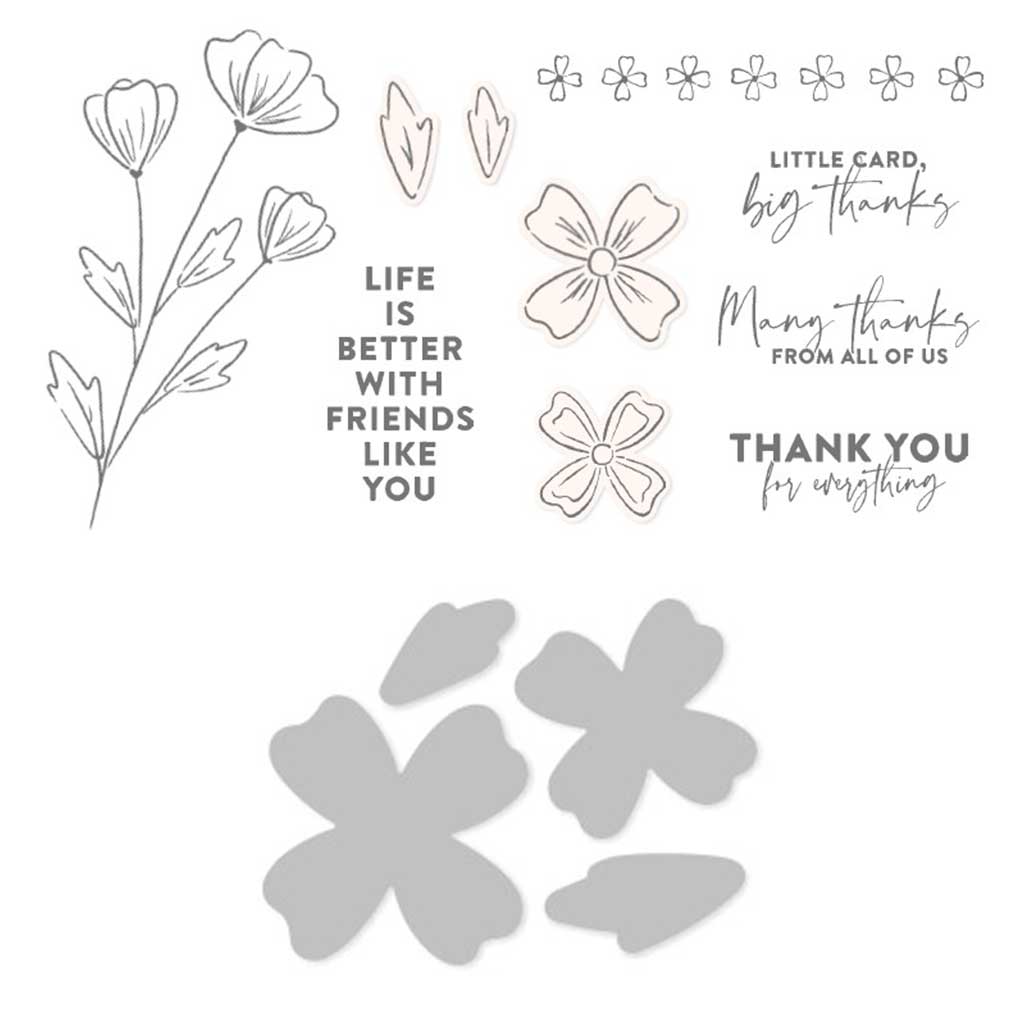
I confess, I goofed on this card. I was TRYING to re-create this card I did last July, but I misread the measurements and my Designer Series Paper was too short. LOL Oh boy then I goofed again when I chopped off the little strip because then the pattern was distrupted, sooo a few more bits of paper and I was able to puzzle this one together. That’s what happens when I craft in the wee hours of the morning! LOLLOL. The Flowers of Friendship Bundle becomes available on May 4th in the new Annual Catalog (let me know if you’d like one!). The fonts and thank you images fitting for all occasions, coupled with the super simple, yet very pretty flowers, makes this set very versatile.
Full list of supplies needed, listed below. A die cutting machine is needed for this card. Card Base: Misty Moonlight Cardstock 5 1/2” h x 8 1/2 w″ w folded to 5 1/2 h x4 1/4″ w. Background: Soft Succulent Cardstock 5 1/4″ h x 4″ w Decorative Layer: Hand Penned Designer Series Paper 5″ h x 3 3/4″ w Sentiment Matte 1: Misty Moonlight Cardstock 2 3/4″ square Sentiment Matte 2: Soft Succulent Cardstock 2 1/2″ square Sentiment: Basic White Cardstock 2″ square Flowers & Leaves: Basic White Cardstock scraps
Let’s Create
Affix all stamps to Acrylic Blocks.
Fold the Card Base in half using a Bone Folder to sharpen the crease.
Attach the Background.
Cut the Decorative Layer into 2 Rectangles: 1 1/2″ w and 2 1/4″ w and then cut both Rectangles together to make coordinating smaller rectangles.
Attach the Decorative Layer pieces.
Stamp the Sentiment in Misty Moonlight ink and stack and attach with the two Sentiment Mattes.
Stamp a few Leaves on the Sentiment Layer with Soft Succulent Ink. Color in with Soft Succulent Stampin’ Blend.
On scrap Basic White Cardstock stamp a large and small flower in Fresh Freesia Ink and four petals in Soft Succulent ink. Color in with Stampin’ Blends, then punch out with the Flowers and Leaves Punch.
Attach the Flowers with Stampin’ Dimensionals and the Leaves with Mini Glue Dots.
Attach Bumblebee In-Color Enamel Dots to the center of each flower.
Decorate the Inside Layer and attach.
Decorate the envelope.
Love it! Who will you send it to?
Shopping List
This project use these products from the 2021-2022 Annual Catalog coming out on May 4th:
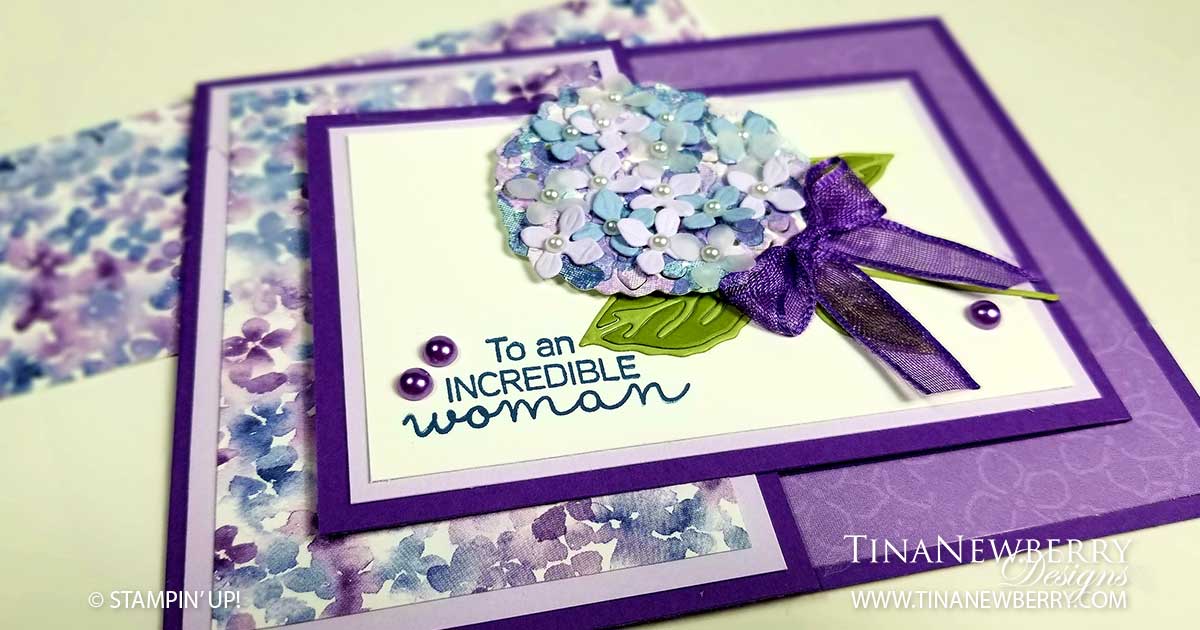
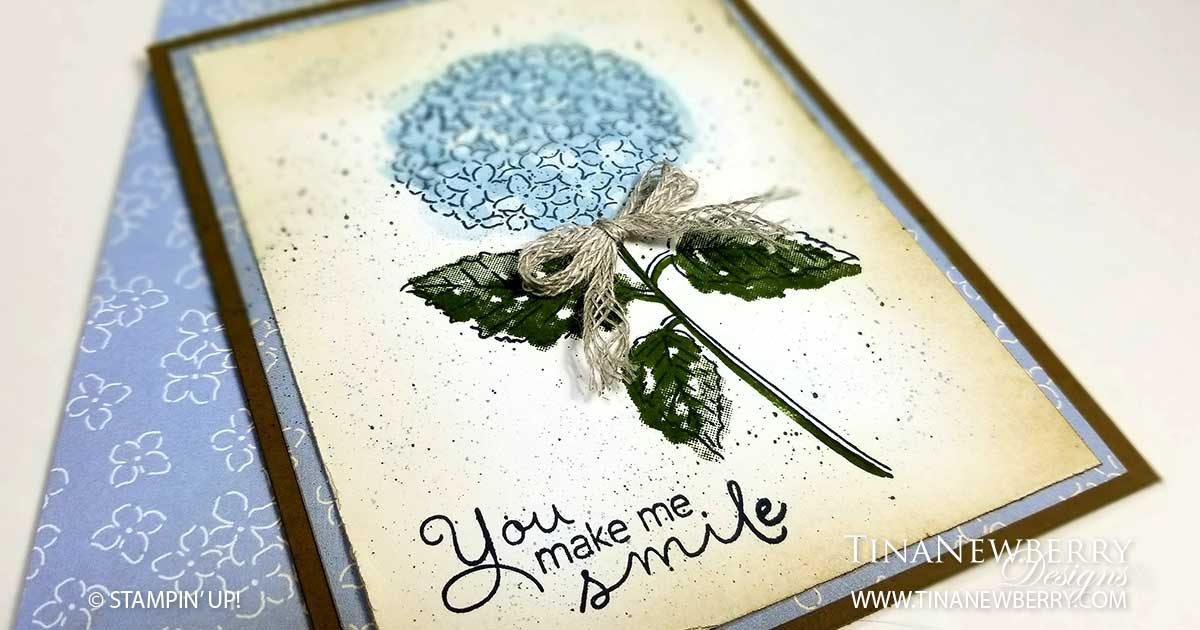
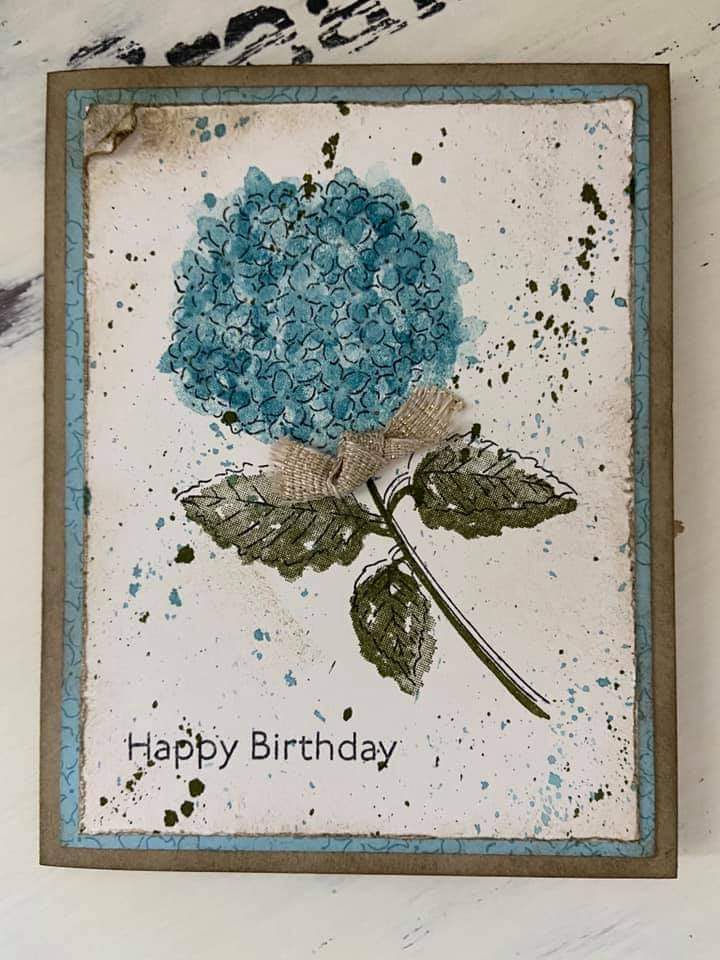
Paper, stamps, ink and one little braided linen bow are all you need to make this pretty nearly #simplestamping card. I saw this design somewhere and I can’t find out where. The photo had no name on it, so I’m not even sure who to give credit to, but I sure enjoyed re-creating it! There’s a little distressing, some two-step stamping, flicking, and a color wash I created using the new Blending Brushes. Read on for details to make it yourself.
Full list of supplies needed, listed below. Card Base: Soft Suede Cardstock 5 1/2 h” x 8 1/2″ w folded to 5 1/2″ h x 4 1/4″ w. Background Matte:Hydrangea Hill DSP 5 1/4″ h x 4″ w Background: Basic White Cardstock 5″ h x 3 3/4″ w Inside: Basic White Cardstock 5 1/4″ h x 4″ w
Affix all stamps to Acrylic Blocks.
Fold the Card Base in half using a Bone Folder to sharpen the crease.
Use the Blending Brush blend some a light bit of Crumb Cake Ink onto the Background Matte and then attach to the Card Base.
Use the Blending Brush blend some a light bit of Soft Suede Ink onto the Background.
Stamp the large Hydrangea in Tuxedo Black Memento Ink. Then add the Stem and Leaves in Mossy Meadow Ink.
For the Hydrangea, stamp off the Flower fill stamp with Seaside Spray and then use the Small Flower fill stamp to add Seaside Spray Flowers to create darker areas on the blossom.
Stamp the Sentiment in Tuxedo Black Memento Ink
Distress the edges with a Bone Folder before attaching the Background.
Separate the Braided Linen Trim and tie into a bow. Separate some more and attach with a Mini Glue Dot.


")


 Braided Linen Trim")