In a hurry and need a card? You’ve got it with this simple layout. Grab your favorite patterned paper and coordinating cardstock from your stash and pull this card together in minutes.
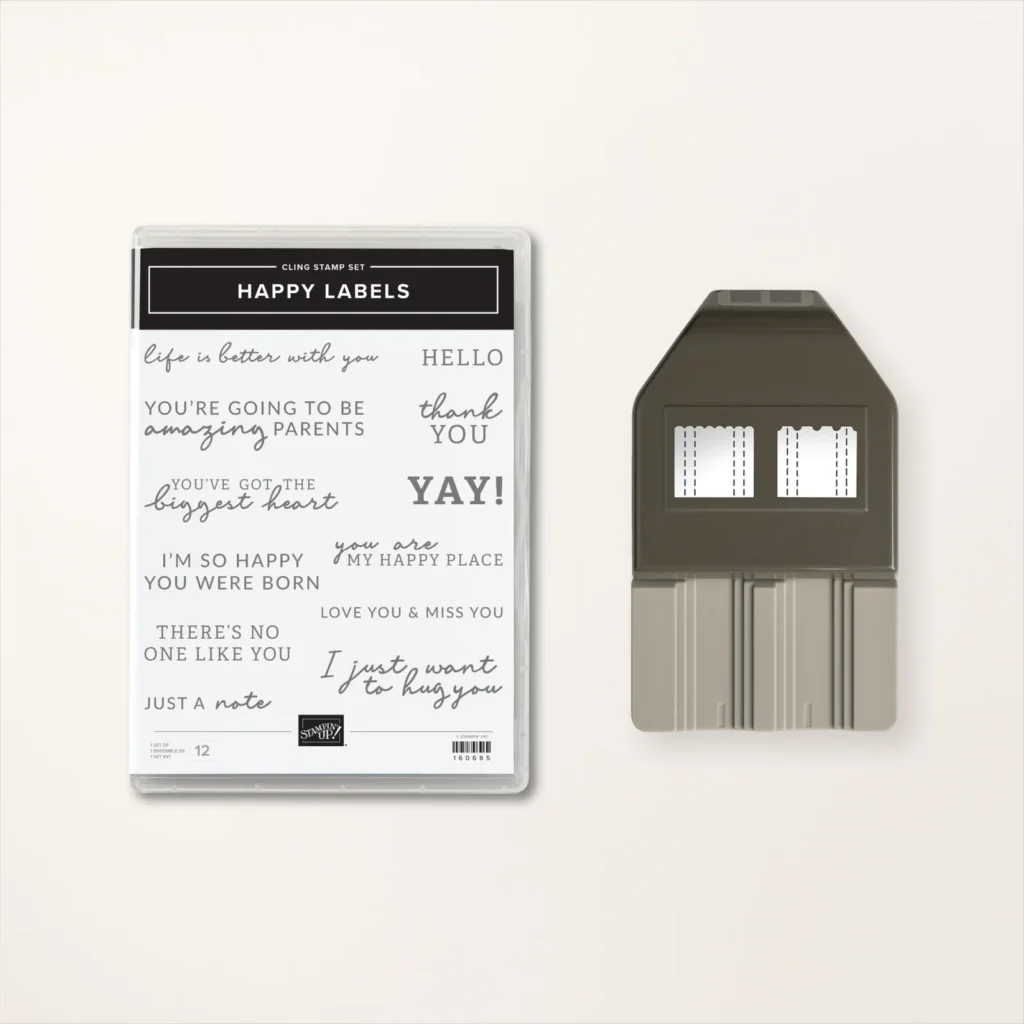
Celebrate the people you love by sending them handmade tags or cards: stamp greetings from the stamp set and punch out labels in different sizes with the Happy Labels Bundle.
Measurements
Full list of supplies needed, listed below. A die cutting machine is needed for this card.
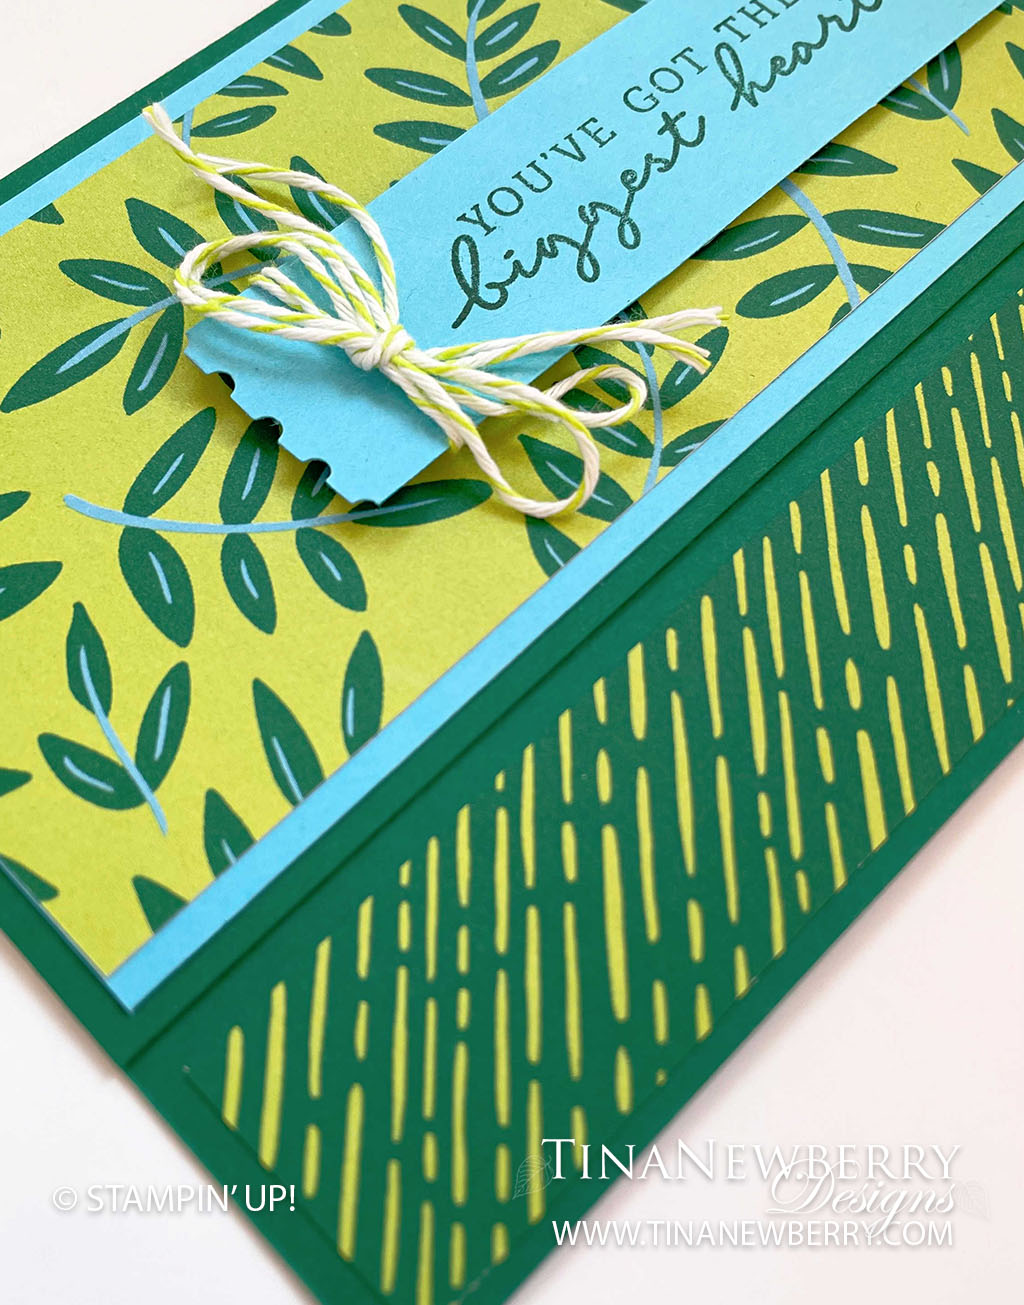
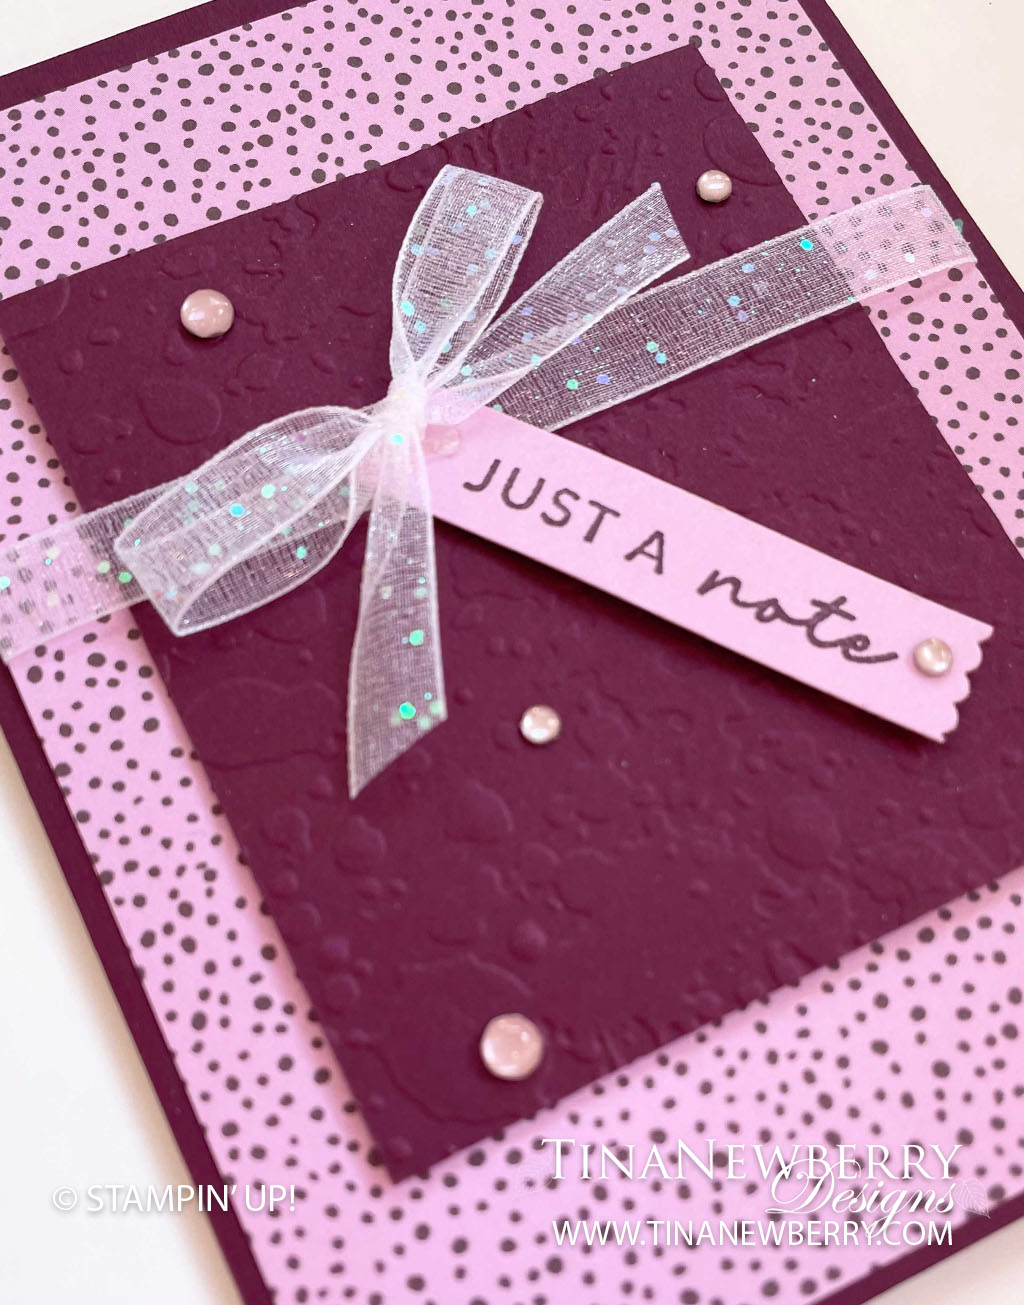
Card base: Blackberry Bliss cardstock 5 ½”h x 8 ½”w, scored at 4 ¼”
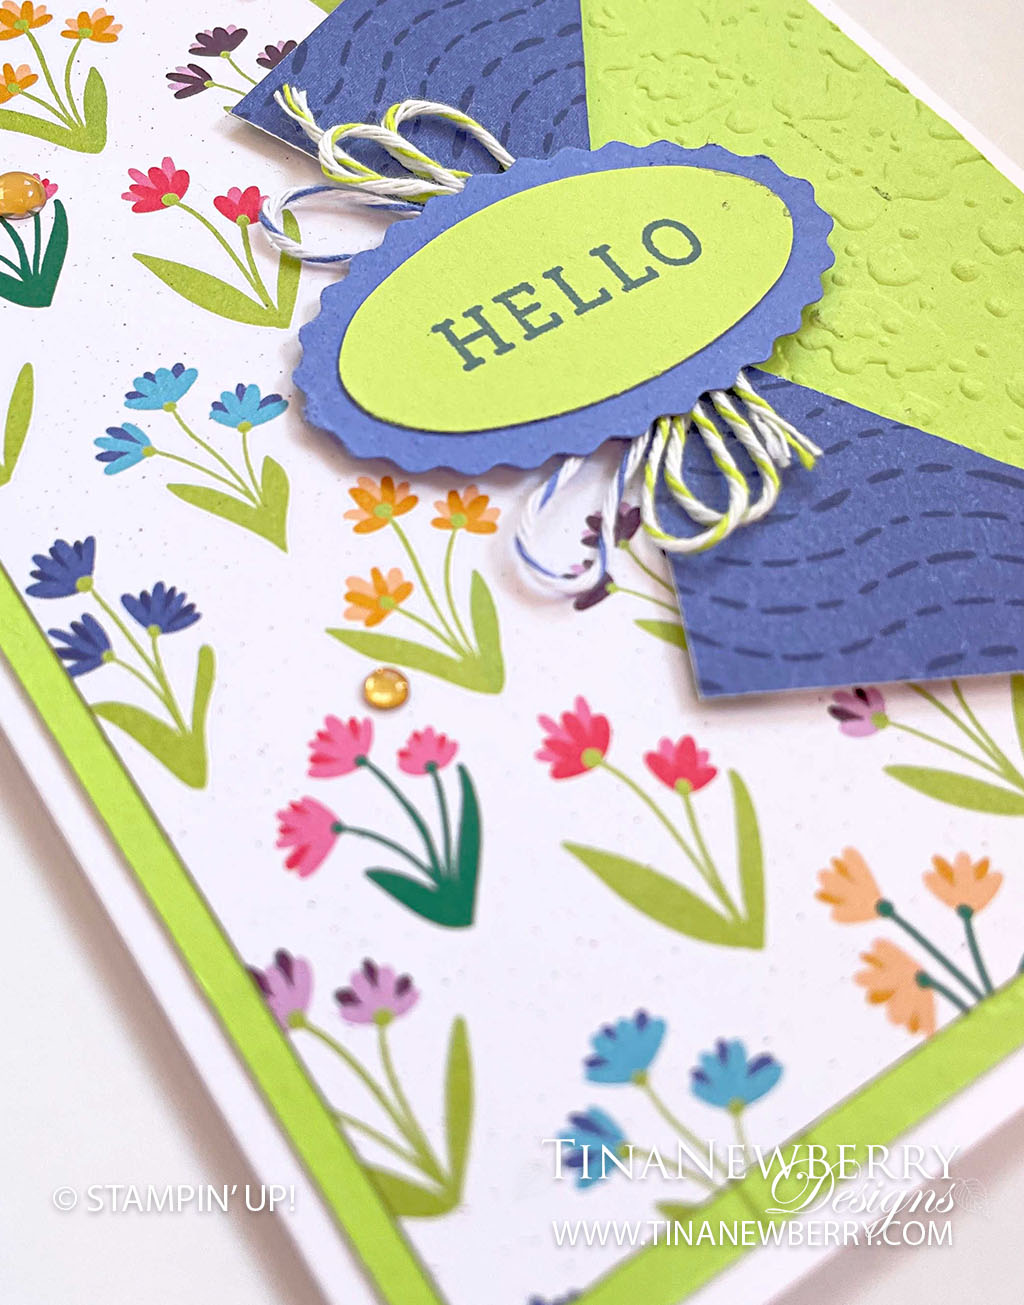
Background layer: Flowers & More DSP 5 ¼”h x 4”w
Embossed layer: Blackberry Bliss cardstock 3 ½”h x 3”w
Sentiment layer: Fresh Freesia cardstock ½”h x 3”w
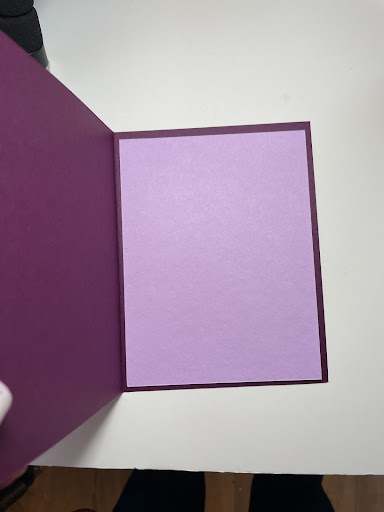
Interior greeting layer: Fresh Freesia cardstock 5 ¼” h x 4” w
Let’s Create
Affix all stamps to Acrylic Blocks.
Fold the Card Base in half using a Bone Folder to sharpen the crease.
Emboss Blackberry Bliss cardstock layer with the Splatters embossing folder.
Adhere embossed Blackberry Bliss layer with Dimensionals onto the Flowers & More DSP layer.
Wrap ribbon around the layers and adhere the ends to the backside.
Adhere the layers onto the card front.
Tie a ribbon bow and adhere with 1-3 Mini Glue Dots.
Stamp the sentiment with Blackberry Bliss Stampin’ Pad onto the Fresh Freesia cardstock layer.
Punch the right hand end with the Happy Labels Punch, left hand side is plain.
Adhere the sentiment label onto the card front with Dimensionals on diagonal, tuck the end under the ribbon.
Embellish with Adhesive Backed Milky Dots.
Adhere the Fresh Freesia cardstock layer into the interior of the card base with Stampin’ Seal.
Such a cheery spring card perfect for letting someone know you’re thinking of them. This layout really shows off both sides of the patterned paper with a peak at a pretty embossing folder underneath. What will you make using this layout?
Celebrate the people you love by sending them handmade tags or cards: stamp greetings from the stamp set and punch out labels in different sizes with the Happy Labels Bundle.
Measurements
Full list of supplies needed, listed below. A die cutting machine is needed for this card.
Card Base: Basic White Thick 5 ½”h x 8 ½”w, scored at 4 ¼”.
Background layer: Parakeet Party cardstock 5 ¼”h x 4”w, embossed on the right side with the Splatters texture embossing folder
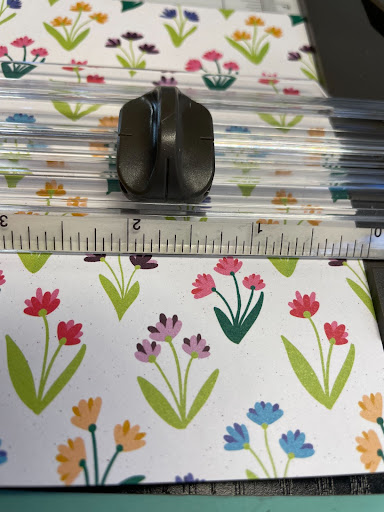
Front layer: Flower & More Designer Series Paper (DSP): 5”h x 3 ¾”w
Sentiment layers: Parakeet Party and Orchid Oasis punches from Double Oval Punch
Inside: Basic White Cardstock 5 1/4″ h x 4″ w
Let’s Create
Affix all stamps to Acrylic Blocks.
Fold the Card Base in half using a Bone Folder to sharpen the crease.
Center your Flowers & More DSP layer in your cutter at the 2 ½” (That is half of the 5″ length) Place your cutter at the 2″ mark on the ruler … then cut from that point out to the edge of the DSP. (see photo)
Gently fold the flaps open from the cut to the corners.
Emboss the Parakeet Party cardstock layer with the Splatters embossing folder, it is ok if one side is plain the DSP will cover it up.
Adhere the embossed Parakeet Party cardstock layer onto the card base.
Adhere the Flowers & More DSP onto the Parakeet Party layer.
Stamp the sentiment onto the Parakeet Party oval.
Adhere the oval labels together with Dimensionals.
Wrap loops of Parakeet Party and Orchid Oasis twine together and adhere to the backside of the ovals.
Use Dimensionals to adhere the ovals to the card front.
Sprinkle on the Adhesive backed Milky Dots
Stamp and decorate the inside and attach with Stampin’ Seal.
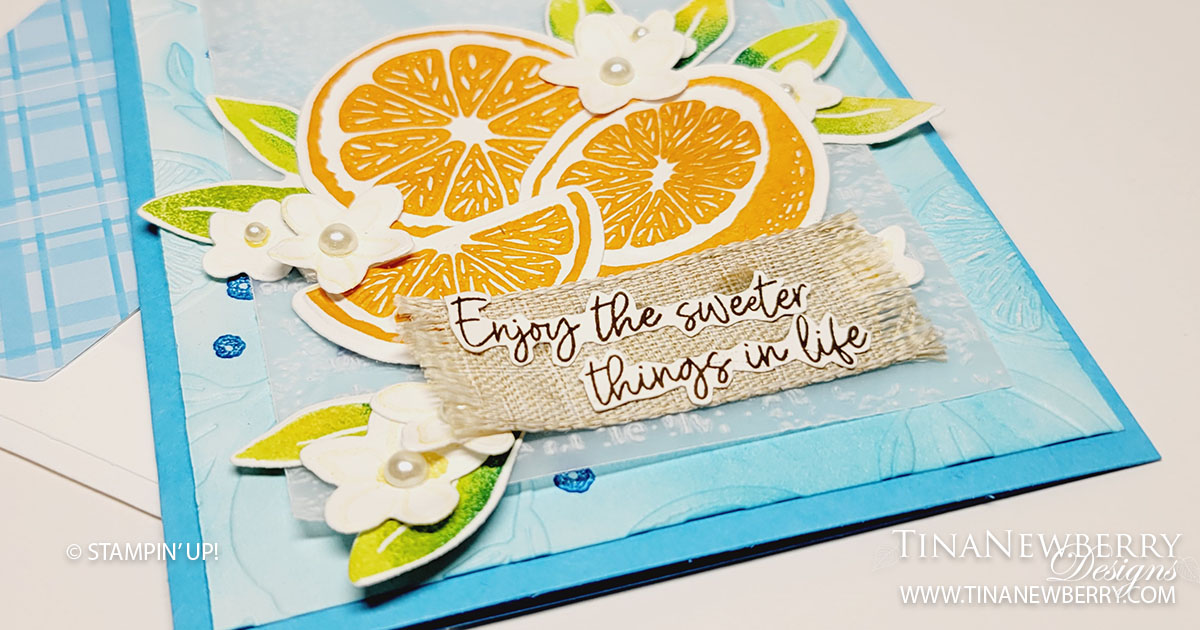
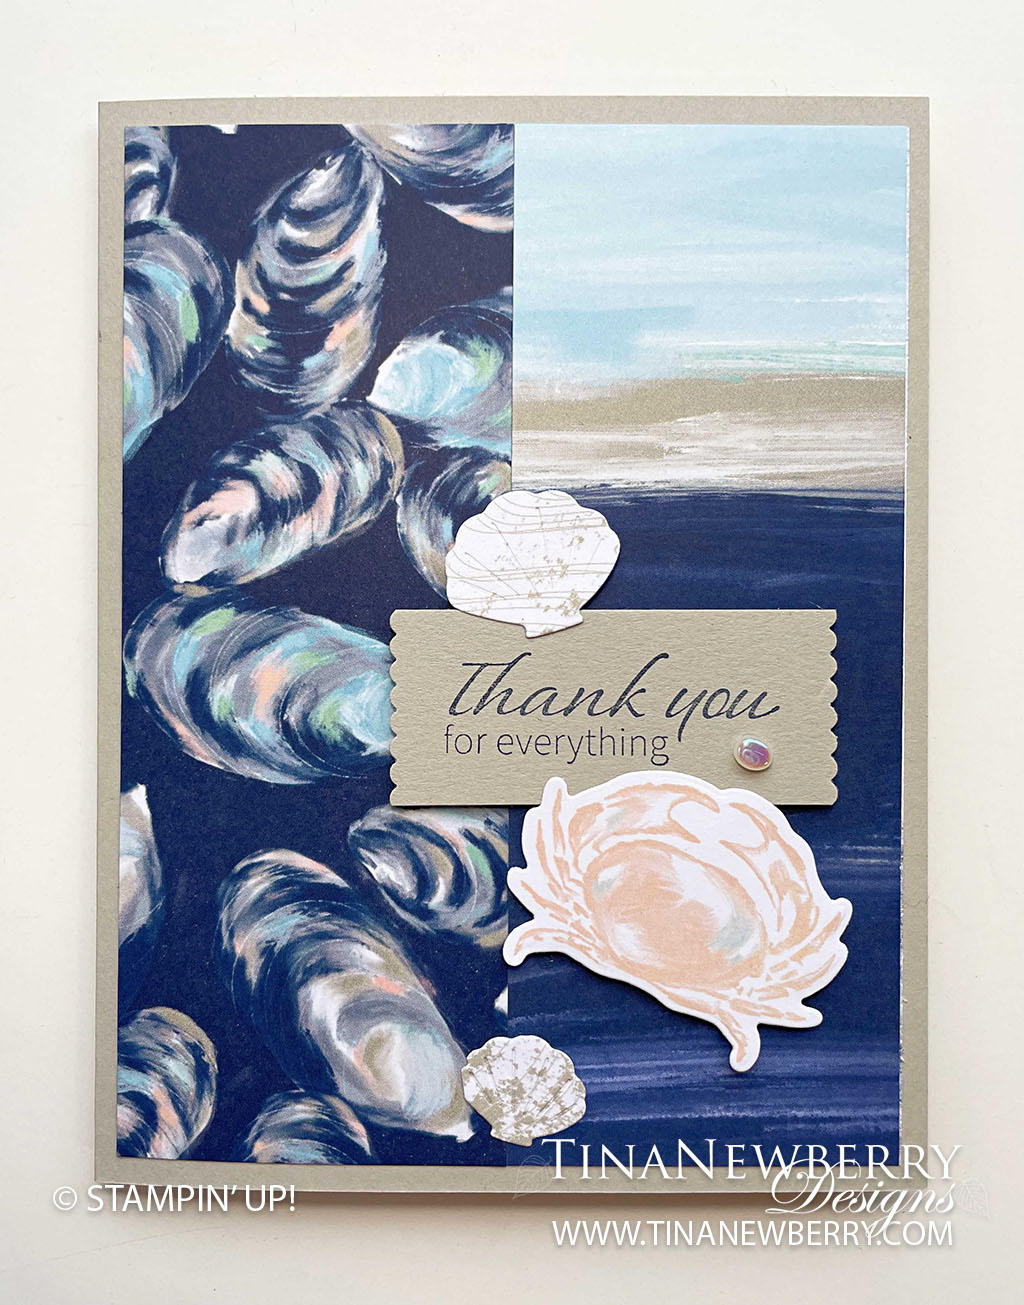
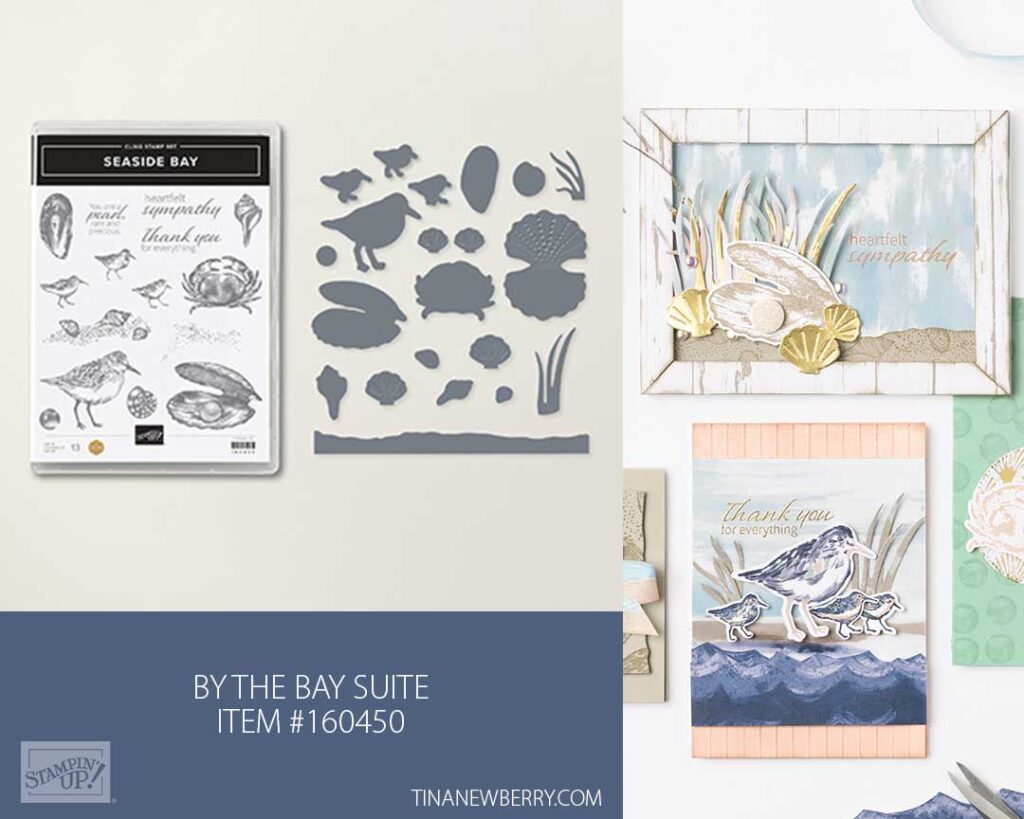
Capture the sun, sand and water with the By-The-Bay Designer Series patterned paper used on this greeting card project. The images, shapes and colors all coordinate for a heartfelt thank you card.
Enjoy soft, serene, and sophisticated designs in the By the Bay Suite. With tones of blues, greens, and pinks in a paintbrush style, this suite is perfect for stylish everyday projects from sending love and support to loved ones to celebrating summer getaways.
Measurements
Full list of supplies needed, listed below. A die cutting machine is needed for this card.
Sahara Sand cardstock:
5 ½” h x 8 ½” w scored on the long-side at 4 1/4″ and folded to 5 ½” h x 4 ¼” w for Card Base
¾” h x 2” w
Basic White Cardstock: 5 1/4″ w x 4″ h
By the Bay Specialty DSP, two prints: 5 ¼” h x 2″ w each and sheet with crabs for die cuts
Let’s Create
Affix all stamps to Acrylic Blocks.
Fold the Card Base in half using a Bone Folder to sharpen the crease.
Find the By the Bay Specialty DSP sheet with the crabs and die cut around a crab.
On the margins of that sheet also die cut 2 shells from the splatter design: 1 small and 1 large shell.
Adhere the By the Bay Specialty DSP layers onto the card front with Stampin’ Seal.
Stamp the sentiment with Night of Navy Stampin’ Pad onto the Sahara Sand ¾”h x 2”w layer.
Now punch each end of the sentiment layer with the Happy Labels Pick a Punch.
Adhere the sentiment onto the card front with Stampin’ Dimensionals.
Adhere the crab and shells onto the card front with Stampin’ Dimensionals.
Place 1 pearl onto the sentiment label.
Stamp the 5 1/4″ h x 4″ w Basic White Cardstock and attach to the inside with Stampin’ Seal.
")


 Host Designer Series Paper")

 Glittered Organdy Ribbon")


")


")


 Specialty Designer Series Paper")

