Show Off Your Patterned Paper

There are endless possibilities with this simple layout featuring your Designer Series or other patterned paper. What will you create?

Save 10% on the Christmas Scottie Bundle

Measurements

Full list of supplies needed, listed below.

Starry Sky Cardstock: 4 ¼” h x 11” w scored and folded at 5 ½” for Card Base

Butterfly Kisses Designer Series Paper (DSP): 

  • 4” h x 5 ¼” w
  • Scrap for bow tie
  • 2” square (3)

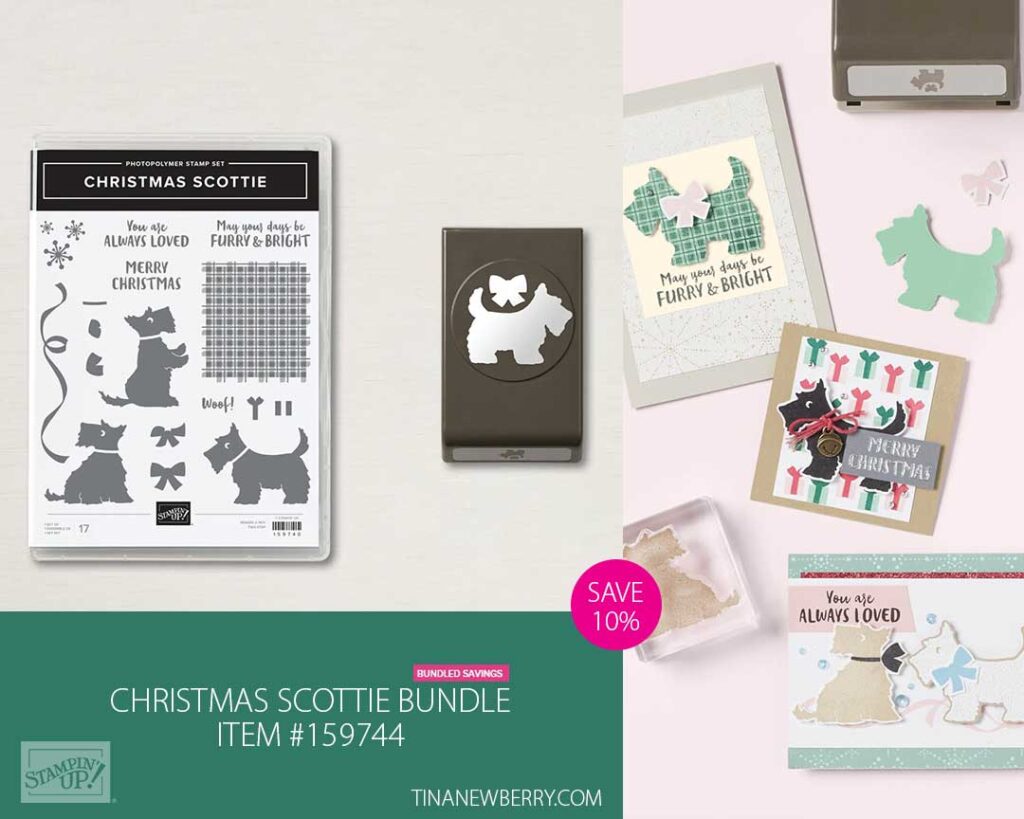
Basic Black Cardstock: Scrap for Scottie

Basic White Cardstock:

  • 4” h x 5 ¼” w
  • 1” h x 2 ⅛” w

Let’s Create

  1. Affix all stamps to Acrylic Blocks.
  2. Fold the Card Base in half using a Bone Folder to sharpen the crease.
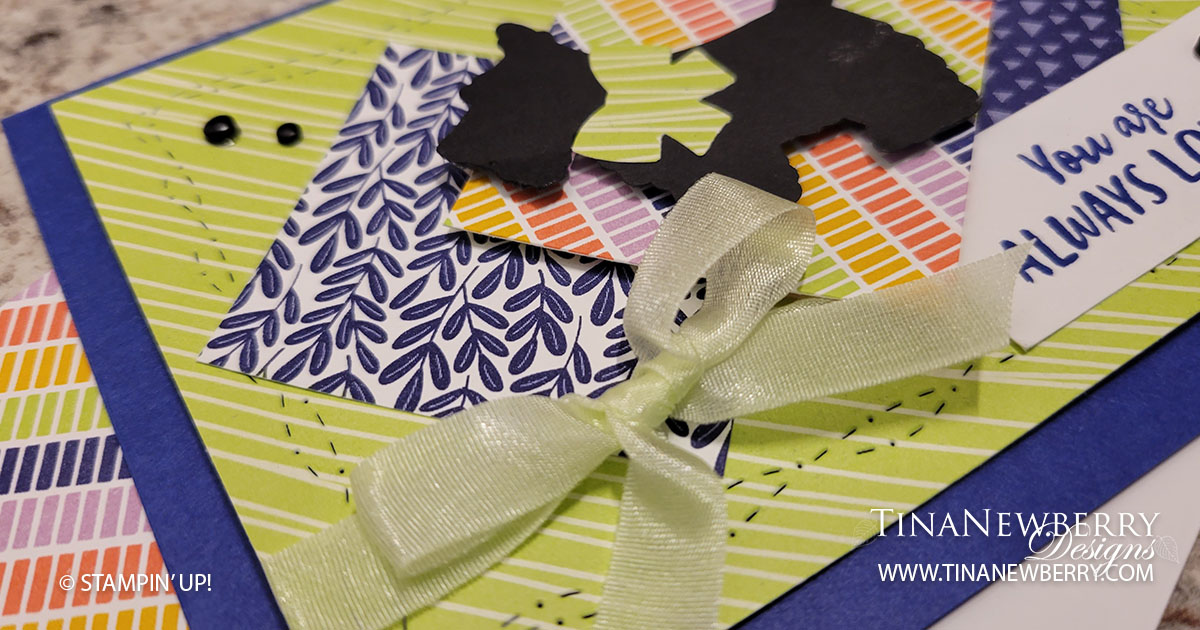
  3. Run the 4” h x 5 ¼” w DSP through the Stampin’ Cut & Emboss Machine with the Stitched with Whimsy Dies.
  4. Layout the three 2” square DSP pieces in diamond shape overlapping on the Stitched with Whimsy DSP. Attach the outer two with Stampin’ Seal and the middle one with Stampin’ Dimensionals. 
  5. Wrap 18” of Soft Sea Foam ribbon around the Stitched with Whimsy DSP and tie a bow. 
  6. Attach the Stitched with Whimsy DSP to the Card Base with Stampin’ Dimensionals. 
  7. Punch a Scottie our of Basic Black Cardstock and a bow tie out of DSP. Use Stampin’ Seal to attach the bow tie to the Scottie and then attach the Scottie with a Stampin’ Dimensional to the middle diamond.
  8. Stamp Sentiment in Starry Sky on the 1” h x 2 ⅛” w Basic White and then attach to the card with Stampin’ Seal. 
  9. Sprinkle on some black Classic Matte Dots.
  10. Stamp and decorate the 5 ¼” w x h” w Basic White for the inside and attach with Stampin’ Seal.
  11. Decorate your envelope.
  12. Woof!! Who will you send it to?

Shopping List

Recommended Stamper’s Toolkit ❤


Stenciled Background Friendship Card

Thank you for your interest in this project. Some projects are exclusive to subscribers who will receive passwords by email.

Are you a subscriber? Awesome! Check your email for the password and enter it here to view this project.

Not yet subscribed?  We’d love for you to join us.  Subscribe to my email list and receive news, information and inspiration by email.

Make Your Own Subtle Snowflake Background

Jazz up your background with a few snowflake watermarks. I’ll show you how!

This holiday season, treat yourself to the un-brrr-lievably adorable All Bundled Up Stamp Set

Measurements

Full list of supplies needed, listed below. A die cutting machine is needed for this card.

Garden Green Cardstock: 5 ½” h x 8 ½” w scored and folded on the long-side at 4 ¼” for the Card Base

Basic White Thick Cardstock:

  • Scrap for Moose

Basic White Cardstock:

  • 4” h x 5 1/2” w 
  • 4” x 3” scrap 
  • 3/4” h x 3 1/2” w

Sweetest Christmas 12” x 12” Designer Series Paper (DSP)

  • 4 3/4” h x 3 1/2” w

Let’s Create

  1. Affix all stamps to Acrylic Blocks.
  2. Fold the Card Base in half using a Bone Folder to sharpen the crease.
  3. Using Versamark Ink, Stamp the snowflake stamp in a random pattern around the outside edge of the front of the Card Base.
  4. Use Stampin’ Seal to attach the DSP to the front of the Card Base.
  5. Run the 4” x 3” scrap Basic White through the Stampin’ Cut and Emboss machine with the Scalloped Contour Die. 
  6. Wrap Pool Party ⅜ Sheer Ribbon around the bottom of the die cut and tie a bow in the middle. Attach Basic White die cut panel to the front of the card with Stampin’ Dimensionals.
  7. On the Basic White Thick scrap, stamp the Moose, in Tuxedo Black ink.  Use Stampin’ Blends to color in. I used: Soft Suede, Pool Party, and Real Red
  8. Use Paper Snips to fussy cut the Moose out.
  9. Attach the Moose with Stampin’ Dimensionals. 
  10. In garden Green ink stamp the sentiment on the ¾” x 3 ½” Basic White Carstcok piece and attach to the front of the card with Stampin’ Dimensionals at the far edges of the sentiment piece. Arrange so it is overlapping the die cut Basic White panel. 
  11. Sprinkle on some Gilded Gems.
  12. Stamp and decorate the 5 ¼” w x h” w Basic White for the inside and attach with Stampin’ Seal.
  13. Decorate your envelope.
  14. How cute?! Who will you send it to?

Shoping List

Recommended Stamper’s Toolkit ❤


Make A Diamond Flip Fun Fold Card

Surprise your loved ones with a cute diamond flip fun fold card. Easily make this fun design with any stamp set and designer series paper for any occassion.

This holiday season, treat yourself to the un-brrr-lievably adorable All Bundled Up Stamp Set

Measurements

Full list of supplies needed, listed below.

Tahitian Tide Cardstock: 4 ¼” h x 11” w scored and folded at 5 ½” and 2 ⅛”

Basic White Thick Cardstock: scrap for Moose, Racoon & Bird

Basic White Cardstock: 

  • 2 ¾” square 
  • 2 ⅞” square
  • 4 ⅛” h x 3 ¼” w (2)
  • 4 ⅛” h x 5 ⅜” w

Storybook Gnomes 12”x12” Designer Series Paper (DSP):

  • 4” h x  3 ⅛” w (2)
  • 4” h x 5 ¼” w
So cute!

Let’s Create

  1. Affix all stamps to Acrylic Blocks.
  2. Fold the Card Base in half using a Bone Folder to sharpen the crease.
  3. Lay the Card Base horizontally on your work surface. On the short-side to the left of the score at 2 ⅛” make a mark with a pencil. 
  4. Place the Card Base in your Trimmer lining up the score line and the mark you made with a pencil. Cut off a small triangle from the corner. Repeat on the other side.
  5. On the largest panel (5 ½” x 4 ¼”) adhere the 4 ⅛” h x 5 ⅜” w Basic White panel and the 4” h x 5 ¼” w DSP with Stampin’ Seal. 
  6. On the 2 ⅛” x 4 ¼” panel of the Card Base attach one of the 4 ⅛” h x 3 ¼” w Basic White panels and one of the 4” h x  3 ⅛” w  DSP panels with Stampin’ Seal.
  7. Fold the Card Base at the 5 ½” score line.
  8. On the 2 ⅛” x 4 ¼” panel on the front of the Card Base attach the second 4 ⅛” h x 3 ¼” w Basic White panel and the 4” h x  3 ⅛” w  DSP panel with Stampin’ Seal.
  9. Now fold the triangular piece of the Card Base, back so it is overlapping the front DSP.
  10. Turn the 2 ¾” square Basic White to a diamond and stamp your sentiment in the middle-right of the diamond.
  11. Attach the Basic White diamond to the triangular piece of the Card Base, making sure to only put adhesive where the triangle will cover the triangular piece.
  12. On the Basic White Thick scrap, stamp the Moose, Raccoon and Bird in Tuxedo Black ink.  Use Stampin’ Blends to color in. I used:
    1. Moose: Soft Suede, Crumb Cake, Tahitian Tide, Real Red
    2. Raccoon:  Smoky Slate, Gray Granite, Black, Tahitian Tide, Real Red
    3. Bird: Daffodil Delight, Tahitian Tide, Crumb Cake
  13. Use Paper Snips to fussy cut the animals out.
  14. Attach the Moose with Stampin’ Dimensionals and the Racoon and Bird with Stampin’ Seal.
  15. Lay the remaining 2 ⅞” square Basic White piece on the inside of the card, turned to make a diamond. If you want to stamp the inside diamond piece, do so now. 
  16. Close the card, and reposition the inside diamond, as needed so it does not show when the card is closed. Carefully open the card and use Stampin’ Seal to attach the inside diamond.
  17. Sprinkle on some Fine Sparkle Adhesive Backed Gems.
  18. Decorate your envelope.
  19. Adorbs! Who will you send it to?

Shopping List

Recommended Stamper’s Toolkit ❤


To CASE is to Love

Thank you for your interest in this project. Some projects are exclusive to subscribers who will receive passwords by email.

Are you a subscriber? Awesome! Check your email for the password and enter it here to view this project.

Not yet subscribed?  We’d love for you to join us.  Subscribe to my email list and receive news, information and inspiration by email.