Ombre Birthday

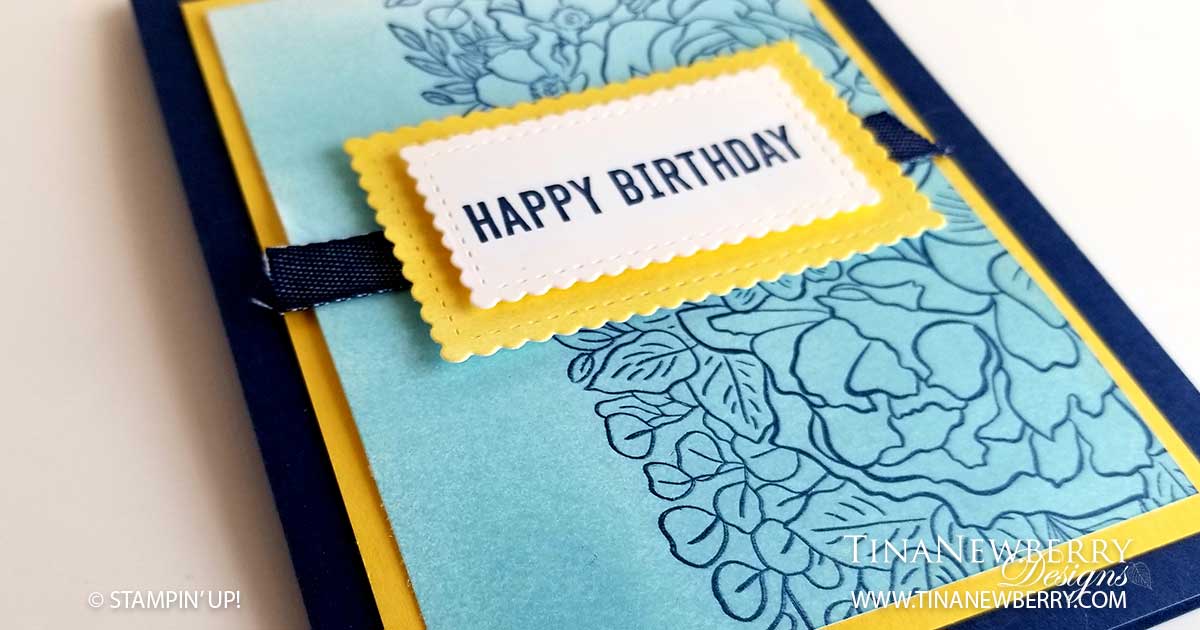
I love how the yellow really pops on this card! I was inspired by a demo Anne Marie Hile did of the Artistry Blossoms Designer Series paper from the 2020-2021 Annual Catalog coming out in June. Again, honestly I was not interested in this paper until I saw a card like this with it. This simple birthday card with subtle details, makes a statement! I mimicked the new DSP by using a brayer to create an ombre effect on whisper white cardstock with the Balmy Blue stamp pad. I then also created a fading ombre effect with the Daffodil Delight stamp pad to use as a layer behind the sentiment. The Breathtaking Bouquet Background added just enough interest to the background layer.

Cutting Dimensions

Full list of supplies needed, listed below. You will need a Die Cutting Machine for this project.
Card Base: Night of Navy Cardstock 8 1/2 h” x 5 1/2″ w folded to 4 1/4″ w x 5 1/2″ h
Background Matte: Daffodil Delight 5″ h x 3 3/4″ w
Background: Whisper White 4 3/4″ h x 3 1/2″ w
Sentiment Background: Whisper White Cardstock cut with 1 5/8″ h x 2 5/8″ w Stitched So Sweetly Die
Sentiment Layer: Whisper White Cardstock cut with 1 1/8″ h x 2 1/8″ w Stitched So Sweetly Die
Ribbon: 4″ Denim Ribbon
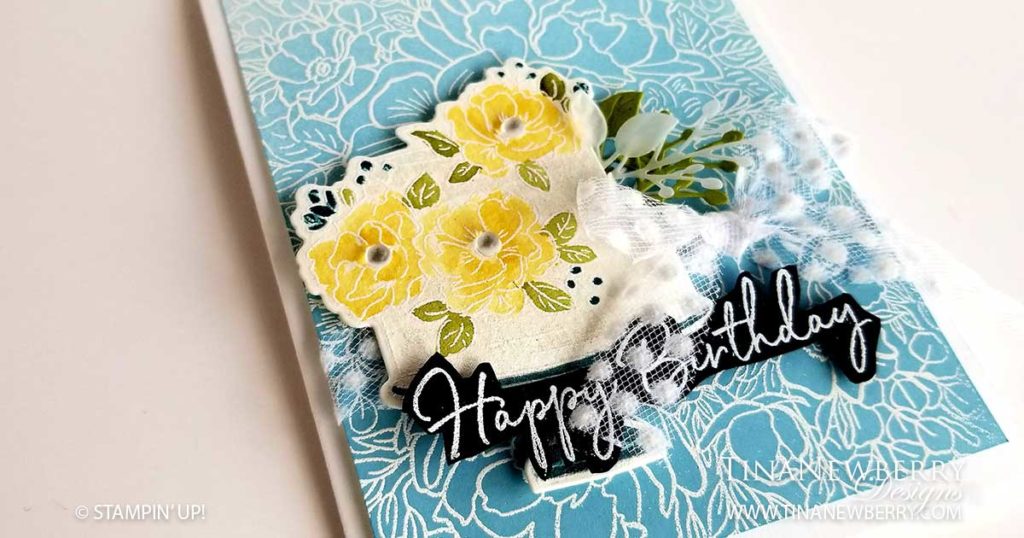
Here’s another card I made just for fun. Products and instructions go with the card shown at top of page.

Instructions

  1. Affix all stamps to Acrylic Blocks.
  2. Fold the Card Base in half using a Bone Folder to sharpen the crease.
  3. Use Snail Adhesive to adhere the Background Matte to the Card Base.
  4. Brayer the Balmy Blue ink onto the Whisper White Background layer to make the ombre effect.
  5. Stamp the Breathtaking Background Stamp onto the Background layer using Night of Navy Ink.
  6. Use Snail Adhesive to adhere the Background Layer to the Background Matte.
  7. Apply a layer of Tear & Tape across the middle of the Background layer and lay down the Denim Ribbon
  8. Stamp Sentiment on Sentiment layer using Night of Navy Ink.
  9. Brayer the Daffodil Delight ink onto the Whisper White Sentiment Background layer to make the ombre effect.
  10. Use Dimensionals to adhere the Sentiment to the Sentiment Background layer and the Sentiment Background layer to the Background layer.
  11. That’s it! Time to send it to someone to make their day!

Product List

Recommended Stamper’s Tool Kit

Design inspired by Anne Marie Hile.

Thinking of You

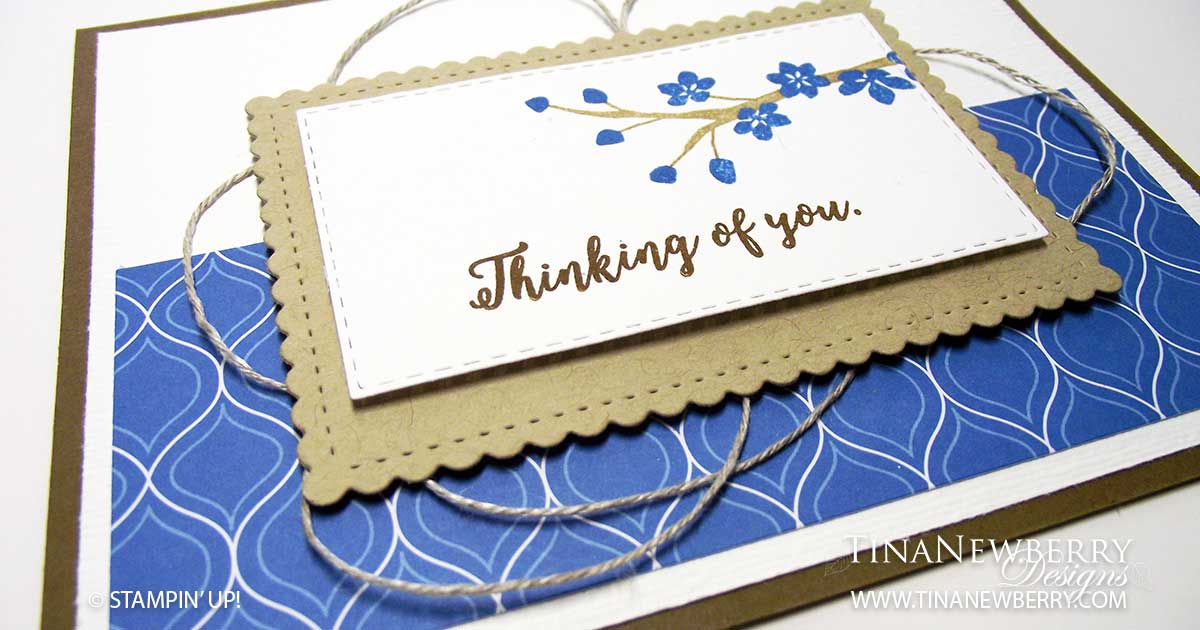
When I first started thinking about this card,I knew I wanted to use Pacific Point. I wasn’t sure the lighter Crumb Cake was enough so I cautiously added the Soft Suede and Early Espresso. I’m quite happy with the results! I’m not so good at adding lots of little repeating stamps. For some reason I can’t repeat ink consistently and all the images come out looking different. But with this stamp set, the flowers and buds are one stamp and the branch is another making it so easy to create a consistent image. And the branch stamp even has cut outs so you can fit the flowers in right where they go. No guess work! And the result is a beautifully put together flowering branch. I’m sad to see this set on the retiring list. I have used it here and there over the last few years and have really enjoyed the results. Look for this set and coordinating dies on sale in my retiring section after June 3rd.

Cutting Dimensions

This project uses a Die Cutting Machine. Full list of supplies needed, listed below.
Card Base: Soft Suede Cardstock 8 1/2 h” x 5 1/2″ w folded to 4 1/4″ h x 5 1/2″ w
Background: Whisper White 4″ h x 5 1/4″ w
Pattern Layer: Pacific Point Designer Series Paper 2″ h x 5″ w

Instructions

  1. Affix all stamps to Acrylic Blocks
  2. Fold the Card Base in half using a Bone Folder to sharpen the crease
  3. Emboss the Background with the Subtle Embossing Folder
  4. Use Snail Adhesive to affix the Background to the Card Base
  5. Use Snail Adhesive to affix the Pattern Layer to the bottom of the Background Layer
  6. Die cut the Stitched so Sweetly Rectangle from Crumb Cake Cardstock
  7. Die cut a coordinating Stitched Rectangle from Whisper White Cardstock
  8. On the Stitched Rectangle, stamp the sentiment in Early Espresso ink then stamp the branch in Crumb Cake Ink and the flowers in Pacific Point Ink
  9. Use Snail Adhesive to affix the Stitched Rectangle to the Stitched So Sweetly rectangle
  10. Use Mini Glue Dots to affix looped Linen Thread to the back of the Stitched So Sweetly Rectangle
  11. Use Dimensionals to affix the Stitched So Sweetly Rectangle to the Background and Pattern Layer as shown
  12. That’s it! Send it to someone today

Product List

Recommended Stamper’s Tool Kit

Design inspired by Ronda Wade.

You Make Me Smile

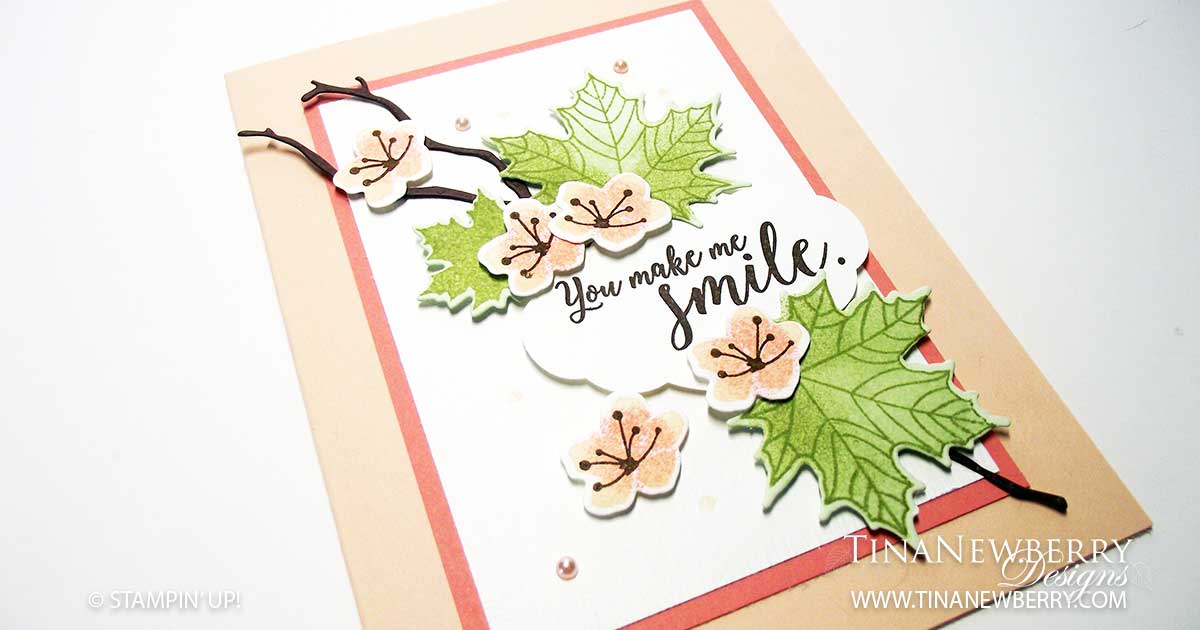
Colorful Seasons did not disappoint with this beautiful design by Sue Vine. Sadly this set and matching dies are on the retiring list and won’t be around after June 2nd. I have not used this set enough, but I sure did enjoy creating six cards of three designs recently on a relaxing Sunday morning. Of this design, aside from the gorgeous color palette Sue Vine chose, I love the shading on the flowers and leaves, made with a sponge dauber. Such a simple technique that makes a big difference.

Cutting Dimensions

Full list of supplies needed, listed below. You will need a Die Cutting Machine for this project.
Card Base: Petal Pink Cardstock 8 1/2 h” x 5 1/2″ w folded to 4 1/4″ w x 5 1/2″ h
Background Matte: Flirty Flamingo 4.5″ h x 3 1/4″ w
Background: Whisper White 4 1/4″ h x 3″ w

Instructions

  1. Affix all stamps to Acrylic Blocks
  2. Fold the Card Base in half using a Bone Folder to sharpen the crease
  3. Emboss the Background with the Subtles Embossing Folder
  4. Use Snail Adhesive to adhere the Background to the Background Matte layer
  5. Use Snail Adhesive to adhere the Background Matte layer to the Card Base
  6. On a scrap piece of Whisper White cardstock, stamp the flower 5 times in Petal Pink ink
  7. Use a sponge dauber with Flirty Flamingo ink to slightly shade the center of the flowers
  8. Die cut the flowers
  9. Stamp the leaf outline and veins using Pear Pizzaz ink of Soft Seafoam cardstock
  10. Fill in the leaf outline with Soft Seafoam ink using the fill stamp
  11. Use a sponge dauber with Pear Pizzaz ink to slightly shade the outer edges of the leaf
  12. Die cut the branch from Early Espresso cardstock and snip off the small branch
  13. Stamp the sentiment in Early Espresso ink on scrap Whisper White cardstock
  14. Punch the Sentiment out using the Pretty Label Punch
  15. Position all the pieces as shown, before adhering anything, to make sure everything fits
  16. Affix the branches first using Snail Adhesive
  17. Affix all other pieces using Dimensionals and Mini Dimensionals
  18. Finish by adhering Artisan Pearls
  19. Beautiful! Who will you send it to?

Product List

Recommended Stamper’s Tool Kit

Design by Sue Vine.

Birthday Wishes

Cutting Dimensions

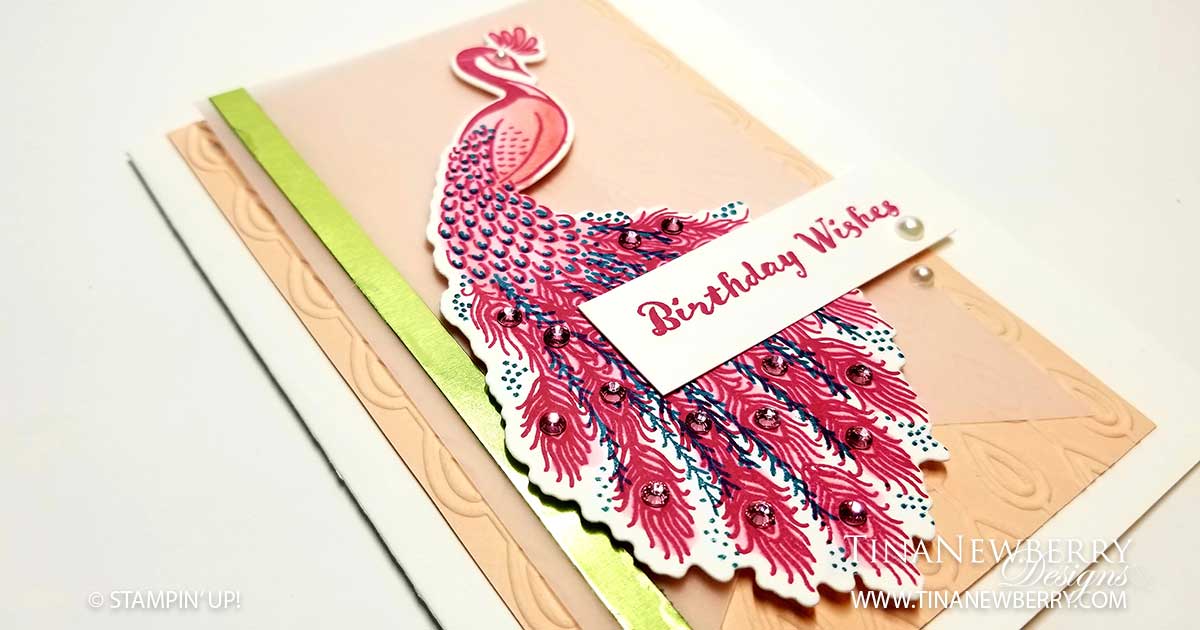
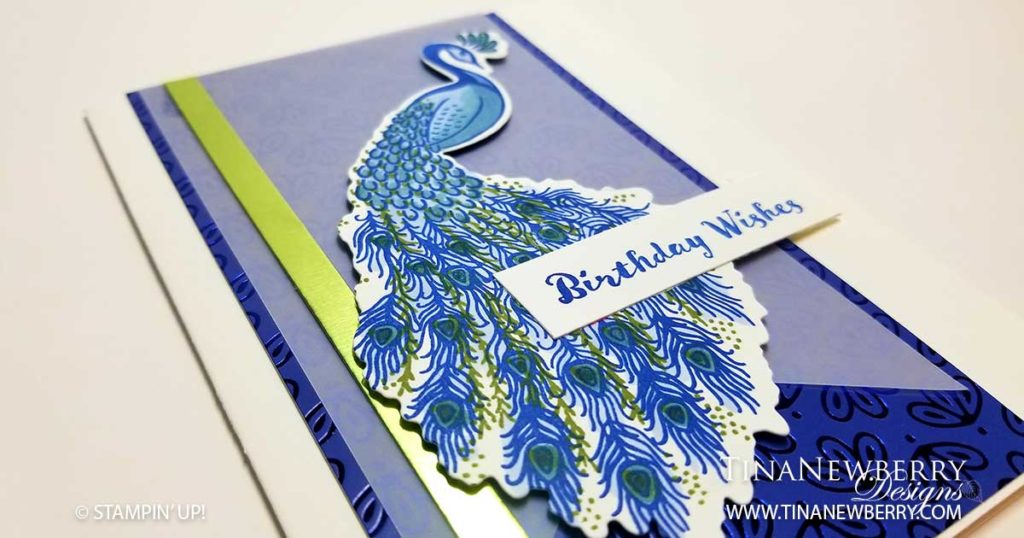
I really wanted to see what the Royal Peacock set looked like, especially this stamp with a different color palette. So I tried one in pink and one in royal blue. I’m not ashamed to tell you my first go at the pink Peacock did not go well. LOL. If at first you don’t succeed, try try again! I am pretty happy with the second go around and the Royal Blue card is great for those men in our lives. Both of these cards were shipped off to my Mum. Can’t wait to see who she sends these to!

Full list of supplies needed, listed below.
Card Base: Whisper White ThickCardstock 8 1/2 h” x 5 1/2″ w folded to 5 1/2″ h x 4 1/4″ w
Background: Petal Pink 5 1/2″ h x 3 1/4″ w
Banner: Vellum Cardstock 5” h x 2 1/2″ w
Decorative Strip: 5” h x 1/4″w

Instructions

  • Fold the Card Base in half using a bone folder to sharpen the crease.
  • Emboss the Background with the Beads & Baubles embossing folder.
  • Use Snail Adhesive to adhere the Background to the Card Base.
  • Strategically use Snail Adhesive to adhere the Banner to the Background. Remember adhesive shows through Vellum.
  • Use Snail Adhesive to adhere the Decorative Strip to the left side of the Vellum.
  • Affix the Peacock Stamp to the Acrylic Block, apply Melon Mambo Ink and stamp image on a scrap Whisper White Cardstock.
  • Affix the Peacock Tail Feathers Stamp to the Acrylic Block, apply Pretty Peacock Ink and stamp onto Peacock.
  • Color the Peacock using the Flirty Flamingo Combo Blender Pens.
  • Die cut the Peacock and adhere to Banner using Dimensionals
  • Affix any Sentiment of your choice Stamp to Acrylic Block, apply Melon Mambo Ink and stamp the Sentiment on scrap Whisper White Cardstock. Trim to size.
  • Adhere Sentiment using Snail Adhesive and Dimensionals.
  • Add Rhinestone Basic Jewels to the Peacock Tail Feathers and in other places, as desired.
  • Gorgeous! Time to make someone’s birthday!

Product List


Recommended Stamper’s Tool Kit

Design inspired by Lisa Curcio