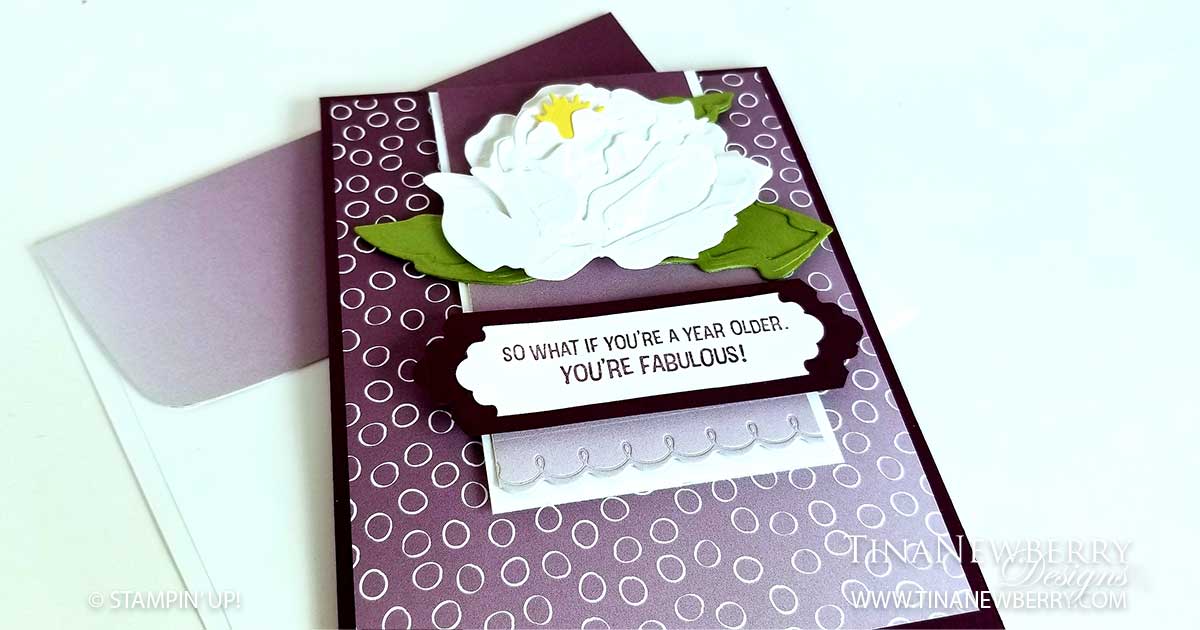
I’m on a roll making birthday cards these days. Somehow I am in short supply. I just love this sentiment from the FREE Approaching Perfection Sale-a-bration Stamp Set. For this pretty card I dug out the Peony Dies to make another beautiful 3-D flower for the focal point and then prettied up all around it with the Oh So Ombre Designer Series Paper, also FREE from the Sale-a-bration Catalog. The Lovely Labels Pick A Punch makes it quick and easy to make beautiful matted labels. Look closely, this card uses only Stamps, Ink and Paper for some #simplestamping.
Full list of supplies needed, listed below. A die cutting machine is needed for this card. Card Base: Blackberry Bliss Cardstock 8 1/2 h” x 5 1/2″ w folded to 5 1/2″ h x 4 1/4″ w. Background:Oh So Ombre DSP 5 1/4″ h x 4″ w Decorative Layer Matte: Whisper White Cardstock 4″ h x 2 1/2″ w Decorative Layer: Oh So Ombre DSP 3 7/8″ h x 2 3/8″ w Sentiment Matte: Blackberry Bliss Cardstock 1″ h x 3 1/2″ w trimmed with the Lovely Labels Pick A Punch Sentiment Layer:Whisper White Cardstock 3/4″ h x 2 3/4″ w trimmed with the Lovely Labels Pick A Punch Inside Layer: Whisper White Cardstock 5 1/4″ h x 4″ w
Affix all stamps to Acrylic Blocks.
Fold the Card Base in half using a Bone Folder to sharpen the crease.
Attach the Background Layer using Stampin’ Seal.
Attach the Decorative Layer to the Decorative Layer Matte using Stampin’ Seal. Then attach to the Background using Stampin’ Dimensionals.
Make the Peony
Crinkle a piece of Whisper White Cardstock and then die cut the Peony.
Die cut the leaves from Pear Pizzaz and the Pistil from Daffodil Delight.
Assemble the Peony and secure with Mini Glue Dots.
Attach the Pistil with a Mini Glue Dot.
Assemble the Leaves and attach with Mini Glue Dots.
Attach the Peony to the Decorative Layer with a Stampin’ Dimensional or a Mini Glue Dot.
Stamp the Sentiment in Blackberry Bliss ink on Sentiment Layer and trim ends with the Lovely Labels Pick A Punch
Attach Sentiment to the Sentiment Matte and add to card with Stampin Dimensionals
Order online from the convenience of your own home or send me your order and I’ll take care of you. ❤ Either way, please use the host code KBSZKQ3A. Order online AND, if your order is $50 or more using host code KBSZKQ3A between now and the end of the month you’ll receive a free pack of embellishment as a THANK YOU gift from me. ❤ If your order is over $150, skip the host code, earn Stampin’ Rewards for free stuff yourself and I’ll still send you a free pack of embellishment as a THANK YOU gift from me. ❤
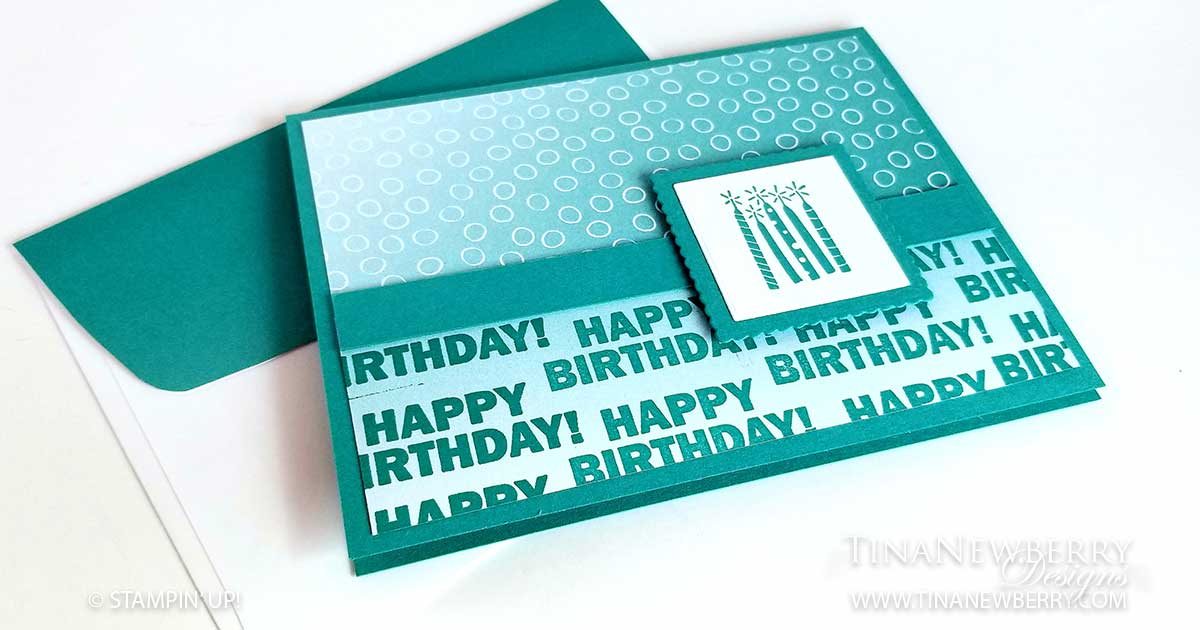
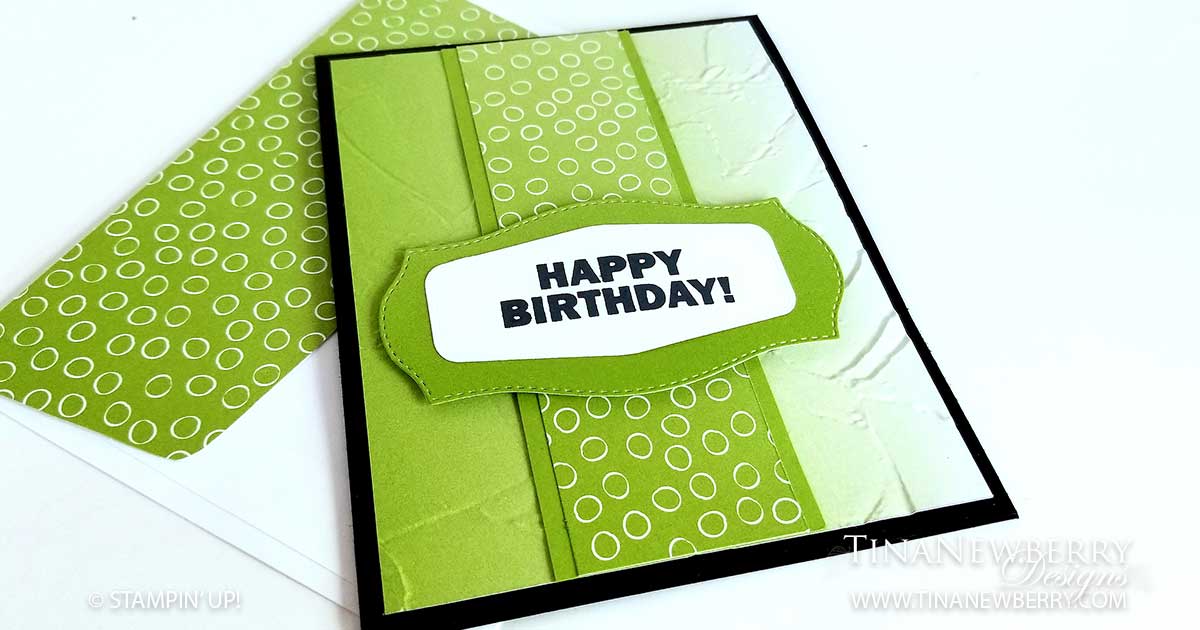
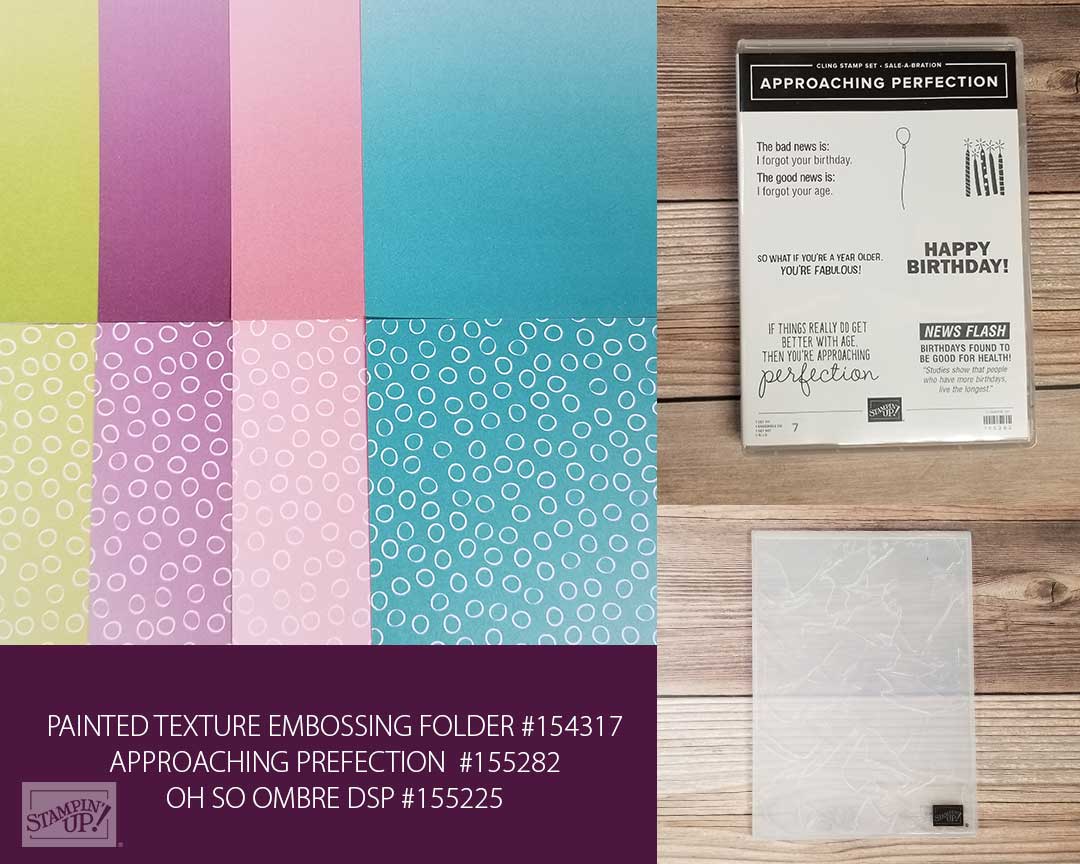
SNEAK PEAK: This quick and easy masculine birthday card uses two FREE products from the upcoming Sale-a-bration Catalog and one from the new January – June Mini Catalog. From January 5th – February 28th in addition to the FREE gift you get from me, you’ll pick FREE product from the Sale-a-bration catalog for every $50 increment purchased. I’ve used the Approaching Perfection Stamp Set and the Oh So Ombre Designer Series Paper on this pretty card. From the January – June Catalog, I’ve used the Painted Texture Embossing Folder. You’re going to love these products! And the best part, this card takes a SIP, using only Stamps, Ink and Paper for some #simplestamping.
Full list of supplies needed, listed below. A die cutting machine is needed for this card. Card Base: Basic Black Cardstock 8 1/2 h” x 5 1/2″ w folded to 5 1/2″ h x 4 1/4″ w. Background:Oh So Ombre DSP 5 1/4″ h x 4″ w with the Painted Texture Embossing Folder. Decorative Layer Matte: Granny Apple Green Cardstock 5 1/4″ h x 1 3/4″ w. Decorative Layer: Oh So Ombre DSP 5 1/4″ h x 1 1/2″ w. Sentiment Matte: Granny Apple Green with the Tasteful Labels Dies. Sentiment Layer:Whisper White Cardstock with the Tasteful Labels Dies. Inside Layer: Whisper White Cardstock 5 1/4″ h x 4″ w.
Affix all stamps to Acrylic Blocks.
Fold the Card Base in half using a Bone Folder to sharpen the crease.
Run the Background through the Stampin’ Cut & Emboss Machine with the Painted Texture Embossing Folder and attach to the Card Base with Stampin’ Seal.
Use Stampin’ Seal to attach the Decorative Layer to the Decorative Matte and then attach to the Background.
Die cut the Sentiment Matte and the Sentiment Layer.
Stamp the Sentiment on the Sentiment Layer with Tuxedo Black Memento Ink and attach to the Sentiment Matte with Stampin’ Seal.
Add the Sentiment Matte with Stampin’ Dimensionals.
Order online from the convenience of your own home or send me your order and I’ll take care of you. ❤ Either way, please use the host code KBSZKQ3A. Order online AND, if your order is $50 or more using host code KBSZKQ3A between now and the end of the month you’ll receive a free pack of embellishment as a THANK YOU gift from me. ❤ If your order is over $150, skip the host code, earn Stampin’ Rewards for free stuff yourself and I’ll still send you a free pack of embellishment as a THANK YOU gift from me. ❤
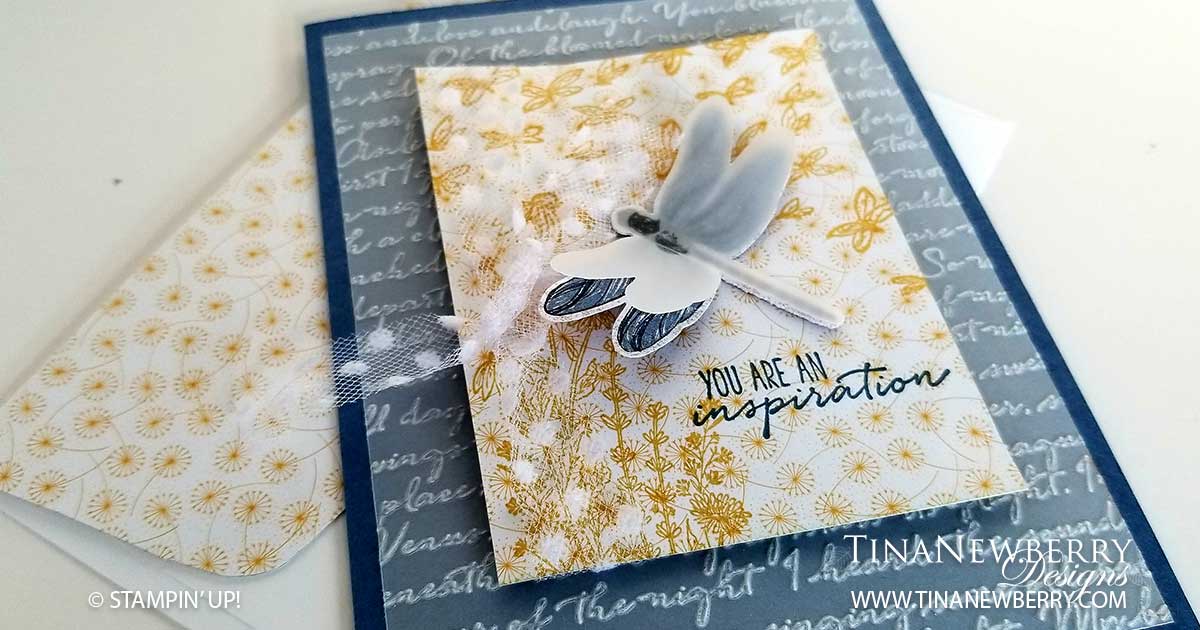
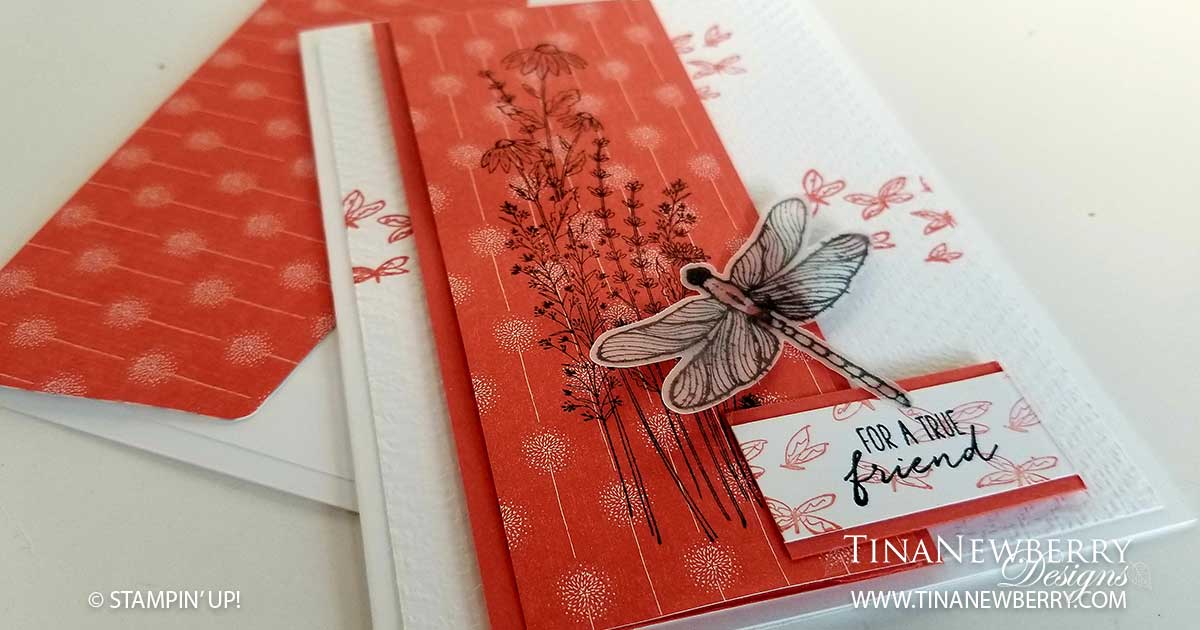
As usual, Sandy McCullough made the most beautiful card! This time she used the Dandy Garden Suite. I couldn’t wait to make it! She used Bumblebee and gold on her original card, so I thought I’d change it up a bit with Calypso Coral. (I think she later made another one with Calypso Coral too). I like the simplicity of it, without being boring. The little swarm of dragonflies stamp adds some wonderful interest to the background without being overbearing and I found the tall Black-eyed Susan stamp to be oddly refreshing in it’s shape and style. And you really can’t go wrong with a vellum Dragonfly can you?
Measurements
Full list of supplies needed, listed below. A die cutting machine is optional for this card. Card Base: Whisper White Thick Cardstock 8 1/2 h” x 5 1/2″ w folded to 5 1/2″ h x 4 1/4″ w Background: Whisper White Cardstock 5 1/4″″ h x 4″ w with the Tasteful Textures Embossing Folder (optional) Decorative Layer: Dandy Garden DSP 5 1/4″ h x 2″ w Decorative Layer Matte: Calypso Coral Cardstock 5 1/4″ h x 2 1/2″ w Sentiment Layer:Whisper White Cardstock 3/4″ h x 1 3/4″ w Sentiment Matte: Calypso Coral Cardstock 1″h x 1 3/4″ w
Let’s Create
Affix all stamps to Acrylic Blocks.
Fold the Card Base in half using a Bone Folder to sharpen the crease.
Stamp the Dragonfly on Vellum Cardstock with Memento Black ink an set aside to dry.
Stamp the Dragonfly Swarm in Calypso Coral Ink on the Background and then run it through the Tasteful Textiles Embossing Folder and attach to card with Stampin’ Seal.
For the Decorative Layer, choose a piece of Designer Series Paper that has a slight pattern to it, but isn’t so busy your stamped image will get lost. Then, stamp the Black-Eye Susan in Tuxedo Black Memento ink on the DSP strip and attach to the Decorative Matte Layer with Stampin’ Seal.
Add the Decorative Matte Layer with Stampin’ Dimensionals.
Stamp the Sentiment on the Sentiment Layer and then stamp off to add the Dragonfly Swarm to the Sentiment Layer. Attach to the Sentiment Matte with Stampin’ Seal.
Stamping Off is the technique of inking your stamp and then first stamping on scrap paper to remove some ink before stamping on the project. This creates a lighter shade of the ink. You can Stamp Off multiple times for a lighter watermarked effect. Have fun with it!
Add the Sentiment Matte with Stampin’ Seal on the left and a Dimensional on the right.
Punch the Dragonfly you stamped on the Vellum Cardstock and adhere using Mini Glue Dots. Be careful where you place the Glue Dots because they will show through. I added two to the head and body because when I added just one it showed through and looked weird.
Order online from the convenience of your own home or send me your order and I’ll take care of you. ❤ Either way, please use the host code KBSZKQ3A. Order online AND, if your order is $50 or more using host code KBSZKQ3A between now and the end of the month you’ll receive a free pack of embellishment as a THANK YOU gift from me. ❤ If your order is over $150, skip the host code, earn Stampin’ Rewards for free stuff yourself and I’ll still send you a free pack of embellishment as a THANK YOU gift from me. ❤